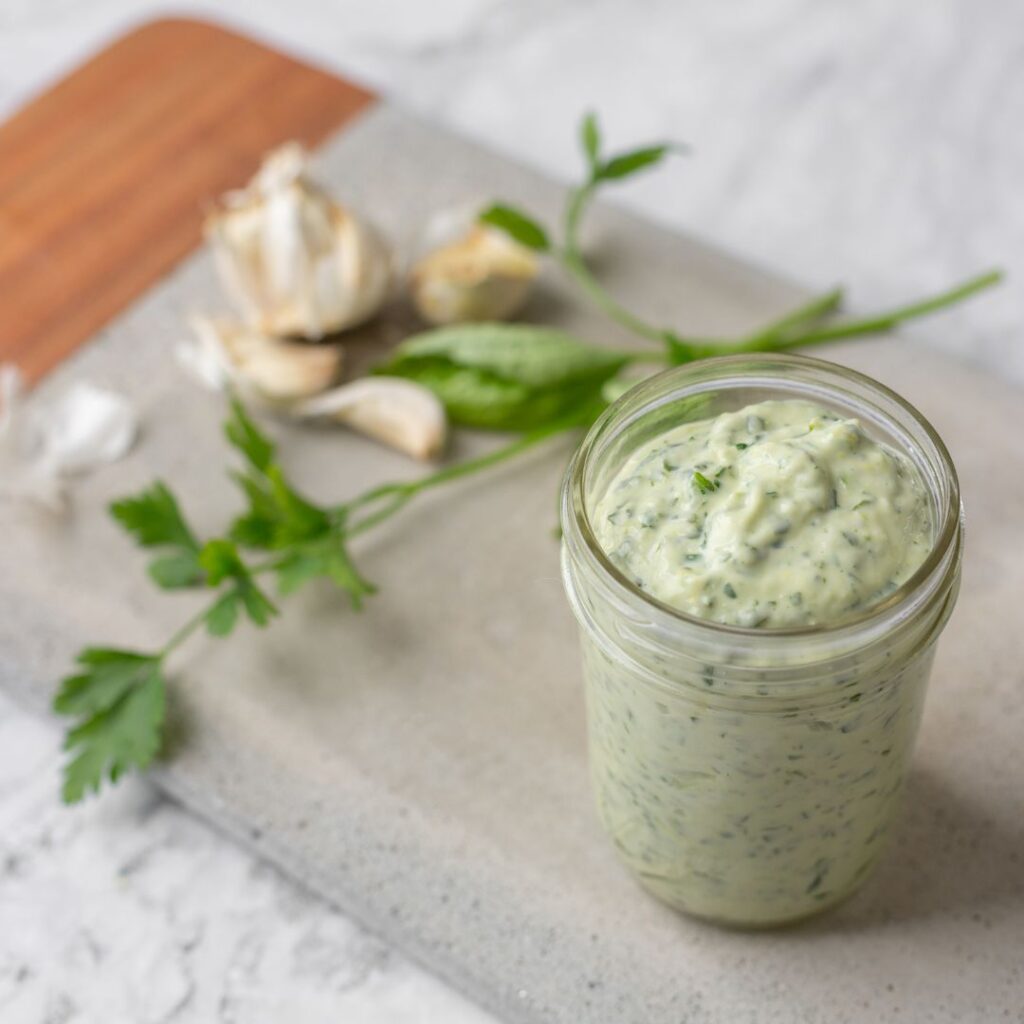
Remove stems of herbs and pulse all ingredients in a blender or food processor until smooth. Serve immediately or store in the refrigerator for up to 1 week.
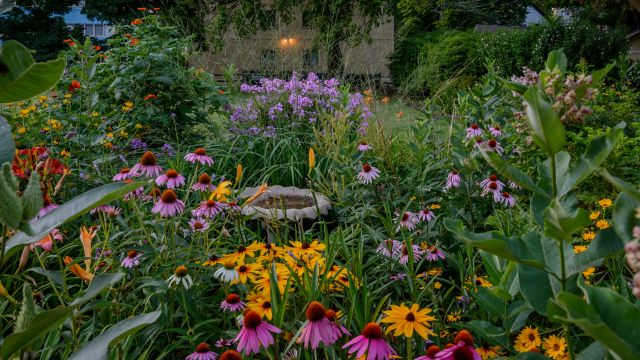
Perennial flowers and plants bring beauty, scent, and pollinators to your landscape. They only get bigger and better with each year; they’re naturally hardy and resistant to pests and critters; and eventually they can be divided to create even more gardens. Best of all, perennials require little to no maintenance after the first year of planting. This article will help you choose the best perennial plants for your garden and give tips on how to plant and care for them in the first season.
Step One: Choose your Location
While we don’t generally believe in gardening rules, you must follow this one rule when choosing perennials: pick plants suitable to your USDA Planting Zone. These plants can survive the coldest temperatures that come your way in the winter and the highest heat in the summer. (Find your zone here by zipcode.) Perennials can be planted outside of these zones – some people even plant them in containers – but the chances of survival to next year will be low.
In addition, if you’re planting perennials to support pollinators, choose plants that are native to your zone. Bees, butterflies, and birds will dine on just about any plant you put out but they also will come back looking for more. If their trusted food source from last season isn’t there, they have to use valuable energy searching for more.
Once you’ve found your zone, you’ll need to map out the area where you’ll be planting. You’ll need these three pieces of info to help choose plants:
What kind of sunshine does this area get? Many perennials prefer full sun but can tolerate some shade (see the chart below). As you place your plants in your plan consider the mature height of each plant and plant the shortest at the front so taller plants will not shade them.
How big is the garden space? This will help you space plants so they have the proper room to grow and spread with time.
Water and drainage. Most perennials are not picky about water but all require good drainage and will not do well sitting in always-wet soils. For your own enjoyment, make sure you plant near enough a water source so you’re able to keep plants watered in the first season. Subsequent years you will be able water less.
Bonus points if you can locate your new perennial bed near your vegetable garden or fruit trees! Pollinators will flock to these flowers and will naturally do their work on your veggies, berries, and fruit blossoms too.
Step Two: Decide on Design
This is where the “no rules” in gardening comes into play! You can plant your flowers however you like. Maybe you want all one color or every color possible. Maybe you want neat rows along your foundation or an entire front yard prairie look. If you like it, you can plant it. The only guideline here is to give each plant the room they need to grow and to combine plants with the same growing needs. For instance, you can’t put a sun-loving plant and a shade-loving plant together in the same garden!
If this is your first time planting a large flower bed, remember this: when you first plant your flowers, the bed will look not full enough. You will be tempted to plant your plants closer together. Resist this urge! These plants will quickly double in size (or more) and fill out your beds. And the more room you give them to grow, the healthier they’ll be in coming years.
As you plot out your garden, consider the blooming time of each flower – some will bloom in early spring, others in mid-summer and some all season long. Combine these so you’ll have blossoms from spring through fall. And don’t be afraid to pick flowers frequently during the season, they will only bloom more!
Step Three: Planting
Perennials can be planted from spring through early fall – as long as the plant has enough time to establish roots before winter. The first season of planting will be a growth year so don’t expect a lot of flowers. This first year, too, your plants need a little extra care in watering and fertilizer so they can put down good roots. Follow the planting instructions on depth and space included with each plant. After planting, give the plant a good drink of water and mulch around the base of the plant (keep mulch away from the stem) so moisture will stay around the roots. Mulching is helpful but not essential in following years.
Right after planting, your plants may look wilted. This is transplant shock and happens to most plants. Just keep watering on a normal schedule and the plant will quickly perk up as it adjusts to its new home. Be sure to put markers by each plant for the first season so you know what’s a plant and what’s a weed.
Journal Tip: Document the locations of each plant in your garden journal and take pictures of the new plants. This will help you identify next year as new leaves emerge. Keeping a journal of perennials is also helpful to future generations who enjoy your garden and is very much appreciated by potential owners if you ever sell.
Step Four: Fall and Winter Care
If you’ve chosen plants appropriate to your Zone, you do not need to do much when the season ends. Most plants can be left unpruned through fall and winter and many actually provide interesting winter structure and hibernation support for pollinators. They can be cut back in early spring before new growth emerges.
Do not cover your perennials with mulch or straw for the winter, this can lead to mold or rot of the plant and root crown. However, in years with no snow cover, plants can sustain wind damage if they are exposed. This will not kill the plant but it can damage branches – winterkill from wind is more common in large bushes such as spirea. If you have a dry fall, be sure to give them a good drink before the ground freezes. Refer to the specific plant you’re putting in, though, for detailed winter care.
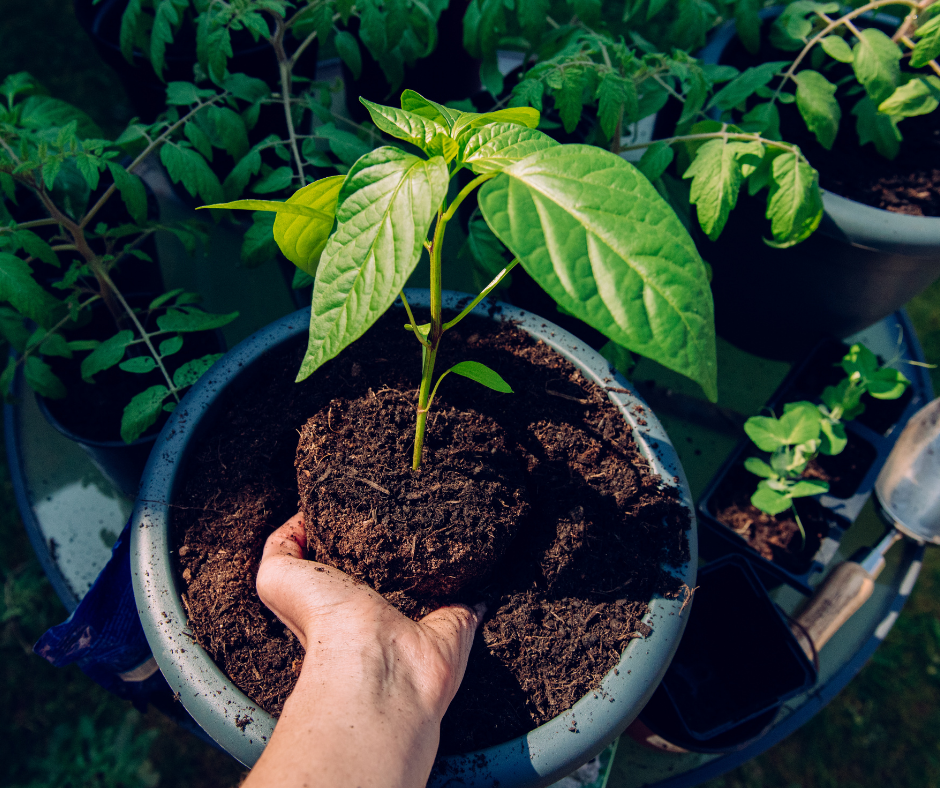
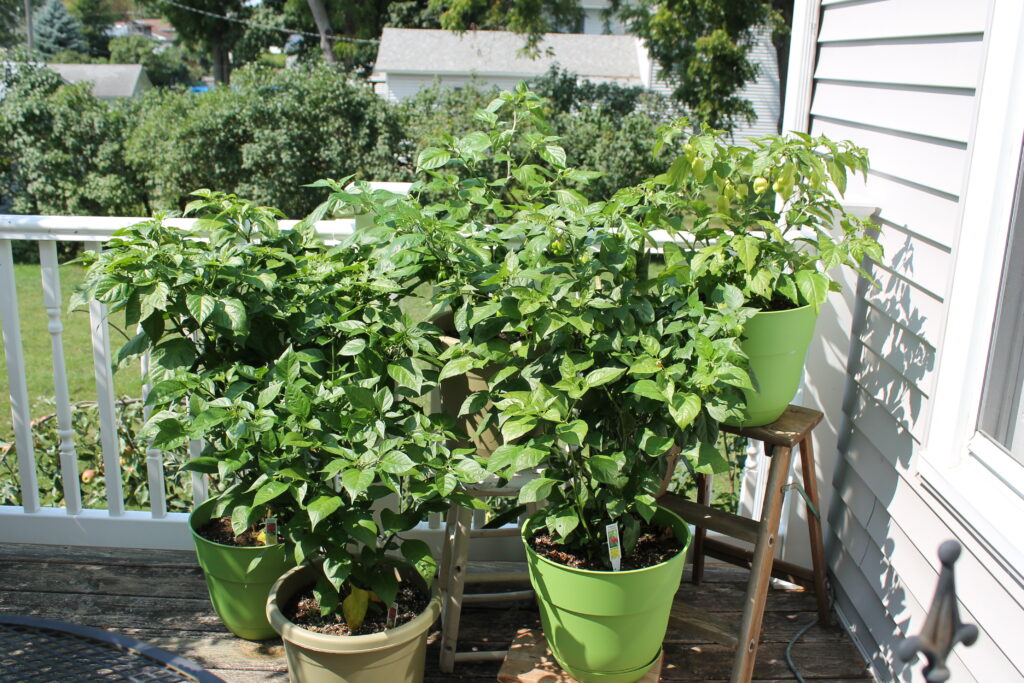
Hot peppers are the perfect deck and balcony plant! As long as you have a sunny spot, they love the conditions in containers and will put out great yields right at your back door. By moving your peppers to pots, you’ll free up space in the garden and you can extend your season by bringing pots indoors when it gets colder. Read on for the best tips on successfully growing peppers in pots.
You can grow from seed but (unless you live in Zone 9 or warmer) you’ll need to start indoors under grow lights for at least 8 weeks. Nursery grown peppers give you the fastest head start and they are generally more robust plants that can handle transplanting. In very warm areas, peppers will grow as perennials but in most US Zones with frost, peppers only last outside for six to seven months. To harvest as soon as possible, start with the biggest plants you can find.
Container
Choose a pot that is at least 12” in diameter. Be sure the container has plenty of drainage holes and fill the bottom with clean rock or gravel to give the pot weight and provide a little extra drainage.
Soil
Peppers prefer slightly acidic to neutral, loamy soil that drains well – regular bagged soil or compost works well for peppers. When using containers, it’s important to replace the soil each year or mix well with compost to replenish nutrients. Fill the pot almost to the rim, leaving about 1” so water won’t spill over the edges when watering.
Sun
Peppers need full sun so be sure you can put your potted pepper in a spot that gets full sun all day. Also make sure the pots can be spaced so they get good air flow and do not shade each other.
Water
Peppers like moderate water but containers tend to dry out faster than in-ground gardens. So, on really hot days, you might need to water twice. Be sure to water at the soil level – not overhead or so that the soil splashes up on the leaves. Water until it comes out the drain holes on the bottom – if your soil is really dry, water for a bit until soil is moistened, let it sit for a minute, then come back and water some more.
Nutrients
Container peppers need extra fertilizer (compared to in-ground gardens) so feed weekly according to the instructions on your favorite garden feed. They do not need any extra nutrients but will benefit from an addition of compost at the beginning of the year.
WARNING: All parts of the really hot pepper plants are hot. Wear gloves when handling stem, fruits, and leaves. Wash your hands thoroughly before touching eyes, nose, or mouth.
How to Plant
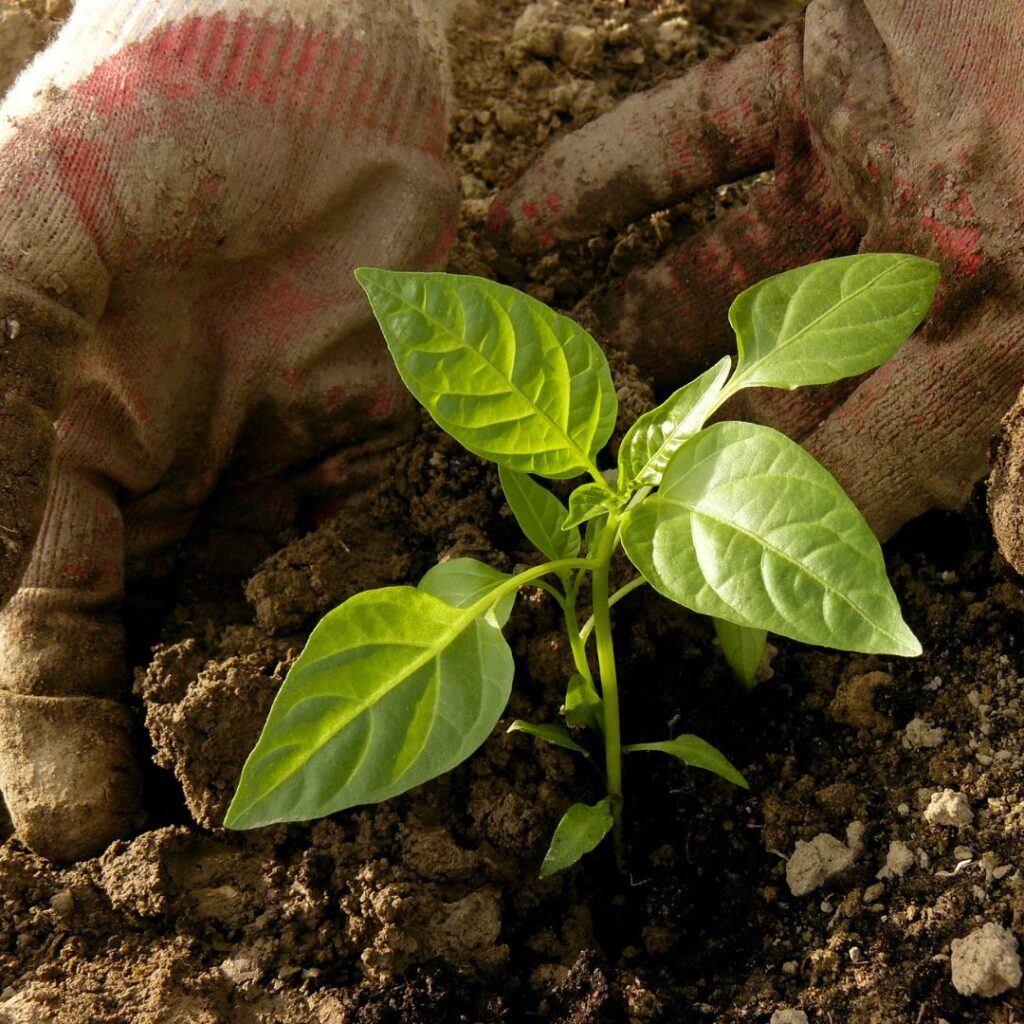
Harden off your plants before planting. Nursery grown plants need a few days to adjust to outside weather conditions. Start by sitting them in a shady spot without a lot of wind and then slowly move them into the sun for longer and longer each day. Be sure to keep well-watered. Once they’ve been in the sun all day, let them sit out overnight (protect from critters) and then they should be ready to plant.
In your container dig a hole that is the same size (width and depth) of the pot the pepper plant is in. Only put one pepper per pot because they will grow quite large and do not like to be crowded or compete for water and nutrients. Tip the plant over, gently cradling the stem between your fingers. Carefully loosen the root ball and place the plant in your hole. Scoop the soil back in to cover the plant – when done the pepper should be buried at the same depth it was in the pot. Water well and move to a shady spot for the first day or so. Then move into the sun, keep watered, and feed once or twice a month.
Care & Pruning
Some gardeners like to pinch off or prune the “growing point” of pepper plants but we do not agree with that method. It can increase the bushiness and sturdiness of the plant but it does not increase yield. We recommend instead carefully staking your peppers (use a wire tomato cage or string trellis system). This prevents the plant from tipping over and supports the branches when the fruit is heaviest. It also preserves the canopy which is important to protect the fruit from sun scald.
The only exception to this rule is late in the season when you know you only have a few weeks until frost or freeze. This is a good time to top the plant off – just cut the top portion of leaves. This will stop the plant from growing and it will instead put all its energy into ripening the remaining fruit.
Harvesting
Peppers are one of the few garden plants that you can harvest fruit at nearly all stages. Most plants start out with green peppers and the longer they stay on the vine, the sweeter or hotter they become and the colors will change from yellow to orange to red (or purple depending on the variety). The more peppers you pick off your plant in the early season, the more they will produce! One thing to note: the longer you leave on the vine, the more chances for critters to get at them.
End of Season
Once temps get below freezing, your peppers are done. If you’re only expecting frost that will be followed by warmer days, cover up your plants with a light blanket at nighttime or move indoors. You can try keeping your pepper alive indoors but it will still need a lot of sunlight to thrive. Once the plant dies back, remove it and throw in the compost pile for next year’s soil.
Are you tired of fighting mosquitoes every time you want to be outside? Download this quick guide for five really easy things you can do right now to deter pesky insects from bothering you. Hint: it may be what you’re drinking! Click here to read or download.
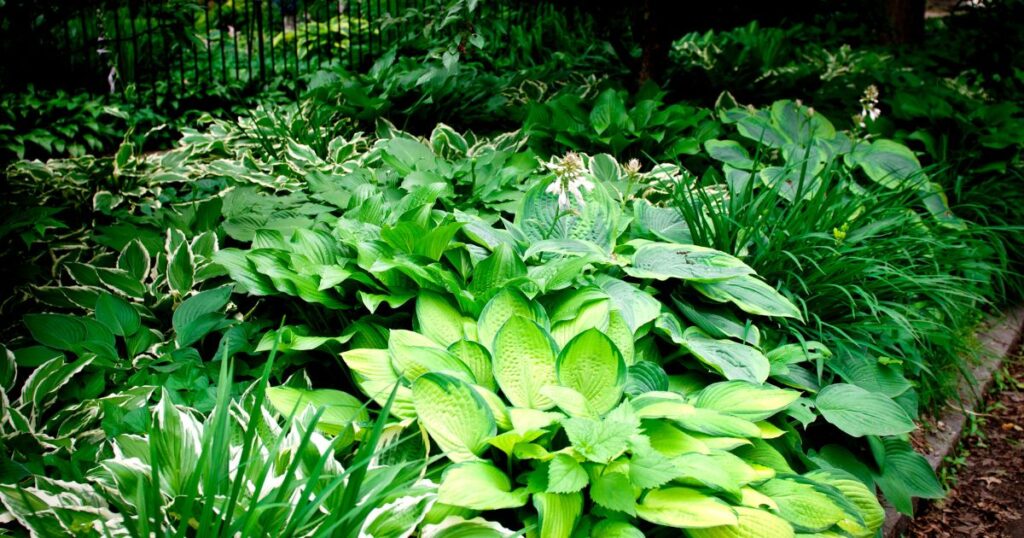
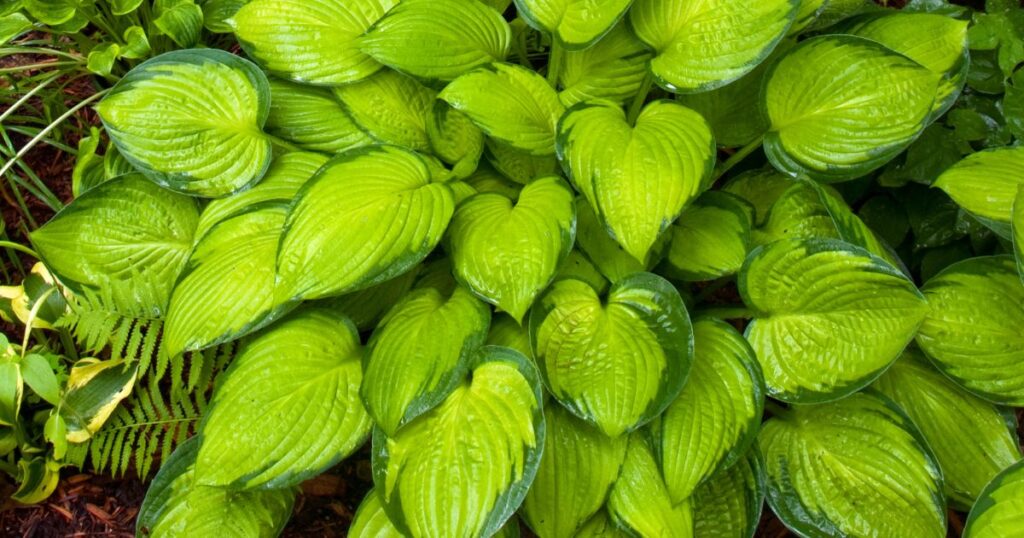
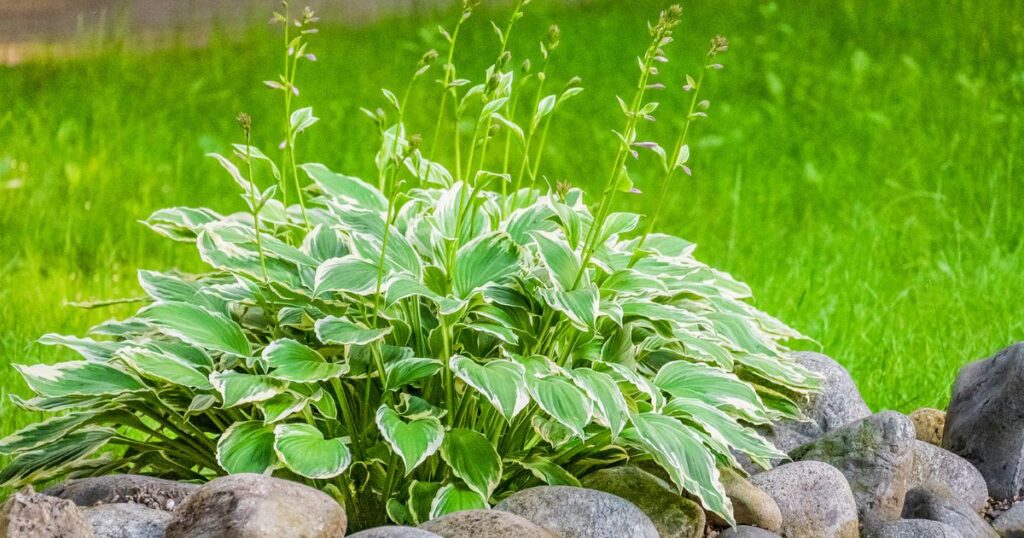
Hostas are a popular perennial choice for gardeners looking to add lush, leafy greenery to shady. Known for their resilience and minimal maintenance, hostas come in a variety of sizes and colors, making them a versatile addition to any garden. In this guide, we’ll cover everything you need to know about planting and caring for hostas, including selecting the right location, planting techniques, care tips, and how to protect your plants from common pests like slugs, deer, and rabbits.
Selecting the Perfect Location for Hostas
Choosing the right spot for your hostas is crucial for their growth and health. Here are some key factors to consider:
Light Requirements
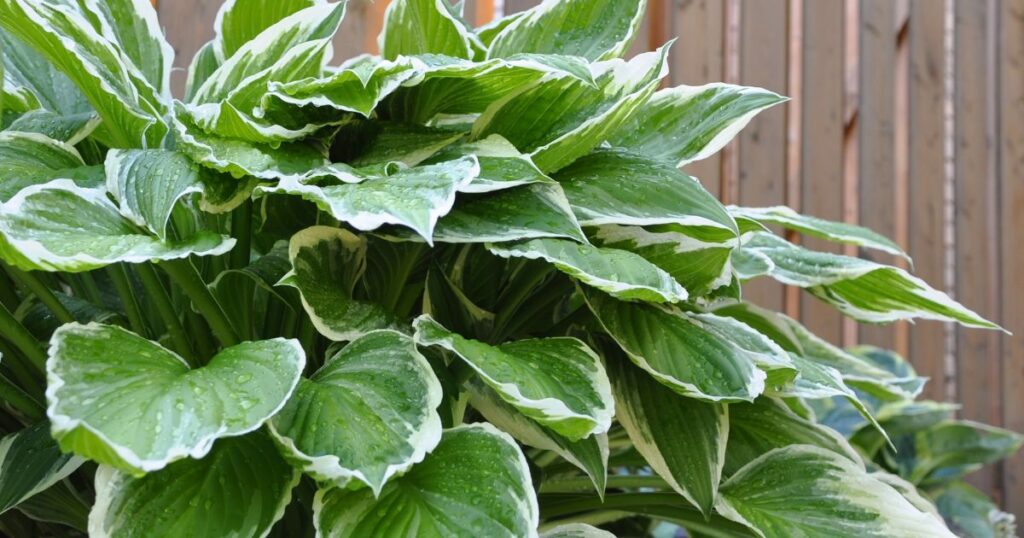
Hostas thrive in shady to partially shady areas. While some varieties can tolerate more sun, most hostas prefer a location that receives morning sun, filtered light, and afternoon shade. Too much direct sunlight can scorch their leaves, while too little light can result in slower growth and duller colors.
Soil Conditions
Hostas prefer well-draining soil that is rich in organic matter. The soil should be consistently moist but not waterlogged. Adding compost or aged manure to the planting area can improve soil health and drainage and keep your plants well fed and happy.
Space and Placement
Give your plant lots of space to grow! Hostas will quickly fill out, sometimes growing to five times their starting size. A crowded hosta garden not only stunts the plants’ growth, it keeps the plant from showing its full beauty in color and canopy. Proper spacing also allows for adequate air circulation, which helps prevent disease. In the first season of planting, mix in a low growth annual such as alyssum or add mulchy to fill in the gaps while your hostas get established.
How to Plant Hostas
Hostas are quite forgiving and can handle most transplanting conditions. Follow these steps for best success:
Preparing the Planting Site
1. Remove any weeds, rocks, or debris from the planting site.
2. Dig a hole that is twice as wide and just as deep as the root ball of the hosta.
3. Mix in compost or aged manure with the soil you removed from the hole to improve nutrient content and drainage.
Planting the Hosta
1. Place the hosta in the hole, ensuring that the top of the root ball is level with the surrounding soil.
2. Backfill the hole with the amended soil, gently firming it around the roots.
3. Water the newly planted hosta deeply to help settle the soil and eliminate air pockets.
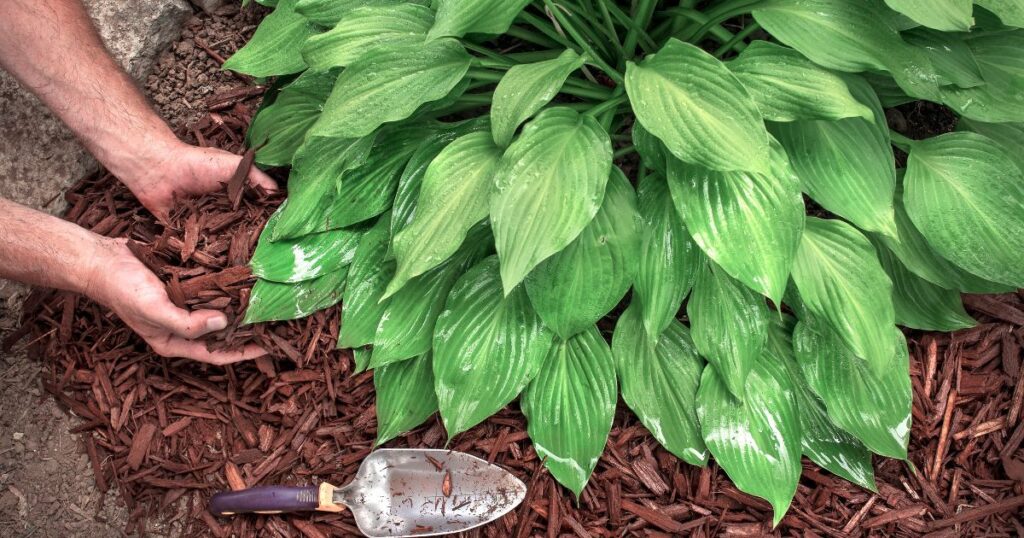
Mulching
Apply a 2-to 3-inch layer of mulch around the base of the plant, keeping it a few inches away from the stems. Mulching helps retain moisture, regulate soil temperature, and suppress weeds.
Caring for Your Hostas
Hostas are relatively low-maintenance plants, but they do require some care to thrive. Here are some essential tips for maintaining healthy hostas:
Watering
Hostas need consistent moisture, especially during the growing season. Water deeply once a week, providing about 1 inch of water. In hot, dry periods, you may need to water more frequently. Avoid overhead watering, as wet foliage can encourage disease. Instead, water at the base of the plant and water in the morning so the plants have time to dry off before cooler evening air and dew settles around them.
Fertilizing
Feed your hostas with a balanced, slow-release fertilizer in the spring as new growth begins. You can also use a liquid fertilizer every 4-6 weeks during the growing season. Avoid over-fertilizing, as this can lead to lush foliage at the expense of flowering.
Pruning and Cleaning
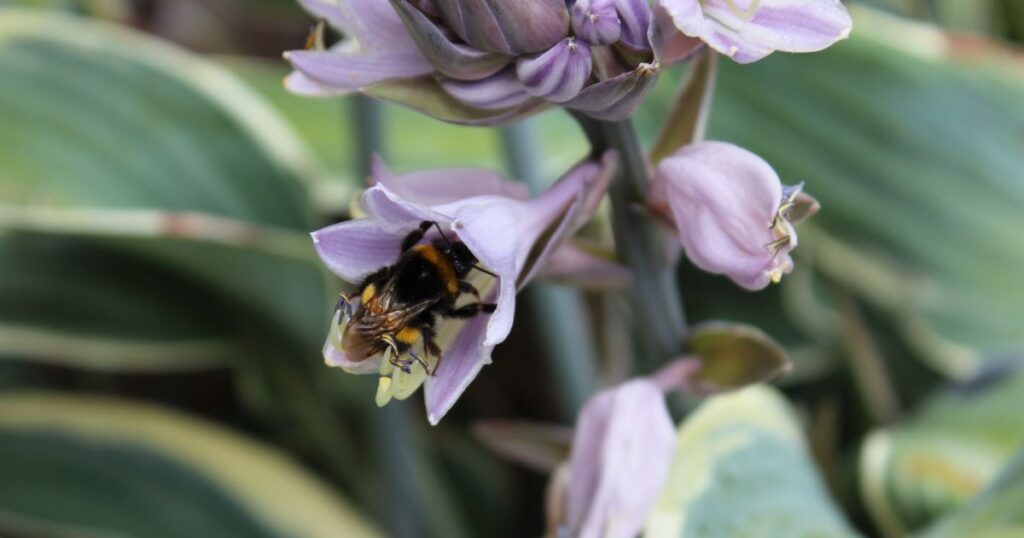
Remove any yellow or damaged leaves throughout the growing season to maintain the plant’s appearance and health. After the blooms have faded, trim back the tall flower stalk to the base. Some gardeners prefer to cut the flower off as soon as it emerges to give the leaves more growth energy. This is personal choice but pollinators will be attracted to the flowers of the plant. In the fall, after the first frost, you can cut back the foliage to ground level to prepare the plant for winter dormancy. Hostas do not need cover over the winter.
Dividing Hostas
Every 3-5 years, hostas may become crowded and benefit from division. The best time to divide hostas is in early spring or early fall. Dig up the entire clump, then use a sharp knife to separate it into smaller sections, each with a portion of the root system. Replant the divisions as you would new hostas.
Protecting Hostas from Pests
Hostas are a favorite target for pests such as slugs, deer, and rabbits. Here are some strategies to protect your plants:
Slugs
Slugs are notorious for chewing holes in hosta leaves. To control slugs:
Remove slugs by hand in the evening when they are most active.
Place shallow dishes of beer around the garden; slugs are attracted to the beer and will drown.
Use copper tape or crushed eggshells around the base of the plants to deter slugs.
Apply iron phosphate-based slug baits, which are safe for pets and wildlife.
Deer
Deer can quickly decimate a hosta bed. To keep deer at bay:
Use commercial deer repellents or homemade sprays made from garlic, hot pepper, or soap. Reapply regularly, especially after rain.
Surround hostas with deer-resistant plants like ferns, lavender, or ornamental grasses to make the area less appealing.
Rabbits
Rabbits also enjoy munching on hostas. Protect your plants with these methods:
Use a low fence made of chicken wire or hardware cloth around individual plants or garden beds.
Apply commercial rabbit repellents or sprinkle blood meal or crushed red pepper around the plants.
Plant clover or other rabbit-preferred plants away from your hostas to lure them elsewhere.
Uses for Hostas in the Garden
Hostas are not only attractive but also versatile in the garden. Here are some ways to use hostas in your landscape:
Ground Cover: The full canopy of a hosta plant makes a great weed suppressant! Use as ground cover in shaded areas, creating a lush, green, weed-free carpet that retains soil moisture.
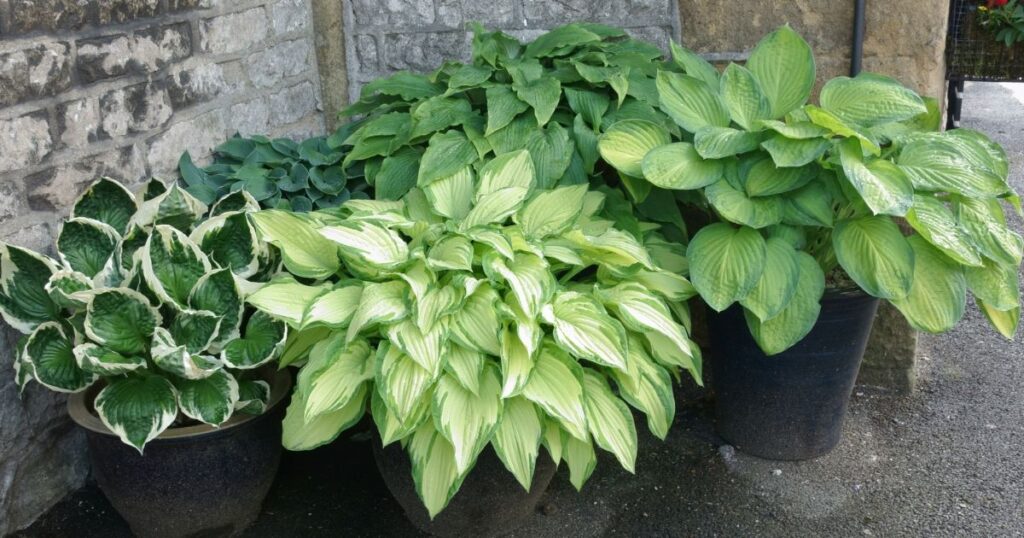
Borders and Edging: Smaller hosta varieties make excellent borders and edging plants, defining garden beds and pathways with their neat, mounded forms. Combine different colors and sizes for an interesting garden that brightens up dark corners.
Companion Planting: Hostas pair well with other shade-loving plants such as ferns, astilbes, and heucheras. Their contrasting foliage textures and colors create a visually appealing garden design.
Containers: Hostas can be grown in containers, making them a great option for patios, balconies, or small gardens. Ensure the containers have adequate drainage and provide consistent moisture.
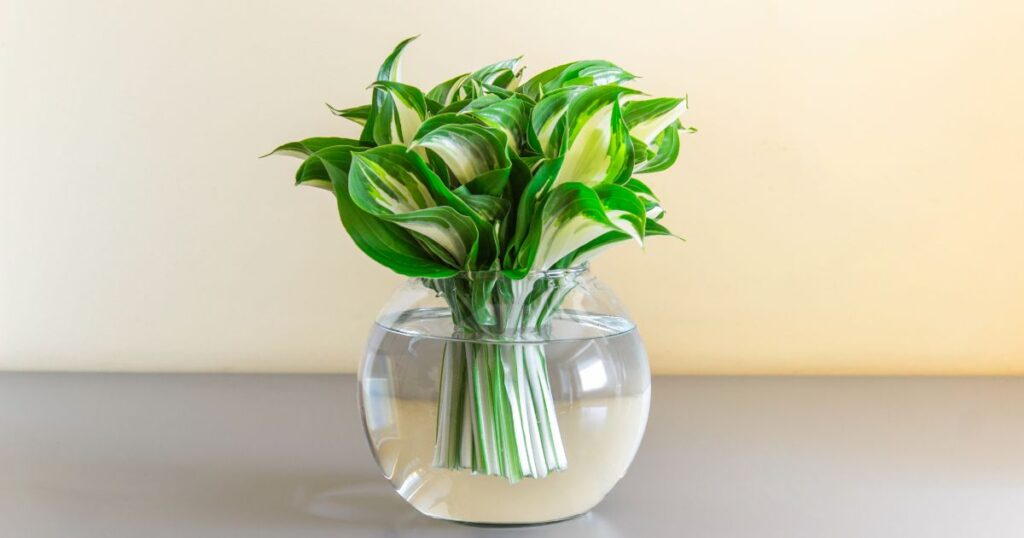
Cutting Gardens: Hosta leaves make a great, long-lasting addition to cut bouquets and look stunning on their own or as a backdrop to fresh cut flowers.
Planting hostas in your garden adds beauty and greenery to shaded areas. By selecting the right location, following proper planting techniques, providing adequate care, and protecting them from pests, you can enjoy healthy and vibrant hostas for years to come. Whether used as ground cover, borders, or container plants, hostas are a versatile and valuable addition to any garden.
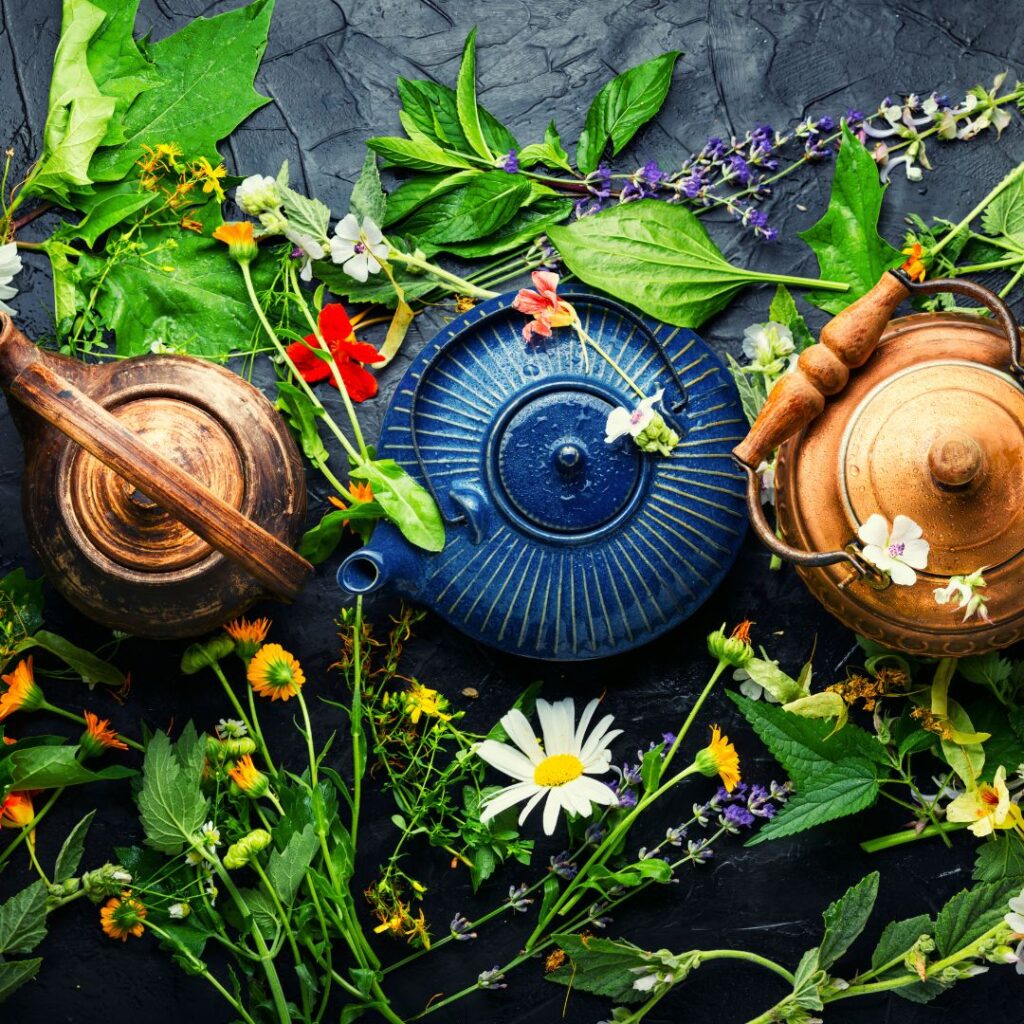
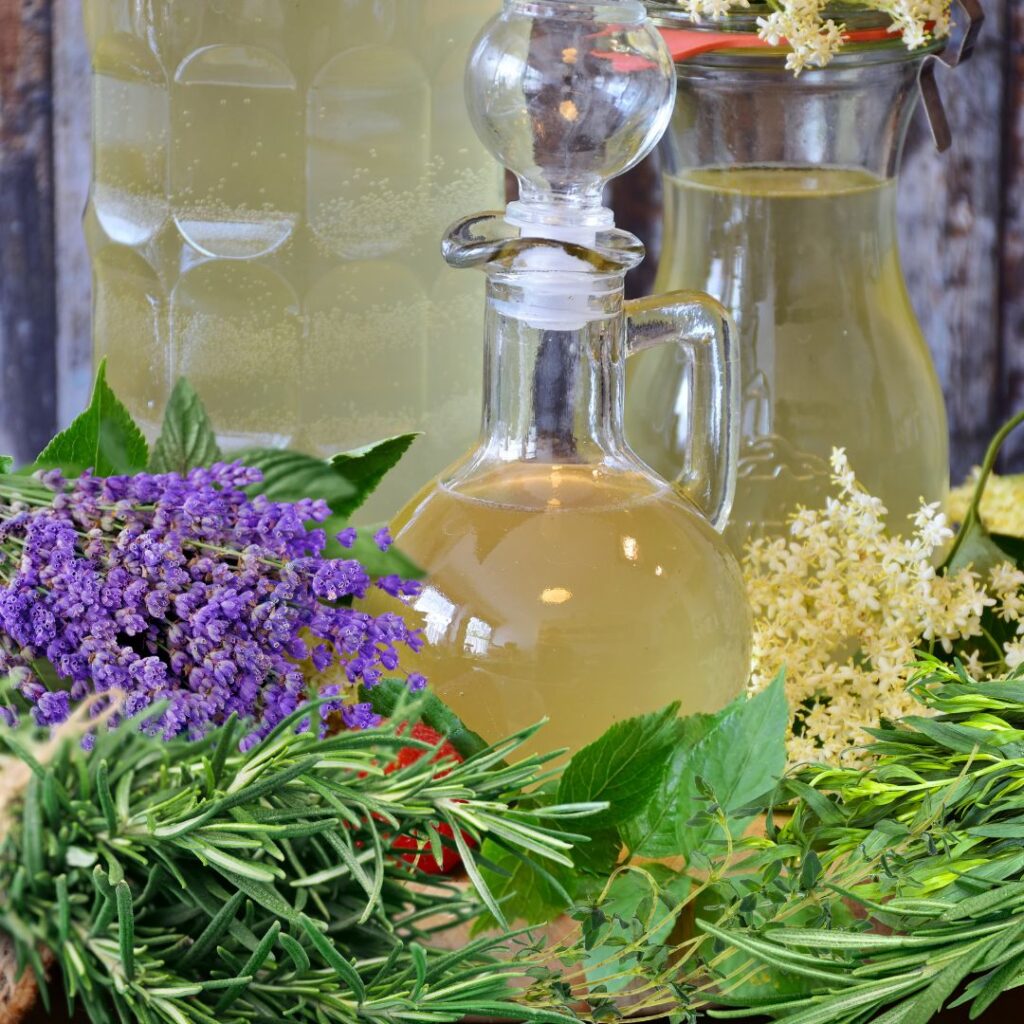
Imagine sipping a hot cup of tea, knowing that you grew each leaf yourself! Not only do you get the joy of gardening (and a beautiful, fragrant summer garden) but you get an abundant supply of fresh, organic tea leaves.
You don’t need a lot of space to grow enough for an entire winter season of tea. This article will show you how!
Choosing the Right Plants
Most fragrant herbs are delicious in tea! These are our top 4 choices plus a must-have for natural sweetness. All are easy to grow, and most are perennial in USDA zones 4 or warmer.
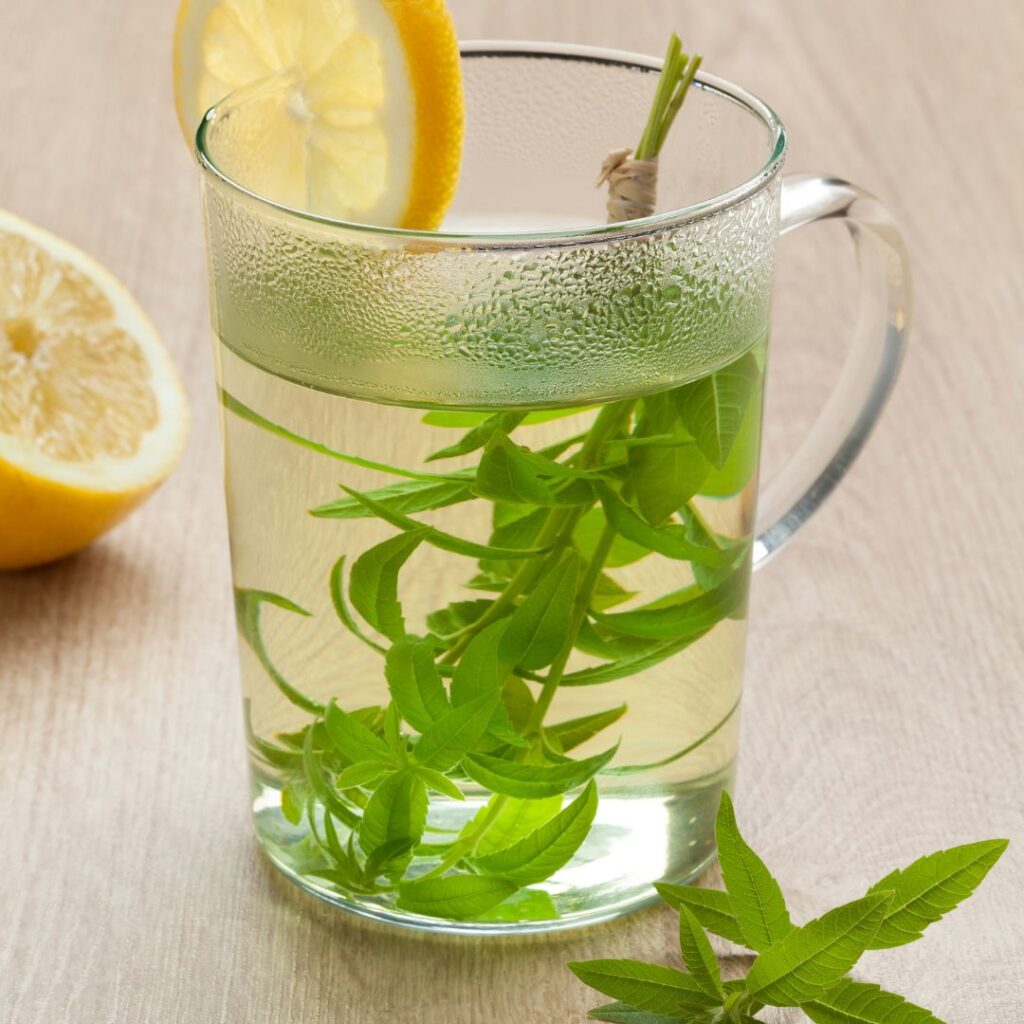
Lemon Verbena (Aloysia citrodora) (Shop here): Known for its intense fragrance, lemon verbena makes a refreshing and uplifting tea. This tender perennial thrives in full sun and well-drained soil, making it a delightful addition to your garden.
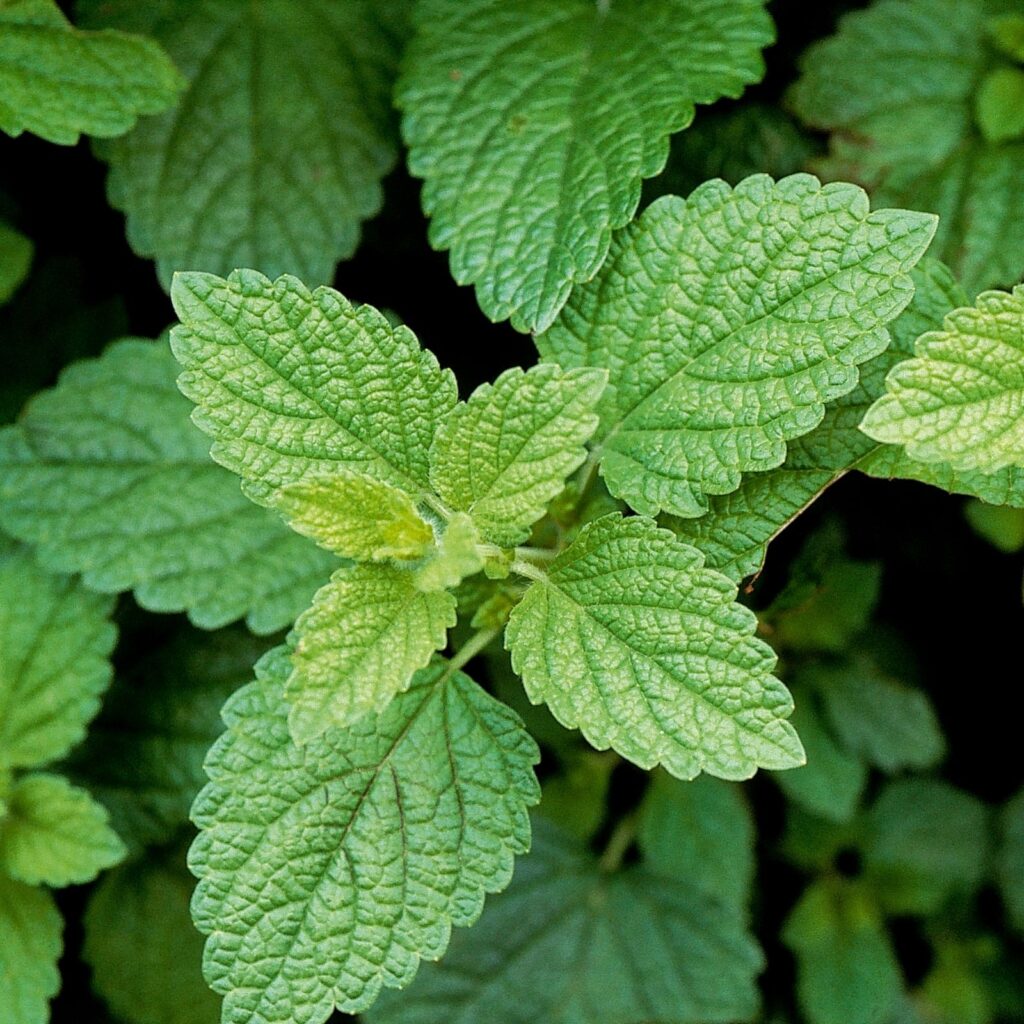
Lemon Balm (Melissa officinalis) (Shop here): With its vibrant lemon scent, lemon balm adds a delightful citrus note to your tea. This herb is resilient and grows well in partial shade to full sun. It’s also known for its stress-relieving benefits.
Peppermint (Mentha × piperita) (Shop here): Peppermint is a perennial, vigorous grower and a popular choice for teas. Its strong minty flavor is perfect for soothing digestive issues and even is a strong mosquito repelling plant! It will grow well in containers too.
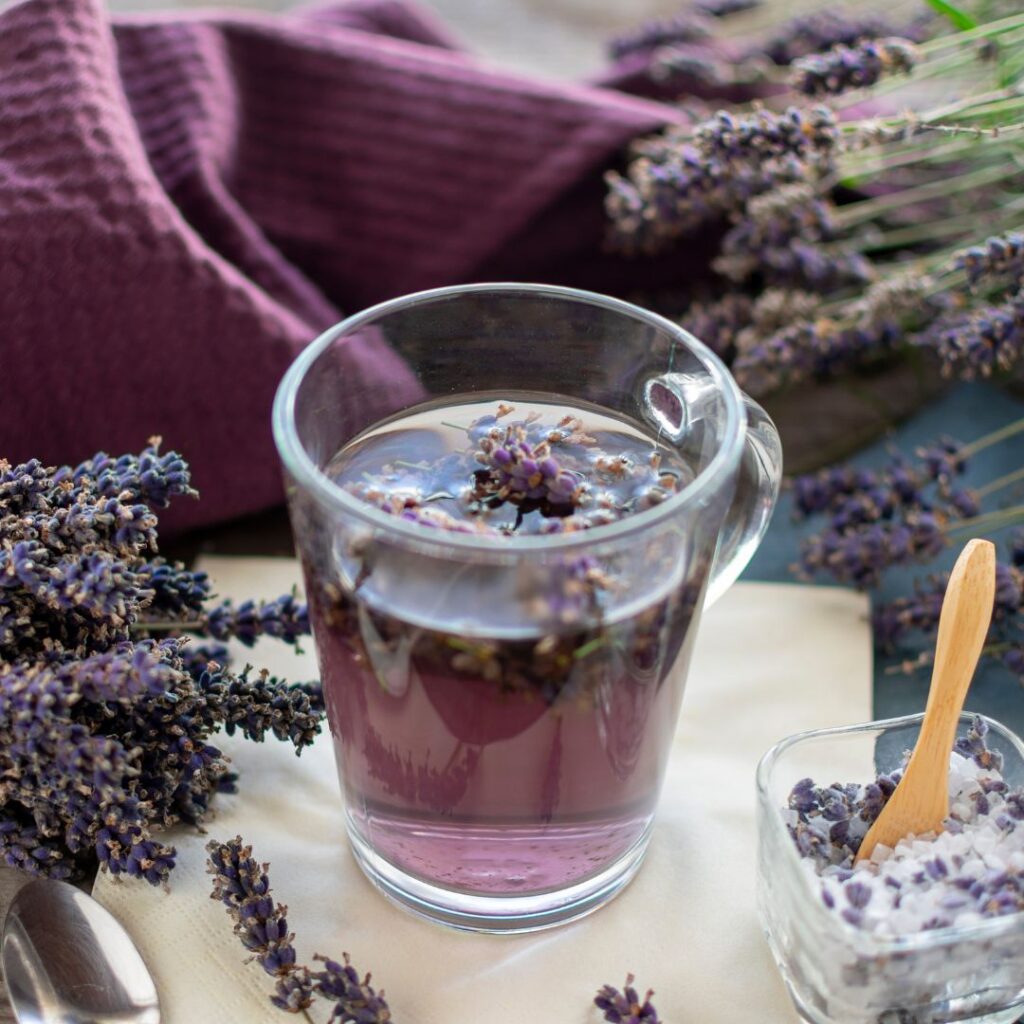
Lavender (Lavandula angustifolia) (Shop here): Lavender tea offers a unique floral flavor and a calming aroma. This drought-tolerant plant loves full sun and well-drained soil. It’s also a beautiful addition to any garden with its striking purple flowers.
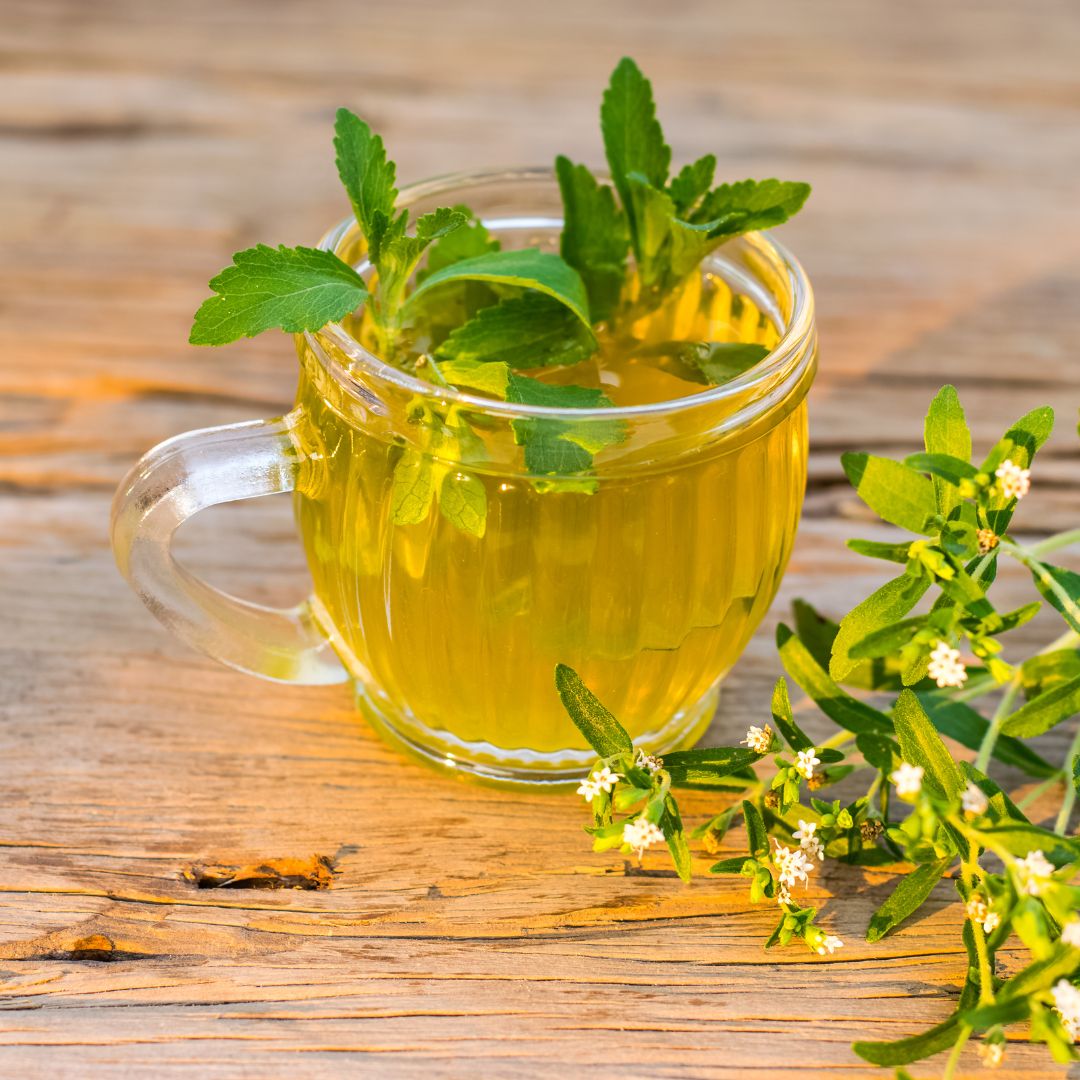
Stevia (Stevia rebaudiana) (Shop here): Stevia is a natural sweetener that can enhance the sweetness of your tea without adding calories. This easy-to-grow herb prefers full sun and well-drained soil. Grow it in containers or in your garden and just pinch off a leaf or two for instant sweetness.
Preparing Your Garden Space
Creating the ideal environment for your tea plants is crucial for their growth and health. Here’s how to prepare your garden space:
Sunlight and Soil: Most tea herbs prefer full sun, though some can tolerate partial shade. Ensure your garden area receives at least 6 hours of sunlight daily. The soil should be well-draining and rich in organic matter. If your soil is heavy clay or sandy, amend it with compost to improve its texture and fertility.
Containers or Ground: These plants work both in-ground or in containers. They all have lovely leaf structure and some have flowers so they do well in patio pots or even window boxes mixed with annual flowers. Perennials herbs make stunning foundation plantings or a pretty addition to a regular veggie garden (and they make great companion plants! Just note that perennial plants in pots will not survive freezing temps unless you protect the roots.
Watering: These herbs prefer consistent moisture but not soggy soil. Some like lavender even do better if left to slightly dry out between waterings. Water your plants early in the morning to allow leaves to dry out during the day and water from the bottom instead of overhead. When watering be sure to give enough so the water gets to the bottom of the root structure.
Planting and Care Tips
Follow the planting recommendations for depth and spacing that’s on the plant tag. Once planted, apply a layer of mulch around your plants to help retain soil moisture, suppress weeds, and regulate soil temperature. Organic mulches like straw, shredded leaves, or bark are excellent choices.
Herbs are generally not heavy feeders, but they benefit from a light application of compost or a balanced organic fertilizer during the growing season. Avoid over-fertilizing, as this can lead to lush foliage with less flavor.
Harvesting, Brewing, and Drying Your Tea
Once your plants are flourishing, it’s time to harvest and prepare your tea leaves.
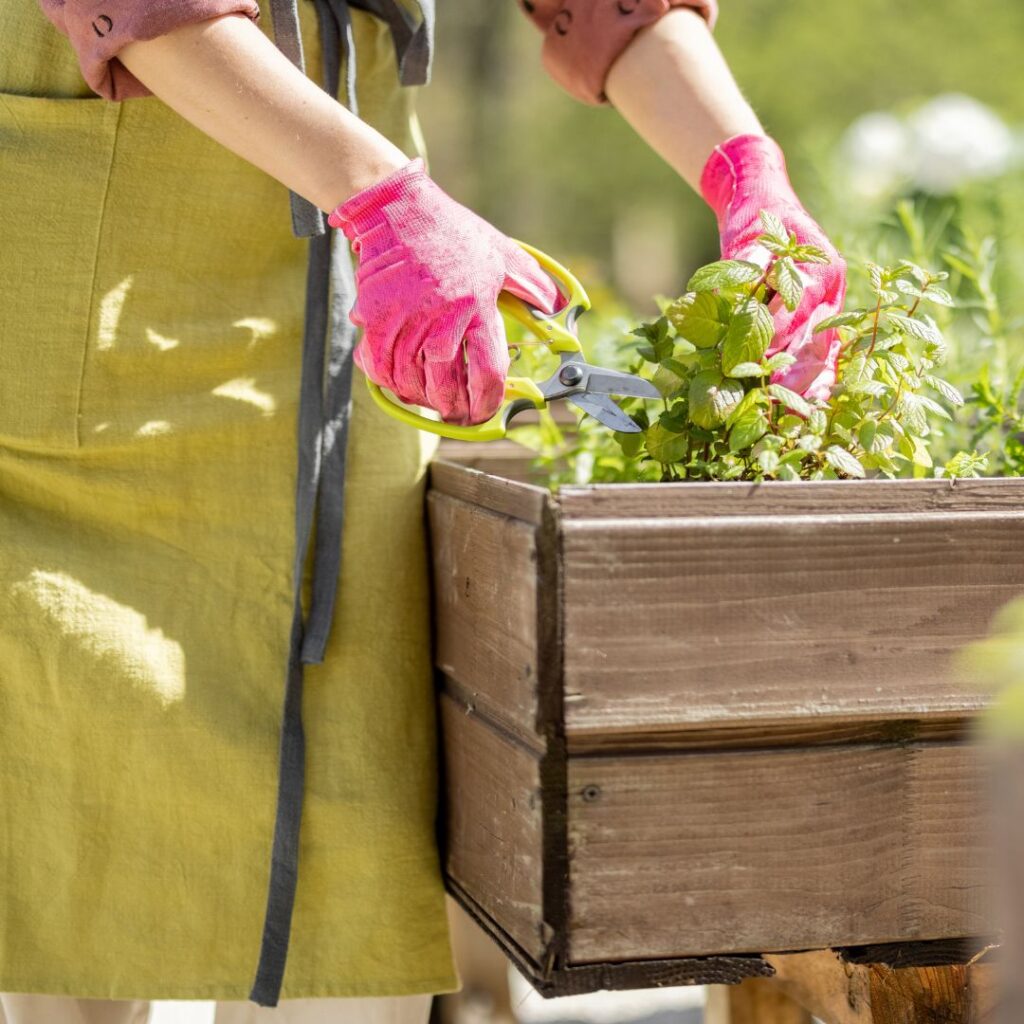
Pruning and Harvesting: Regularly prune your herbs to encourage bushier growth and prevent them from becoming leggy. Harvest leaves in the morning after the dew has dried but before the heat of the day. This timing ensures the highest concentration of essential oils, which contribute to the flavor and aroma of your tea. Avoid harvesting more than one-third of the plant at a time to ensure continued growth. All of these herbs will continue to grow until the first hard freeze.
Blending and Brewing: Experiment with different combinations to create your unique tea blends. A good starting blend might include lemon balm or lemon verbena with a touch of peppermint for a soothing, aromatic tea.
How to Make Fresh Tea: You can use herbs right out of the garden. Simply harvest a handful of leaves, rinse them gently to remove any dirt or insects, and pat them dry. For a single cup of tea, use about a tablespoon of fresh herbs. Place the herbs in a tea infuser or directly into your cup, then pour hot water over them. Allow the tea to steep for 5-7 minutes to extract the full flavor. Fresh herbs tend to have a milder taste compared to dried ones, so you might want to use a bit more if you prefer a stronger flavor.
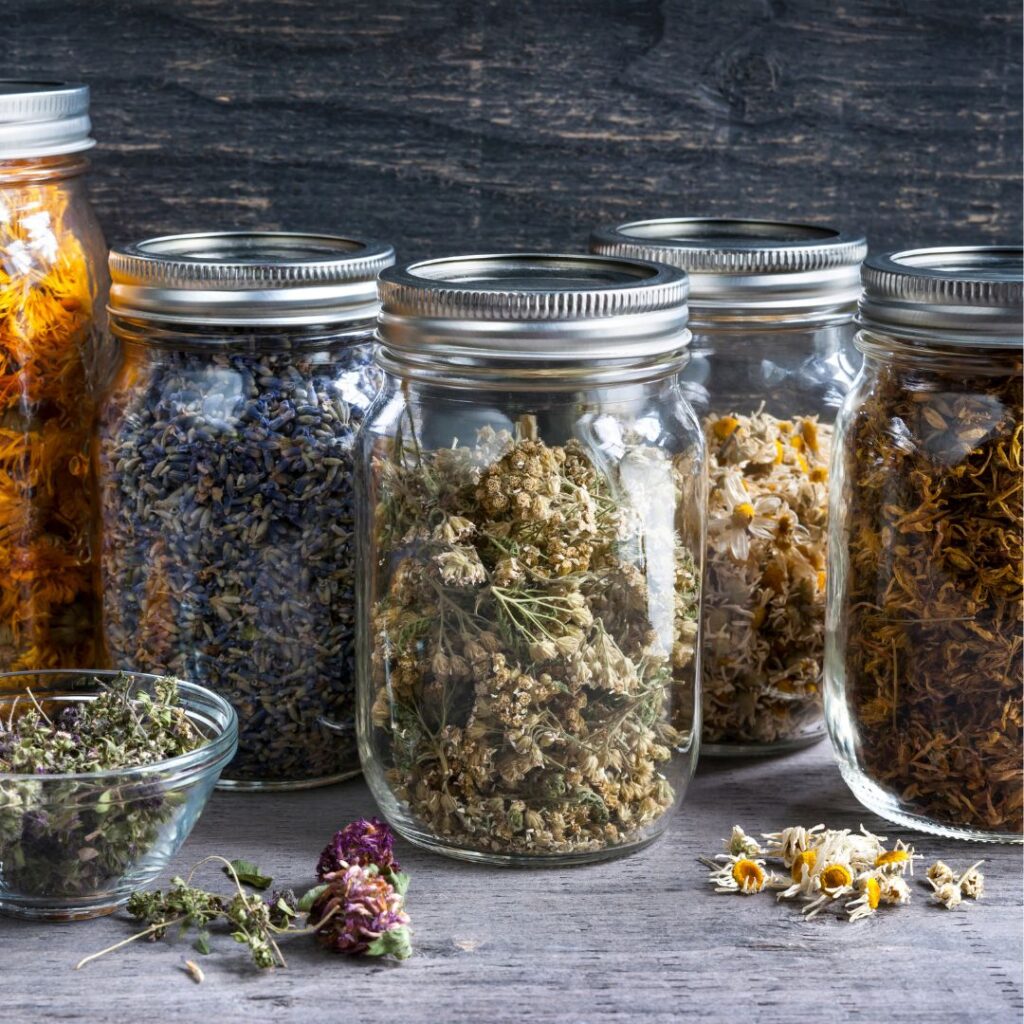
How to Dry Herbs for Tea: To dry your herbs, spread them out on a clean, dry surface away from direct sunlight. Or You can also use a drying rack or hang small bunches upside down in a dark, well-ventilated area or dry with an electric dehydrator. Ensure they are completely dry before storing to prevent mold growth. Use about one teaspoon of dried herbs per cup of hot water, steep for 5-10 minutes, and enjoy.
Store fresh herbs in a glass of water or in a container in the refrigerator. Store dried herbs in airtight containers away from light and heat.
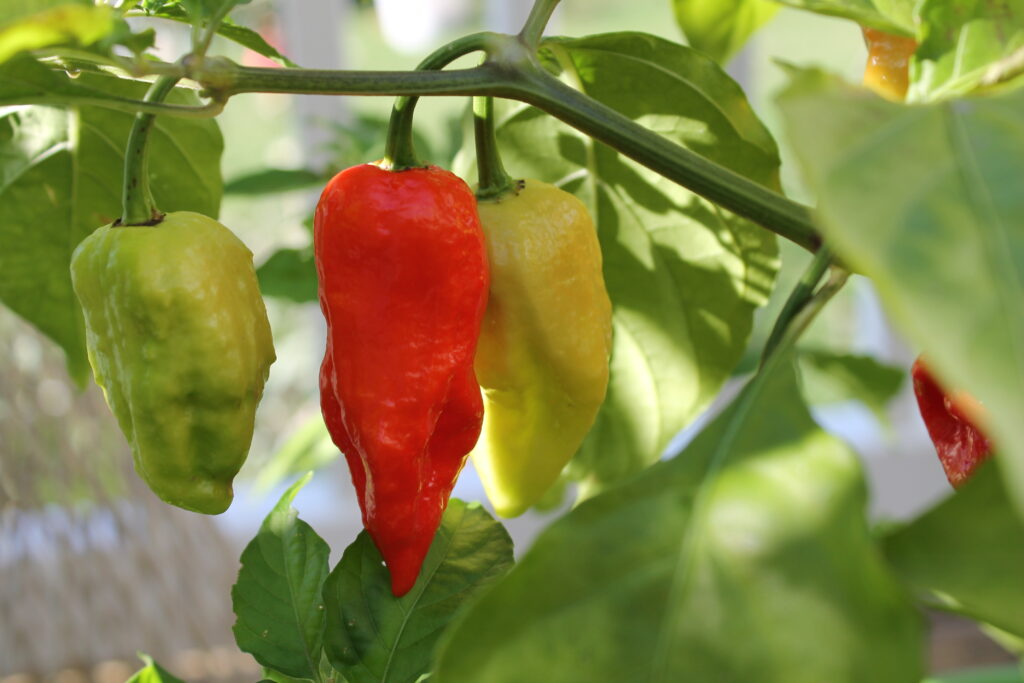
Hot peppers, with their fiery personalities and vibrant colors, are a delight to grow and cultivate. Whether you’re a seasoned gardener or just starting out, growing hot peppers can be a rewarding and spicy adventure. In this comprehensive guide, we’ll walk through everything you need to know to grow hot peppers like a pro, from choosing the right varieties to harvesting your bounty.
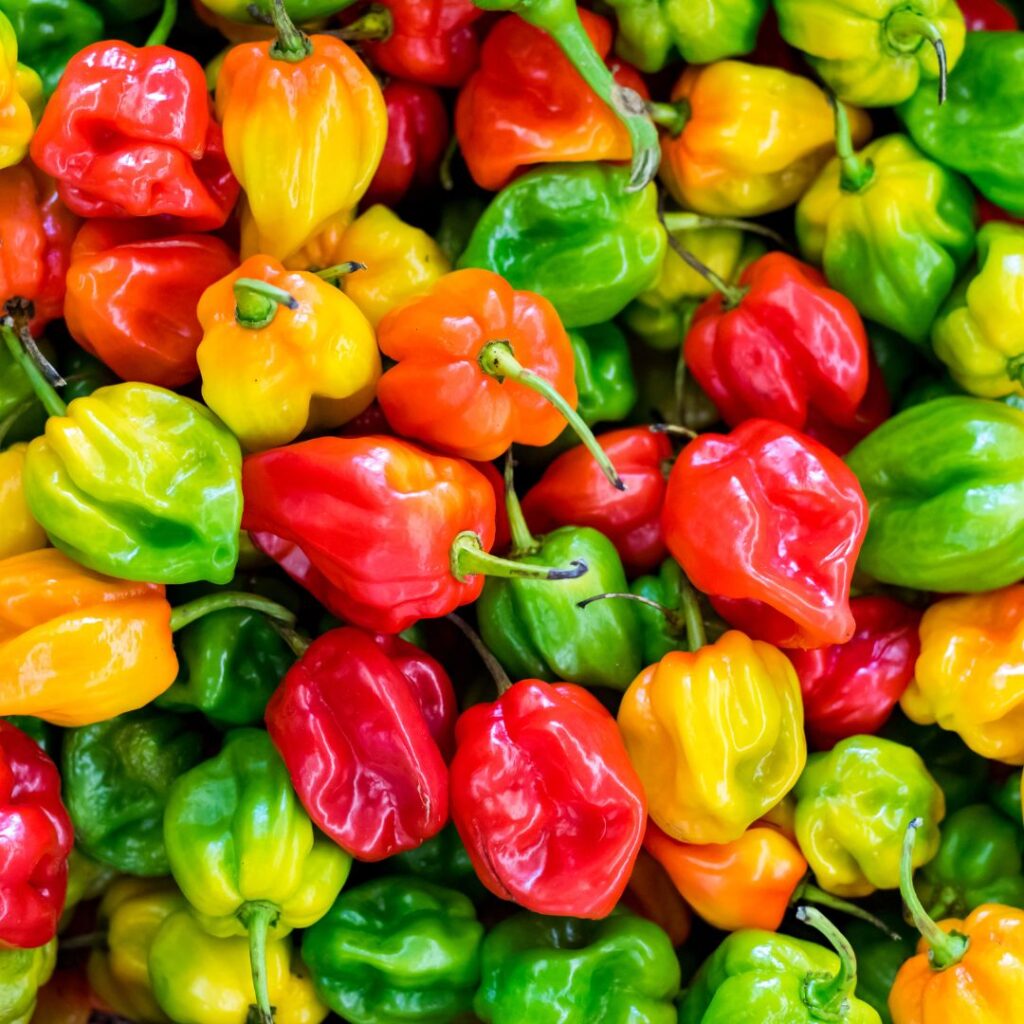
Hot peppers come in a wide range of shapes, sizes, flavors, and heat levels. From the mild heat of jalapeños to the fiery intensity of habaneros to the off the chart heat of Carolina Reapers, there’s a pepper out there to suit every taste preference. When selecting varieties to grow, consider your climate, available space, and desired level of heat. Some popular varieties to consider include:
Jalapeño: A versatile pepper with medium heat, perfect for adding a kick to salsas, sauces, and more.
Habanero: Known for its intense heat and fruity flavor, the habanero is not for the faint of heart but can add a bold punch to dishes.
Thai Gong Bao: Small but mighty, these peppers pack a serious heat punch and are commonly used in Thai cuisine.
Cayenne: Long and slender, cayenne peppers are prized for their spicy flavor and are often dried and ground into powder for use in seasoning blends.
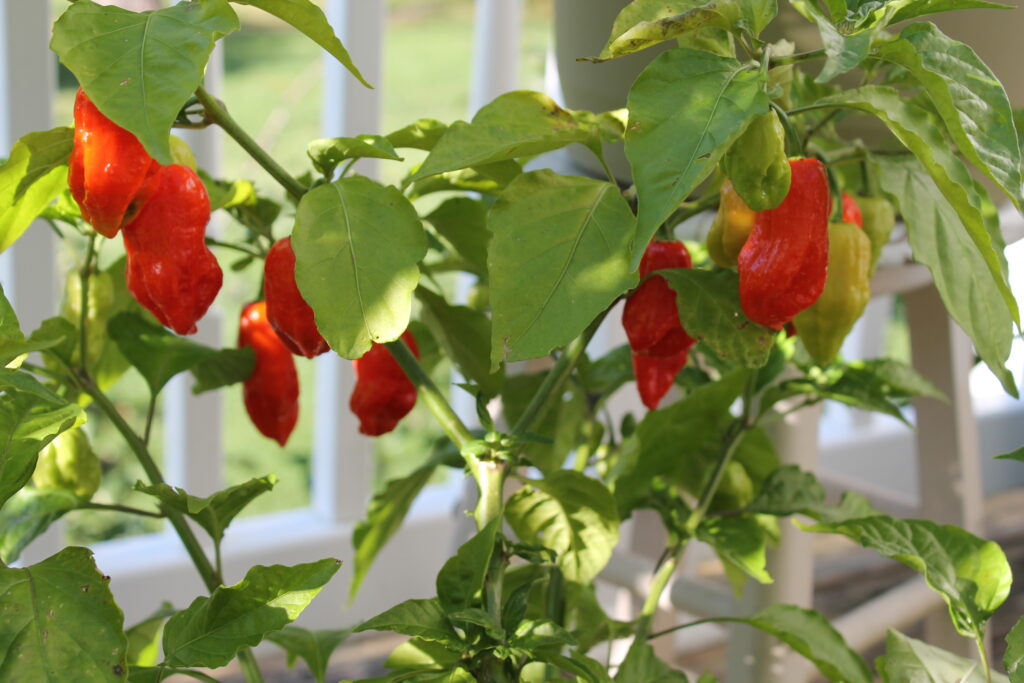
Ghost Pepper (Bhut Jolokia): One of the hottest peppers in the world, the ghost pepper boasts a Scoville heat rating that will leave even the most seasoned chili heads sweating.
Planting and Care Tips
Once you’ve selected your pepper varieties, it’s time to get your hands dirty and start planting. Here are some tips to ensure your hot peppers thrive:
Choose a Sunny Spot: Hot peppers love warmth and sunshine, so choose a location in your garden that receives at least 6-8 hours of sunlight per day.
Prepare the Soil: Hot peppers prefer well-draining soil with a pH of around 6.0 to 6.8. Amend your soil with compost or aged manure to improve fertility and drainage.
Planting: Plant your pepper seedlings outdoors after the danger of frost has passed and the soil has warmed to at least 60°F (15°C). Space plants 18-24 inches apart to allow for proper air circulation and growth.
Pepper plants also do well in pots and are perfect for small balcony or patio gardens. Choose a pot big enough for the plant to mature (they will grow to about 10x the size of the seedling). When planting in pots, it’s important to keep the soil well-fed and watered as they will dry out more quickly than in ground gardens.
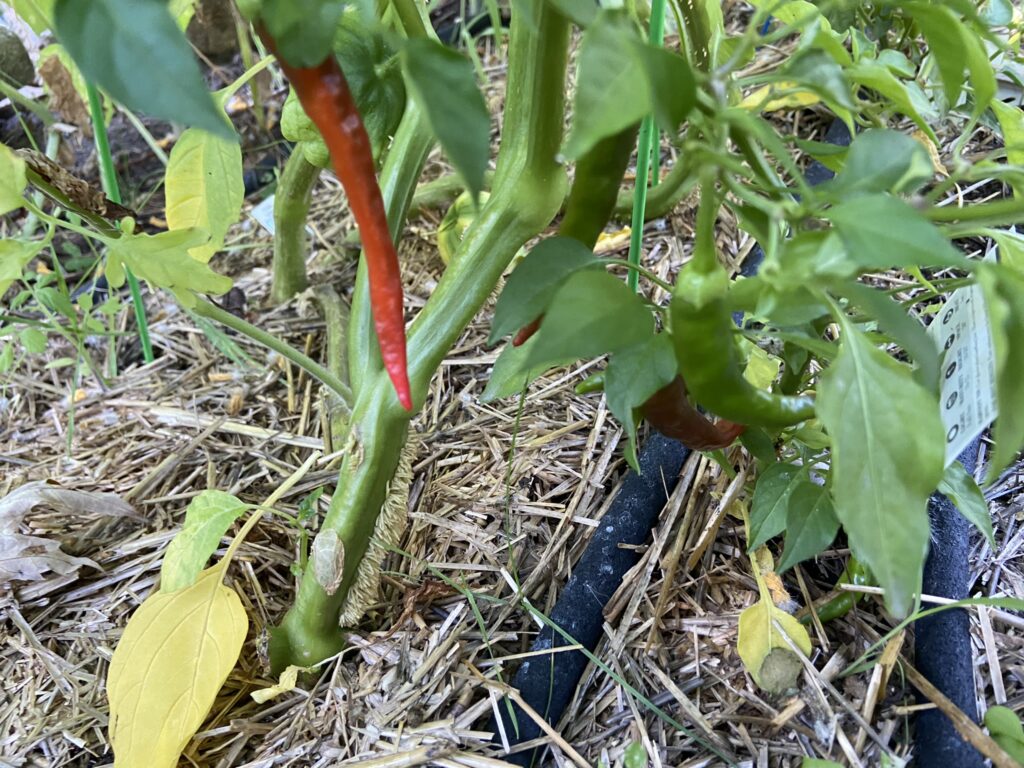
Support: Large plants will benefit from supports such as a cage or trellis to hold heavy branches. As the fruit grows keep an eye on the branches and tie them up if they start to crack or bend.
Watering: Keep the soil consistently moist but overwatered. Water deeply once or twice a week, depending on weather conditions and soil moisture levels.
Fertilizing: Feed your pepper plants with a balanced fertilizer high in potassium (such as a 5-10-10 or 10-10-10 blend) every 4-6 weeks throughout the growing season to promote healthy growth and fruit production.
Interesting Facts About Hot Peppers
Peppers are such a unique fruit, here’s some fun facts to share at your next BBQ:
Scoville Heat Scale: The heat of hot peppers is measured on the Scoville scale, which quantifies the amount of capsaicin, the compound responsible for their spiciness. The higher the Scoville rating, the hotter the pepper. For example, a mild jalapeño typically ranges from 2,500 to 8,000 Scoville heat units (SHU), while a fiery habanero can reach up to 350,000 SHU or more.
Capsaicin and Endorphins: When you eat spicy food, your body’s response to the capsaicin in hot peppers triggers the release of endorphins, natural chemicals in the brain that create a sense of pleasure and well-being. That’s why some people crave spicy food and even experience a “spice high” from consuming hot peppers.
Birds and Peppers: Hot peppers evolved their spiciness as a defense mechanism against mammals that would otherwise eat their fruit and destroy the seeds inside. Surprisingly, birds are immune to the heat of peppers due to a lack of capsaicin receptors in their mouths, making them important seed dispersers for pepper plants in the wild.
Health Benefits: Beyond their fiery flavor, hot peppers are packed with health benefits. Capsaicin has been shown to have anti-inflammatory, antioxidant, and pain-relieving properties, and regular consumption of spicy foods has been linked to a reduced risk of certain chronic diseases, including heart disease and cancer.
Cultural Significance: Hot peppers have a rich cultural history and play a prominent role in cuisines around the world. From the spicy curries of India to the salsa-drenched tacos of Mexico, peppers add depth and complexity to dishes, as well as a touch of culinary adventure.
Harvesting and Enjoying Your Peppers
Peppers plants will bear fruit from 60 days (small sweet peppers) to 150 days (some hot peppers). Unlike most garden plants, fruits can be picked at every stage from green to red. Unless you’re planting a unique variety with brown or purple fruit, the pepper will go from green to yellow to orange to red. At red, the fruit is at its ripest point and will be at the sweetest or hottest depending on the variety.
To pick the pepper, gently twist at the stem or use a clean cutting shears. Do not pull on the pepper as you may dislodge the plant from the soil. For extra hot varieties, wear gloves when picking! Even the oils of the leaf and stem are hot.
Store harvested peppers in a cool, dry place or refrigerate them in a paper bag for up to two weeks. You can also freeze peppers whole or chopped for longer-term storage.
Whether you dice them into salsa, pickle them for a tangy crunch, or dry them for homemade chili powder, there are countless ways to enjoy your homegrown hot peppers. Get creative in the kitchen and experiment with different recipes to showcase the unique flavors and heat levels of your peppers.
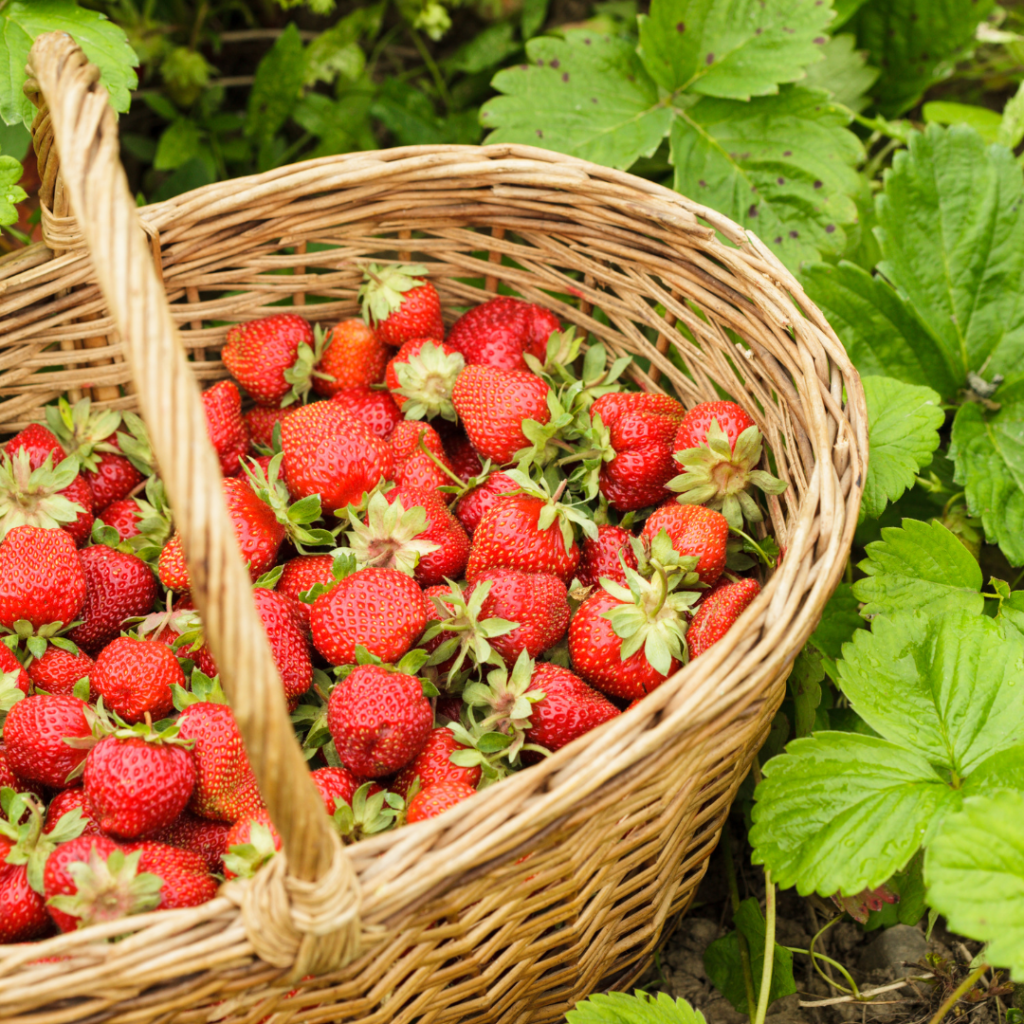
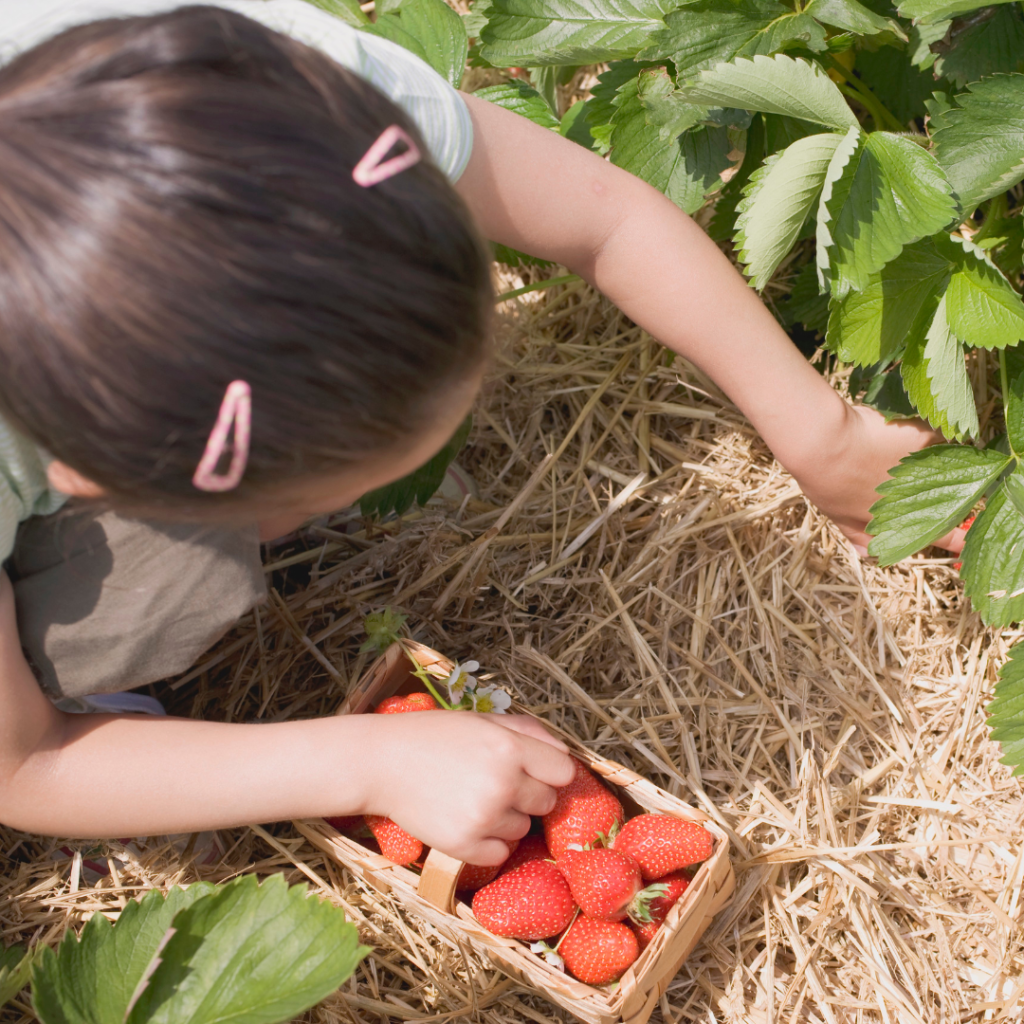
Imagine just heading out to the garden for a bucket full of sweet, ripe strawberries! Growing your own is much easier than you think and this article will show you how. Strawberries will grow in most zones and can even be grown in containers (with a little extra care). And once you plant, you’ll be able to harvest for years.
In this guide, we’ll walk you through the steps to plant and care for strawberry plants, from soil preparation to harvest and winter care.
Choosing the Right Plants
Strawberry plants are quite adaptable and can grow in most USDA hardiness zones, but are typically grown in zones 3 to 10. Gardeners in colder zones (3 to 6) should choose more hardy varieties while those in warmer zones need to choose plants better suited to heat and humidity. Just check the plant label for that variety’s characteristics.
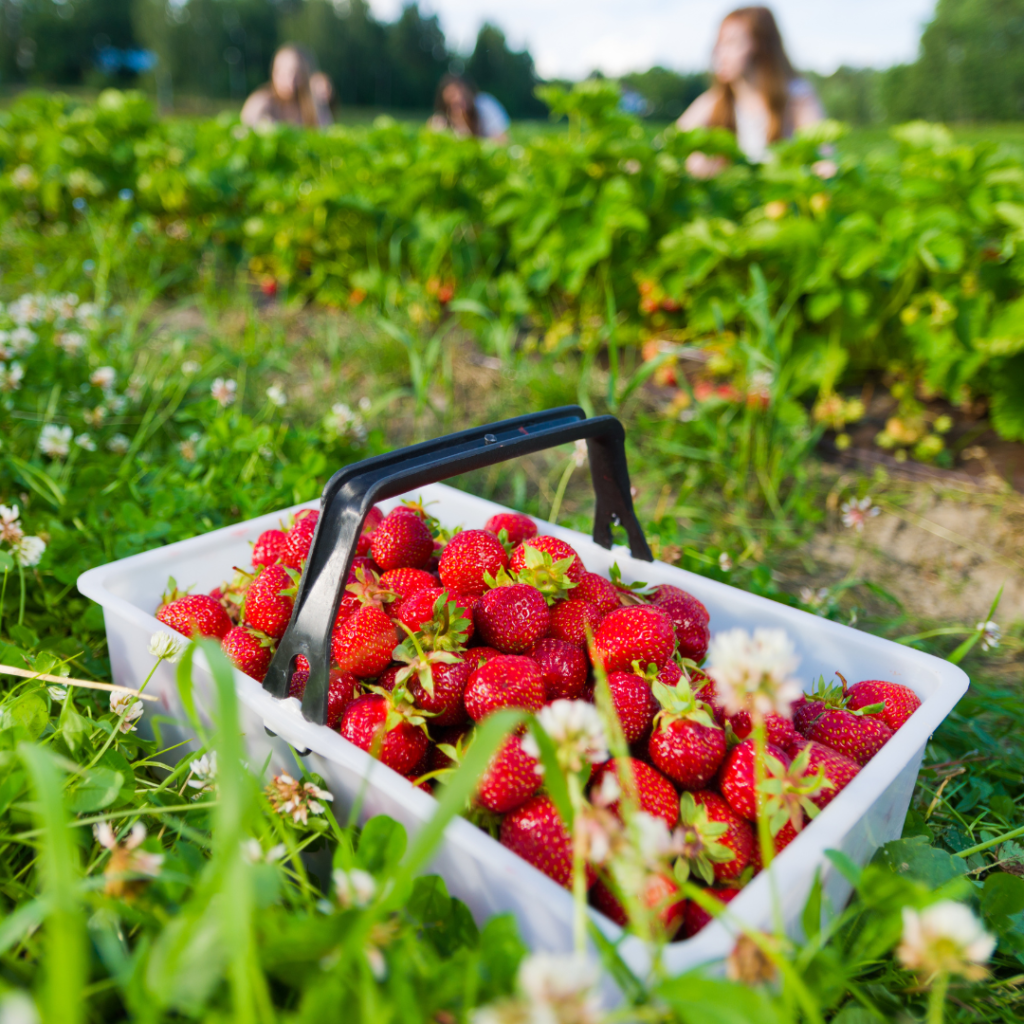
Strawberry plants also come in varieties with different harvest times and quantities. This comes down to your personal preference and, in some cases, when you want to harvest. For example, if you’re planning to make jam, you’d want to pick all your berries at once so you’d choose a June-bearing variety. We’ve listed more details below but be sure to check your plant tag when ordering.
1. June-bearing strawberries:
June-bearing strawberries, also known as “short-day” strawberries, typically produce a single large crop of berries in late spring to early summer (usually during the month of June). These plants tend to produce the largest with the most intense flavor. After the initial harvest, June-bearing plants may send out runners to propagate new plants. Gardeners often prune these runners to focus the plant’s energy on fruit production.
2. Everbearing strawberries:
Everbearing strawberries, as the name suggests, produce multiple crops of berries throughout the growing season. While they typically have a smaller overall yield compared to June-bearing varieties, they offer the advantage of producing strawberries from spring through fall. Unlike June-bearing varieties, everbearing strawberries may not send out as many runners, and they may not require as much pruning.
3. Day-neutral strawberries:
Day-neutral strawberries are a relatively newer type of strawberry plant that has been bred to produce fruit regardless of day length or temperature. These plants are not as sensitive to the length of daylight hours as June-bearing varieties, allowing them to flower and fruit continuously throughout the growing season, from spring to fall. Day-neutral strawberries typically produce smaller berries but offer the advantage of a longer harvest period and greater flexibility in planting and growing conditions. They are well-suited for gardeners who want a steady supply of strawberries throughout the summer months.
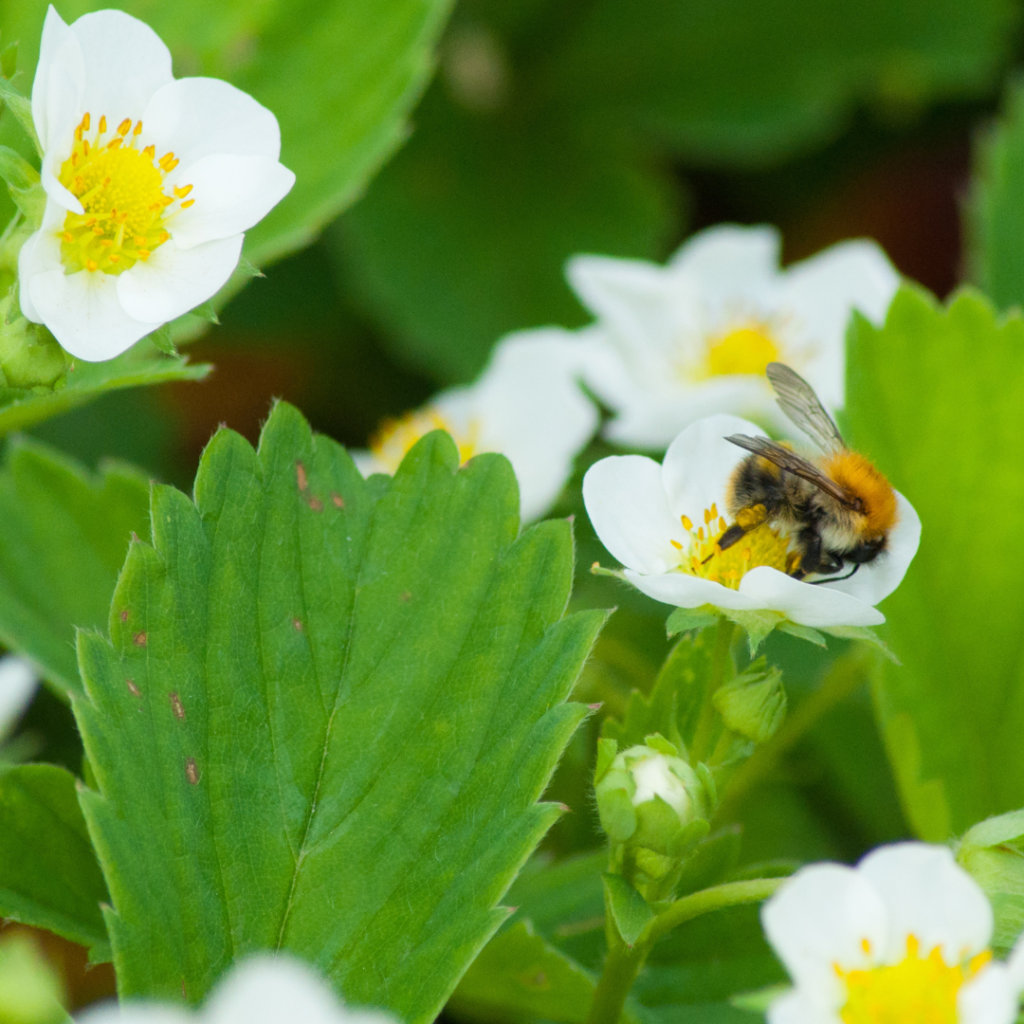
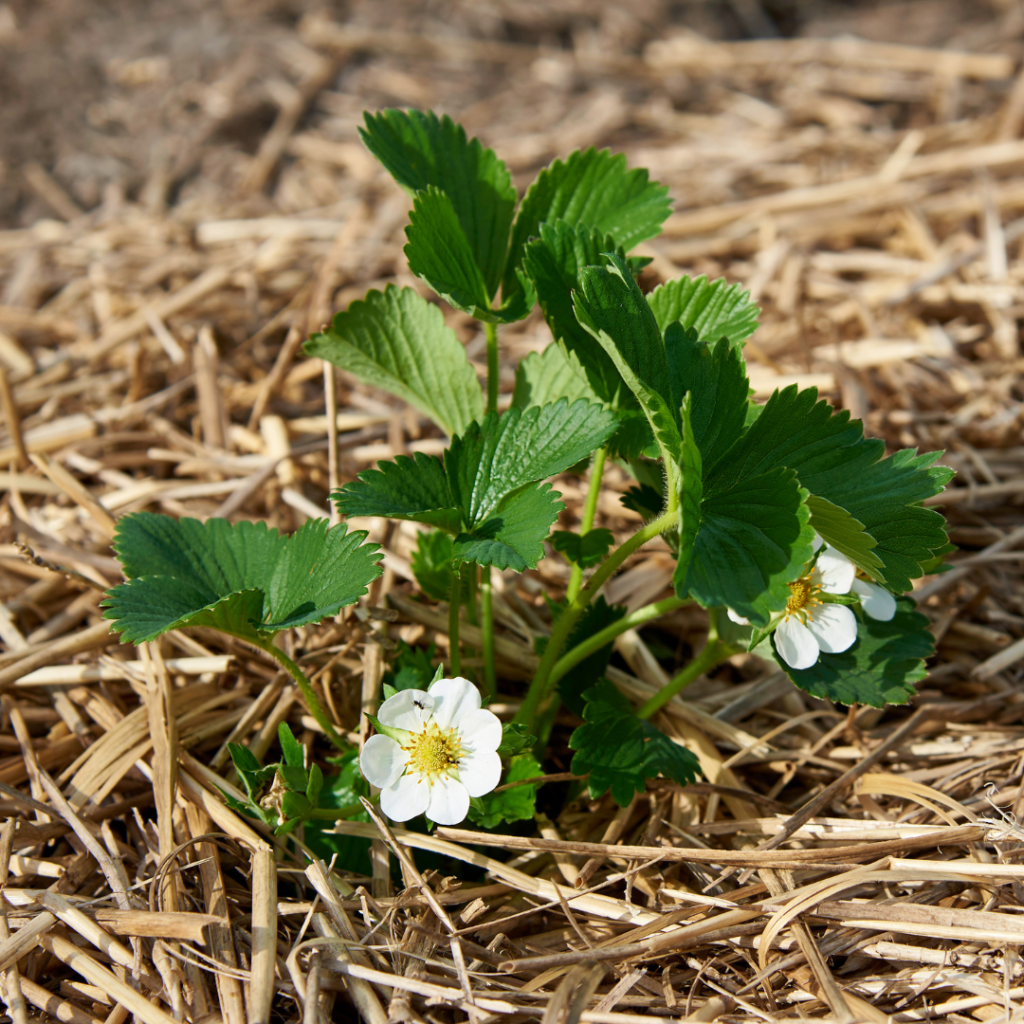
Strawberry plants are a great pollinator attractors as they’re covered in tiny, fragrant blooms each spring. Not only lovely but bees cannot resist stopping by for a visit!
Planting Specifics
Strawberry plants thrive in slightly acidic, well-drained soil with a pH between 5.5 and 6.8 and need full sun. For bigger harvests, mix in compost or organic matter before planting.
Choose a location with room to spread, spacing them about 12” to 18” apart in rows. Dig a hole that is slightly bigger than the root ball and set the plant in the ground at the same depth as the pot. The crown of the plant (where the roots meet the leaves) should be slightly above ground. Fill the hole in with soil and tamp down slightly.
After planting, water thoroughly so soil settles around the roots. Layer straw or organic, food-safe mulch around the plants but avoid touching the stems. Keep well-watered for the first few weeks until plants are established. Note: it is normal for plant leaves to look a little wilted right after planting, they will come back quickly!
If you’re planting in containers, you must protect the roots from freezing temperatures if you want them to survive over the winter. You can bury the pot in the soil and cover with straw or insulate the entire pot with lots of straw and store in an area that won’t get heavy wind. Do not store in a heated garage or basement, the plant needs to go dormant for a few months out of the year.
Summer Care for Strawberry Plants
Strawberry plants are easy care garden plants and only need regular watering and minimal fertilizer (if you’re using compost or organic matter in your soil). Avoid over-fertilizing, as excessive nitrogen can result in lush foliage but minimal fruit production. The best watering method is with a soaker hose laid near the plants; overhead watering can damage the leaves.
Don’t Pick the First Year!
For the healthiest plants and biggest future harvests, it’s best to not pick strawberries in the first year of growth. It’s okay to sample a few, just leave the bulk of the fruit on the plant. This helps the plant establish strong roots which will carry them through their first winter and give you more robust plants and harvests next season.
In late fall or early spring, prune back any dead or diseased foliage but leave the bulk of the plant over winter. Remove any runners that have strayed from the main plant (or into areas you don’t want the plants to grow), as they can divert energy away from fruit production. Be sure to keep the plant watered until freezing temperatures are forecasted.
After the first frost, apply a thick layer of straw (this is where they get their name) over the plants to insulate the soil and protect the crowns from freezing. Additionally, consider covering the strawberry bed with row covers or a layer of straw for added protection if you live in an area with extreme deep freezes.
Second Season Plant Care.
Now the fun starts! When spring arrives and you know the temperatures will stay above freezing, it’s time to uncover your strawberry plants. Carefully pull back straw that’s covering the plants but leave most of the straw in place as mulch to help retain water. Keep the plants watered and let them grow. Within weeks you’ll see robust foliage and tiny blossoms which each will turn into a sweet, juicy strawberry. And now you can pick them all!
To pick strawberries, just gently twist the berry off the plant. They will release easily when ripe. Don’t pull or tug as you may damage the plant. Growing your own means you can wait to pick when berries are at their peak ripeness.
Sharing your Crop with Birds and Critters.
Your family is not the only one who loves fresh strawberries! You’ll have berry thieves stopping by frequently, especially birds. If you choose to put netting over your plants, please choose the smallest possible weave because birds can get stuck in netting. Or you can just choose to share a few berries with the animals who call your yard home!
From this season forward, you can pick as many berries as the plant produces. Over a few years, the original plants will start producing less berries but the runners they send out will take up the slack. If you have the room to let them spread, you will have strawberries for as long as you want.
The fall and winter care for subsequent seasons are the same as shown above and each winter you should cover your plants with straw to protect them from extreme temperatures.
Growing strawberries at home is a delightful journey filled with anticipation, care, and ultimately, sweet rewards. By following these simple steps for planting and caring for your strawberry plants, you’ll be well on your way to enjoying a bountiful harvest of fresh, flavorful berries year after year. So roll up your sleeves, dig in the dirt, and let the magic of gardening unfold as you nurture your own patch of sweet success.
In 2022 we grew nearly 300 pounds of food + cut flowers + maple syrup from our in town 1/4 acre urban homestead. And in 2023 we grew even more by just adding a few more container gardens and planting flowers in new places. We grew it all completely organically without a ton of work. This article shows how much of each kind of veggie we harvested in 2022 and three easy changes we made to bump the harvest.
These results really show that you do not need a huge acreage or a homestead to grow a large amount of food for your family. And it doesn’t take a ton of work (as long as you’re willing to live with a few weeds!)
We do not have a big garden! In total, the raised beds are around 600 square feet, we have two Haralson apple trees, 6 neighborhood maple trees, two rhubarb plants, and six deck pots (in 2023 we upped this to 12 pots). Plus every corner I can find is planted with perennial or annual flowers.
We live right in town with neighbors on all sides. We have busy work schedules and are gone a lot so we don’t spend a lot of time on maintenance or replanting (so this garden could have probably grown even more!). This harvest is more than enough for our small family and we ended up sharing with neighbors and taking a lot to the food shelf.
Three things we added that made a huge difference:
I put a water filter on my hose – this is normally attached to RVs to filter the water coming into the camper. I have treated city water and I’ve always wondered if that affected the plants. I can say it does and I think this change is one factor in such a great garden season. These are not inexpensive and can be found online, just search “RV/Marine inline water filter”
I added soaker hoses to my vegetable garden and put it on a timer. Highly recommend the timer because you will forget you turned it on! This kept everything at a much more consistent moisture level and it protected tomatoes from soil splash which causes blight. And side note: I did not have blight on my tomatoes this year for the first time in 10 years!
I let volunteers grow and did not till in the spring. Last fall I decided to leave garden debris in my garden to build up the soil quality and give critters food and habitat. I also didn’t till the garden up before planting. Wow, did I have volunteer plants! Sunflowers, tomatoes, lettuce, broccoli, and parsley. The sunflowers produced a lot of seeds and both the tomatoes and cucumbers used the sporadically-spaced sunflowers at trellises. (You have to be willing to love non-straight rows and haphazard planting to like this kind of garden!)
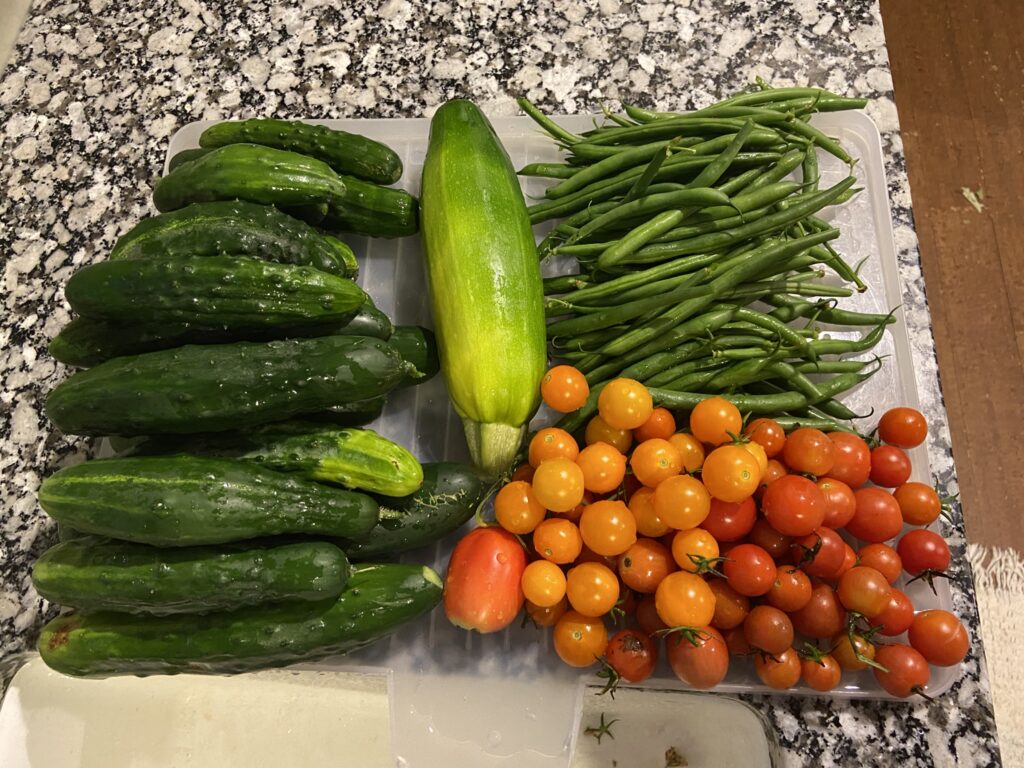
Here’s what we harvested in one season:
Maple syrup: the first harvest of the year, we made 2 gallons of pure maple syrup
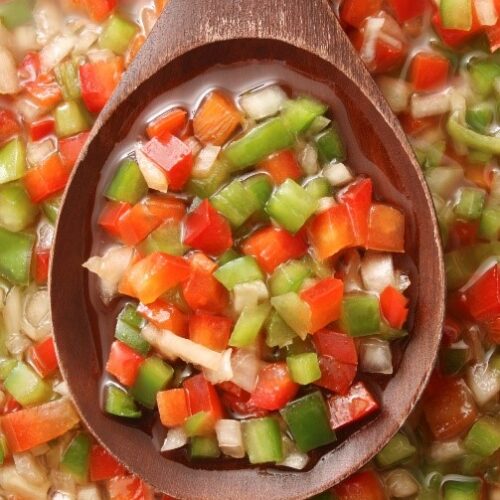
Rhubarb: enough to make two large rhubarb crisps and 8 pints of jam. Also made a few pints of hot pepper rhubarb jam (recipe here)
Parsley: made 1 quart of chimichurri and used all summer fresh
Basil: made 2 quarts of pesto and used all summer fresh
Mint: made 5 batches of mojitos, made 2 quarts infused tincture for sore throats
Dill: picked multiple batches for pickles and dried herbs
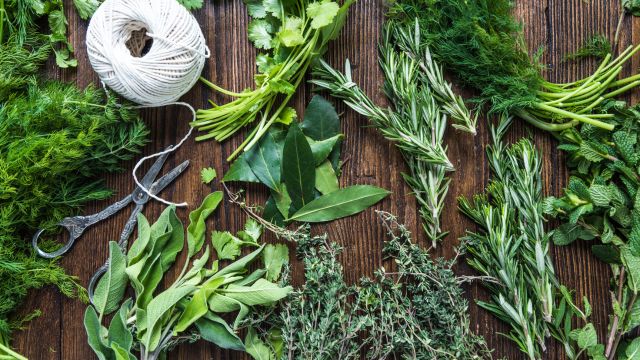
Thyme, Rosemary, Sage: Used all summer and made 3 pounds of herb infused butter (just mix fresh herbs with softened butter and roll into a log. Wrap in wax paper and freeze. Then just slice off as needed.
Kohlrabi: 10 plants, ate raw and roasted and sauteed the greens
Zucchini: harvested 47 zucchini, most about 8″ long
Cucumbers: harvested 212 cucumbers (!)
Green beans: harvested 7 gallon bags
Peas: harvested 3 gallon bags
Roma and Beefsteak Tomatoes: picked 38 tomatoes from 4 plants, made 8 quarts of tomato sauce plus lots of fresh slices and salsa.
Cherry Tomatoes: picked 4 gallon bags from 3 plants. One cherry tomato plant grew as tall as the sunflower using it as a trellis.
Peppers: harvested 15 peppers off 2 plants.
Carrots: 25 carrots, largest one was 2” in diameter
Apples: grew almost 2 bushels of apples but the bees and ladybugs got at about ½ bushel before we picked them.
Sunflowers: All my sunflowers were volunteer this year and each stalk grew at least 5 heads, some grew 12! I let them dry in the garden and a lot of the seeds got eaten by the birds. After picking this week and shucking, we ended up with about 1 gallon of seeds. We’ll feed these to the birds and save some for planting next year.
Cut flowers: I had fresh bouquets in the house from May until this past week! And I harvested zinnia, daisy, cosmos, and salvia seeds from the dried flowers for planting next year.
Bring to boil and let simmer for 1 minute. Gently muddle leaves to release flavor. Cover and let steep for 30 minutes. Strain leaves and refrigerate or freeze. Use in cocktails or add to sparkling water or iced tea.
Late-summer and early fall is the best time of year to plant perennials if you live in zones that have a winter freeze. Fall planting forces the plant to put energy into root growth which builds a stronger plant with bigger blooms. The cooler days and nights also mean the plant doesn’t have to work as hard to stay cool or hydrated. The key is to give the plant enough time to get established before the first freeze. This article will teach you how to plant perennials in the fall (or winter if you live in warmer zones such as 8 to 10). So, roll up your sleeves, grab your gardening tools, and embrace the magic of fall planting!
Putting Down Strong Roots
One of the most compelling reasons to plant perennial flowers in the fall is the incredible boost it provides to root growth. During this time, the soil remains warm from the summer heat, creating the ideal environment for root establishment. As the air temperature cools down, plants shift their energy focus from producing flowers to building strong and extensive root systems.
One key thing to remember, though, you must keep the newly planted perennial well-watered. Most areas have less rainfall in the autumn so it’s up to you to provide that for your plant. After planting, use a thick layer of mulch to retain moisture (keep away from plant stem). Then when you water, use a gentle soaking stream of water about 3” away from the plant (but all the way around it) so the roots will reach down and out to get to the water. Do not fertilize the plant because this encourages leaf and blossom growth.
Choosing the Right Plants
Many cold hardy perennials, shrubs and trees are excellent candidates for fall planting. In general, plants with USDA cold hardiness ratings of 4, 5, and 6, are the best candidates for fall transplanting in cold winter climates. Be sure to choose healthy plants with lots of roots. Before planting, trim off broken branches or blossoms.
Once planted, treat like a regular transplant. Do not cut back before winter but you can trim any dead growth off in the spring. If the area where you plant will not get good snow cover, cover with straw or mulch after the first hard freeze. This will ensure the plant will not grow more but will protect the new root system.
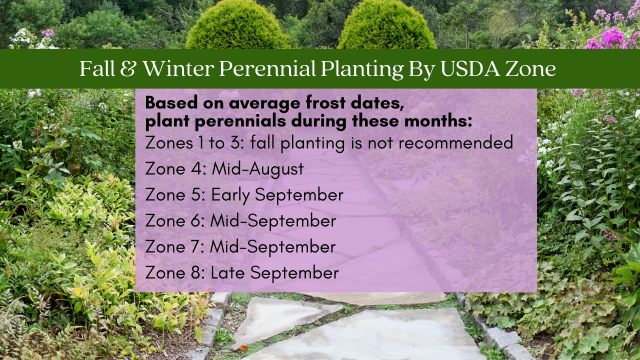
Planting Time by USDA Hardiness Zones
To make the most of fall planting, it’s essential to consider the best times based on your USDA Hardiness Zone. You must plant at least six weeks before your typical first frost or freeze date. Find your zone on this map or by inputting your zip code into the USDA website (here):
The Promise of Future Blooms
When you plant perennial flowers in the fall, you are essentially making an investment in your garden’s future beauty. While these newly planted perennials may not display an abundance of blooms immediately, they are quietly preparing for a spectacular show in the next growing season. Come spring, the well-established roots will support vigorous growth and abundant flowering.
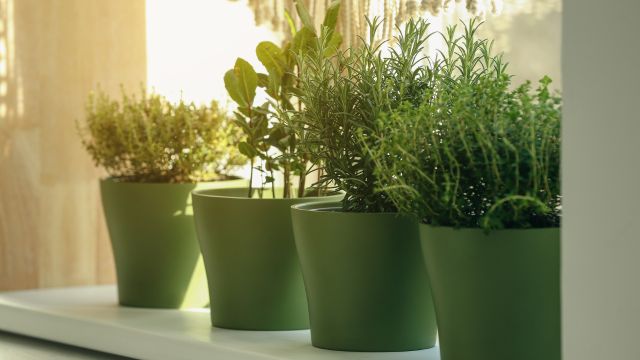
You don’t have to give up on fresh herbs once gardening season is over! You can grow all your favorites through the winter and all you need is a few pots, some soil, and a sunny window. Some gardeners move outside potted herbs inside in the fall but this can be stressful for the plant and runs the risk of introducing outside pests to your indoor growing environment. And usually by the end of one growing season, herbs have either gotten too large to move or have gone to flower and seed, neither of which gives you tasty fresh herbs. We recommend starting with fresh, new plants that you’ll keep inside until next spring. This article will teach you how to plant, grow, and maintain and indoor herb garden.
Choosing the Right Herbs
Some herbs such as mint do not do well indoors as they need room to spread and a long period of sunshine to grow. Choose instead herbs that you’ll use frequently in winter cooking such as thyme, oregano, sage, or rosemary. These herbs also grow in a compact style so they won’t need extra-large pots or a lot of room.
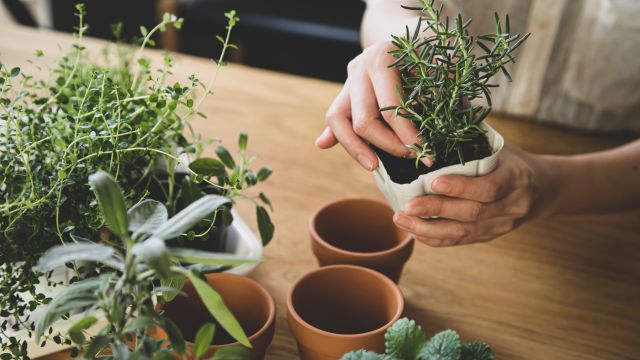
Start with a pot about two times the size of the plant’s root ball and one that has good drainage.. Be sure to put a drip tray underneath it! We recommend one herb per pot so you can better control each one’s light and inputs. Some may grow faster than others and could compete with a pot companion for light, water, and nutrients.
Light Needs for Indoor Herb Gardens.
Position your indoor herb garden near a south- or west-facing window so your herbs will get at least 6 hours of sunlight per day. Just make sure it’s not too cold or drafty close to the window. You can also supplement a full-spectrum grow light placed 6 to 12 inches above the herbs for 12 to 16 hours a day or plant your herbs in an all-in-one tabletop herb garden.
Soil, Water, and Feed Needs of Indoor Herbs
Most herbs will do just fine with a regular potting soil mix as long as they have good drainage. Like all potted plants, though, they need more frequent feeding. Be sure to choose a food- and pet-safe fertilizer.
Speaking of pets, like many household plants, some common herbs are toxic to cats and dogs. Be sure to research the plant you’re bringing in and keep it in a location your pets can’t reach.
Just like outside plants, your indoor garden will need regular watering. Unlike outdoor plants, though, they will not have their preferred humid environment (you’d be surprised how much plants get from humid air). If possible keep a small humidifier going near your plant (not straight on them). Alternatively, fill your waterproof drip trays with decorative pebbles and let the water sit in them to slowly evaporate around the plant.
Many herbs such as rosemary, thyme, and sage are susceptible to overwatering so allow your plants to dry slightly out between watering. This especially true as winter days shorten which signals to your plants to use less water and nutrients and slow down growing. Adding a grow light during the darkest days of winter will help ease this change. Use either filtered water or let plant water sit for a few hours in an open container to off-gas chlorine and other chemicals in treated city water.
Like all houseplants, indoor herb gardens are susceptible to pests. Keep an eye out for common indoor pests like aphids, spider mites, and whiteflies and treat appropriately with food-safe methods.
To use herbs, just snip off as much as you need for cooking or drying but leave at least one-third of the plant for regrowth. Don’t let your herbs flower or go to seed (unless you want the seed) because this greatly slows down leaf growth.
Once spring rolls around again, you can plant these herbs outside to get a head start on the season. Just make sure you properly harden them off so you don’t shock their systems with an outdoor lifestyle!
Now is a great time to plant an indoor herb garden so you’ll never be without fresh herbs. We have sage, rosemary, thyme, and few other varieties still in stock but they are going quickly. Shop here.