Why is a Pollinator Garden Important?

monarch butterfly on milkweed plant

Bee and butterfly population in decline

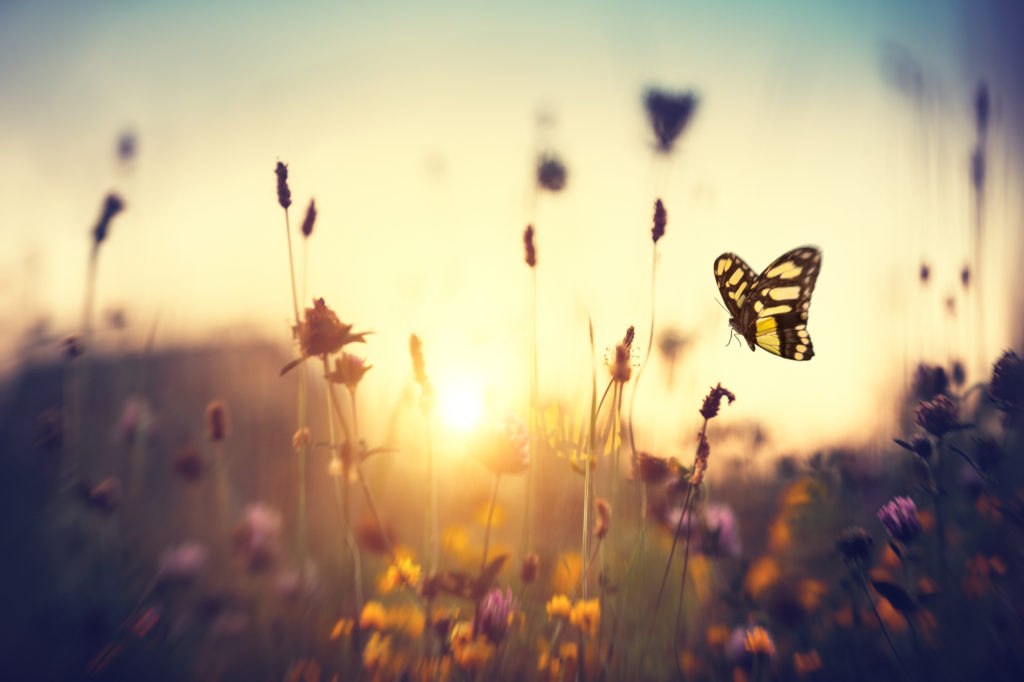
It is pretty likely you have heard but the populations of a lot of common pollinators are in decline. Bee populations are in decline globally which is something that needs to be fixed. Some other pollinators, less important than bees but still important, like Monarch butterflies have seen a 90% drop in their population over the last 20 years or so.

The main reasons that pollinator populations are in decline is because of increased use of pesticides (insect killers) and herbicides (weed killers) accompanied by an ever-increasing destruction of habitat due to urban sprawl and agricultural development. The loss of habitat is a serious blow to pollinator’s abilities to nest, feed, and shelter but the increased use of pesticides and herbicides in both rural and urban settings has taken an already bad situation and made it much worse. Where bees, butterflies, and other pollinators lived is now mostly urban developments or corn fields.

Combating these potentially devastating losses requires a combination of multiple methods.

  1. Education. Learn more about it and teach those around you. Demonstrate to your community how to grow a pollinator-friendly garden.
  2. Practice what you preach. Stop using pesticides or herbicides in your own garden. Let native flowers and grasses grow to support pollinators (hint: big expanses of green lawn do not help many creatures!)
  3. Talk to your local government. Be the voice of the pollinators and encourage your local officials to stop using chemicals and to not mow flowers or grasses until after the nesting season. This especially applies to rural ditches and buffer strips.
Summer meadow with butterfly at sunset.

How a pollinator garden benefits your yard or other gardens

Aside from the wonderful aesthetic a pollinator garden can add to the area you call home, it will also provide lots of benefits to any flower or vegetable gardens in your landscape. Having a pollinator garden will attract bees, butterflies, and other pollinators to the area and help the growth of a vegetable of a flower garden by accelerating the rate of pollination in the garden. Spend a few minutes watching the bees in your garden and you’ll soon learn they do a lot of work for us!

In addition to the benefits to a garden, there can also be a financial incentive opportunity depending on the state you reside in. There are a few states within the US that are exploring programs that would pay residents to establish bee habitat, which a pollinator garden would potentially qualify as depending on size and state regulations.

What is Greywater and How You can Benefit from it

What exactly is greywater

You may be wondering what this new word your friends all are talking about it, greywater. Essentially greywater is just about any kind of water that you use in your house, after it has been used for something. There are a few exceptions however, those being any water that comes into contact with human waste. So, in other words, the water you flush down your toilet would not be considered greywater. But other things like water from your shower, sink, dishwasher, or laundry machine would all be considered greywater. One exception to those would be if you wash dirty diapers in your laundry machine however.

How to collect greywater

The best way to collect greywater from all these sources is to simply just have the plumbing system direct water to a holding tank, this will also work best if you can avoid the use of pumps to help save on electrical costs you already have in your home. There are some instances where you would not have to change your plumbing system at all to collect it however, there are washing machines available that have a drain that would direct all the water into a barrel or tank of some sort. You can then use this greywater as you please, assuming it is not being used for cooking or drinking because it will have soap residue in it. The water you collect may not look “clean”, but it is clean enough to use for lawn irrigation or other outdoor activities like gardening.

How to use the greywater you collect

The greywater you collect within your house unfortunately cannot be used for many indoor activities because it is not safe for consumption because of chemical residues. However, it is a perfectly safe alternative to use as water in a toilet, which is one of the top uses of water in every home. And of course, the less “new water” you use in your home, the more money you will save on your energy and water bills every month!

Most people that use greywater will use it to water either their lawn or gardens in their yards. However, there are a few things to remember when using greywater in your garden or lawn. The most important one, is to not store greywater for more than a day because the residues within it will start to break down and will likely lead to an unpleasant odor. Another thing to consider when using greywater outside, is that you do not want to use it in an area where it will pool up, that can lead to all sorts of problems such as a mosquito breeding habitat!

Helpful greywater tips

You also should consider using environmentally friendly soaps in your home that are low in chlorine, salts, and boron, because those will clog up pores in the soil and not let the water soak in as much over time. Using these kinds of soaps and detergents in your home will ensure the greywater you collect will not have chemicals in it that will reduce the health of your lawn and garden. It is really important to consider what chemicals you use in your house if you decide to install a greywater system, because not using environmentally friendly cleaning products can harm things you use greywater on. Keep in mind that greywater is a great way to reduce your water usage, but you need to be mindful of what is going into your greywater collection system.

Why Conserving Water is so Important

Benefits of conserving water

Did you know that only 3% of water on the entire earth is freshwater? An even crazier fact is that only 0.5% of that is available for us to use as drinking water. The other 2.5% is locked up in ice caps or frost deep underground, so we must really be conservative when it comes to how much and how often we use water. One of the largest benefits of conserving water, whether it be indoor habits or during outdoor activities, is that you will use less energy. Obviously, the less energy you use the less your bills will be, not to mention the fact you will be helping save the planet! Practicing sustainable water usage is so very important, and once you learn the tips and tricks to help conserve water it is very simple to do.

Helpful tips for indoor water conservation

Conserving water might seem like a big task to accomplish considering how important it is, but it truly is really simple. Here are some tips to help you conserve water indoors during everyday activities. When you are brushing your teeth or washing your hands, turn the faucet off when you aren’t putting your toothbrush or hands in the water. You can also buy a low-flow attachment for your shower, which is a great way to reduce the gallons of water that would normally be wasted during shower time. Another bathroom tip to conserve water would be to invest in a low flow or dual flush toilet, these can either be bought as a conversion kit or a standalone product to replace your old toilet.

Fun facts about water conservation

You would be amazed at all the water you can conserve indoors with these simple changes to your everyday indoor habits! Just to put it into perspective, the average American household uses around 170 gallons of water per day, while a country like Australia only uses about 36 gallons per day! For instance, if the metro area of Atlanta, GA embraced efficient water use and conservation techniques they would save up to 700 million dollars, or in terms of gallons around 150 million gallons!

Helpful tips for outdoor water conservation

Similarly, to the tips for indoor water conservation, tips to conserve water outdoors are also very simple! One thing you can do to drastically reduce the amount of water you use from a well or city system, is to make your own rain barrel. If you are not sure what that is or how to do it, you are in luck because we have an entire article dedicated to rain barrels!

Another big tip to conserve water outside is to not excessively water your lawn, especially if it is during the peak season for rainfall. Another helpful tip for outdoor water conservation, is to water your garden or lawn early in the morning when it is cooler. The cooler it is outside, the less of the water you use will evaporate and will have a better chance to do what you put it there to do! After all, if you knew most of the water you were using in your garden just evaporated why water it at all in the first place?

Why You Should Mulch around Trees

Benefits of mulching around trees

Like mulching just about anywhere else, it will provide a host of benefits to your trees. One benefit is that it will decompose over time and release nutrients into the soil that will help the tree grow. Aside from providing nutrients, it will also keep the soil warm and moist which is also beneficial to a growing tree. The reason you want to keep the soil warmer, is partially so it will help the soil retain more moisture. Assuming water is not pooling up excessively around the base of the tree, it will not harm the tree to have some extra moisture in the soil.

Mulching around a growing tree creates somewhat of a microclimate in the area that you spread mulch and can make a big difference in the overall health of the tree. Another important benefit mulch will provide is that it will not allow any weeds to grow around the base of the tree. This is important for the growth of a tree, especially a young one, because roots of weeds will potentially outcompete the roots of the tree for water and nutrients causing the tree to not grow like it would without the presence of weeds.

How to mulch around trees

First spread it at least four or five inches thick, in a circle all the way around the tree. Start from the base of the trunk and go outwards at least a foot or two. After spreading the mulch out to this standard, you will want to scrape it away from the base of the tree (at least 6 inches). If it is too close it can cause the trunk to rot. This will quickly kill a young tree. Check on it once in awhile to make sure wind or rain has not caused the mulch to shift and be pushed against the trunk.

What kind of mulch to use

When considering what kind of mulch to use around the base of a tree, there are a few things to consider. One of the more important factors is whether or not you use an organic material. There are some plastic mulches out there that look like wood chips so make sure you are using real wood chips if you want the added benefits of an organic material. As previously mentioned, organic materials provide a few extra benefits that non-organic mulches do not, so I would highly recommend using a mulch such as wood chips. They will last a long time, and you will not have to constantly replenish them like you would if you chose to use grass clippings as opposed to wood chips.

Using your Grass Clippings as Mulch

Why you should use grass clippings

There are quiet a few benefits of mulching with grass clippings, one of which is that you will no longer have to worry about disposing of them if you usually do. Aside from that, they also provide a good source of nitrogen and potassium for whatever you choose to mulch. Another good benefit they provide is that they will suppress the growth of weeds wherever you choose to use it as mulch. In addition to all these great benefits for your garden, they will also make a good place for toads to hide so they can eat any pests that might otherwise eat plants in your garden.

Where to use grass clippings as mulch

You can use grass clippings as mulch just about anywhere, that being said you will need to pay attention to how thick you are spreading them. If they are too thick, they will potentially turn into a slimy mat of half decomposed grass instead of decomposing and releasing their nutrients. If you use them in your garden, make sure to spread them just thin enough to cover the dirt but not thick enough to where you cannot see through them.

You can also use grass clippings as mulch for your yard, it will help your grass grow thicker and potentially greener. When using grass clippings as mulch in your yard, you will want to spread them thin enough where they are not very visible within the grass that is living.

You can also use grass clippings as mulch in a flower bed and apply them similarly to how you would for a vegetable garden. In addition to all of this you can use grass clippings as mulch around younger trees to improve their source of nitrogen. The most important aspect of using grass clippings as mulch is to make sure you remember to not spread them very thick, that is the number one way to hurt your plants as opposed to helping them.

Using Mulch in a Garden

Benefits of mulching in a garden

Aside from the nutritional benefits mulch can potentially provide to plants in your garden, a big benefit is the suppression of weed growth. If you apply just a few inches of mulch to your garden after your vegetables have grown a little bit, it will prevent weeds from sprouting up and stealing nutrients from your vegetables. Another benefit of using mulch in your garden, is that it will help the soil stay moist and prevent excess water evaporation that would normally occur without using mulch. Assuming you are using a mulch made of organic material, such as compost or grass clippings, it will break down over time and release nutrients to help maintain the health of your soil.

Mulching with grass clippings

You can use your grass clippings from mowing your lawn, provided you do not chemically treat your lawn, in your garden for a multitude of benefits. If you spread a thin layer of grass clippings in your garden, it will break down over time and release the nitrogen and potassium it holds into the soil. In addition to adding nutrients, it will also attract animals like toads. They like to hide within the grass clippings and will help them be more prevalent in your garden than they were before. These animals will also benefit your garden by helping control pests like slugs and insects that would normally turn your vegetables into food for themselves instead of food for you! These are just a few reasons to use grass clippings as mulch in your garden, and once you do it hopefully you will quickly notice all the benefits that using grass as mulch can provide to your plants.

Mulching with compost

Unlike grass clippings as mulch, using compost as mulch will help suppress the growth of weeds in your garden. To use compost as mulch in your garden, it is best to till some into the soil at the beginning of your planting season. You will also want to add a layer that is a few inches thick once your garden is established. This will help the soil stay warm and moist, it will also provide a continuous source of organic material that releases plenty of nutrients for growing vegetables. Mulching with compost, is arguable the most effective kind of mulching you can do in a garden. The various benefits it provides outnumber just about every other kind of medium you might consider using as mulch in your garden.

Mulching with wood chips

Similar to using compost, wood chips will help your garden stay free of weeds that steal nutrients and sunlight from your vegetables. They will also decompose over time and release organic nutrients that will help your plants grow better. However, if this is a benefit you are looking to have in your garden, you will be much better off using compost instead of woodchips. The compost will release much more beneficial nutrients when compared to using wood chips as mulch. Maintaining healthy and moist soil is one of the most important things for a vegetable garden to produce vegetables that are plentiful and large, so using mulch that is made of an organic material like wood chips will not hurt. Provided you do not spread them too thick, only a few inches is necessary, your plants will thank you for helping them grow big and strong!

Pest Control using Natural Pesticides

Natural pesticides versus chemical pesticides

The use of chemical pesticides in your garden or yard can lead to many unintended consequences. For instance, if you apply a chemical pesticide before a heavy rain most of it will wash away, missing its intended target, and likely end up contaminating and possibly killing critters that are beneficial to the environment. In addition to potentially polluting an area you didn’t intend to spread it to, these treatments are full of harsh man-made chemicals that are not necessarily safe for the environment. This article will explain a few natural pesticides that are not only safe for your plants and critters you do not want to harm a few of them are also completely safe for your children or pets.

Diatomaceous earth

Diatomaceous earth is a sedimentary rock made up of fossilized algae and makes up about 25% of the Earth’s crust by weight. So there is plenty to go around! You can buy it by the bag at any nursery or gardening store. It works because it’s abrasive so crawling insects do not like to move across or burrow through it (especially snails, grubs, or slugs).

Diatomaceous earth also has affinity it has for absorbing lipids it will quickly rid your yard or garden of any unwanted insects. The way it does this is by dehydrating these insects it contacts by draining their exoskeletons through the absorption of the lipids within their exoskeleton. The best part about using it, is it is totally safe around kids and pets!

How to use Diatomaceous Earth

This is very easy to use in your yard and garden. Just spread a light dusting of it on any problem areas you have been experiencing. One thing to keep note of when using diatomaceous earth, is it has a tendency to absorb lots of water from rain which reduces its effectiveness. To combat this, you will want to keep an eye on the weather and avoid spreading it if you know it is going to rain; along with that it is also a good idea to reapply it after it rains to maintain its effectiveness.

Neem oil

Neem oil is an extract from the seeds of the neem tree, which makes it another natural pesticide that is safe for use around kids and pets. In addition to being a powerful natural pesticide, it can also be used as a fungicide if you are having problems with fungi in your gardens or on house plants. Like diatomaceous earth, neem oil can usually be found in the gardening stores and home supply centers. Typically it’s sold in a concentrated form as an oil. A little goes a long way and be forewarned, it does not smell pleasant. The smell with dissipate quickly but if using indoors, plan ahead to be able to open your windows.

How to make your own neem oil spray

If you are interested in mixing your own spray, which in most cases would be cheaper, just mix a couple teaspoons of neem oil with a teaspoon of mild liquid soap and a quart of water. After mixing this combination thoroughly, it is ready to be sprayed on plants that you have noticed being eating by insects. The way it works is by acting as a hormone disruptor for any insect that decides to try and make a meal out of plants in your garden. Put a little more simply, it will make any insects that eat it unable to perform their normal bodily functions. Eventually they will die from ingesting any of the neem oil mix you have put on your plants.

Tomato leaf insecticide

Believe it or not, the leaves of the tomato plant are poisonous. The tomato plant is a member of the nightshade family, so you can use this to your advantage to effectively combat an aphid infestation or something similar in your garden while avoiding the use of harsh chemicals. This is just another great way to ensure you are using chemical free pesticides within your garden, it is good for your garden and will not harm any ecosystems it may be washed into from the rain.

How to make your own tomato leaf spray

All you need to do to make tomato leaf insecticide, is chop up about 2 or 3 cups of leaves from a tomato plant or plants and let them sit in a quart of water overnight. In the morning, use a strainer to get all the chopped up leaves out of the water and put the remaining liquid in a spray bottle. After you do this, it is ready for use! It’s really that simple, all you need to do to use it is spray it onto plants in your garden if you suspect they might have a run in with aphids or another insect that thinks they will make a meal out of the plants in your garden.

How to use Compost

How to tell if compost is ready for use

The best way to tell if your compost is ready for use is if it looks like soil or if it still resembles whatever you put in your composting area. If it looks like soil and does not look like the things you put in to be composted, it is ready for use! Another easy way to tell if it is ready, is if it smells earthy, it is ready for use! If you are still unsure after these two techniques, there is one more you can try. Put some in a sealed container and remove the air from it; a plastic bag works best for this. Let it sit in the bag for a few days and after this open it up. If you detect any sort of funky smell coming from it, your compost is not quite ready for use yet and needs more time to decompose.

Where to use compost

As far as usage of your compost, there really is not a limit to where you can use it. Any plant that uses soil will love a compost home. It can be sprinkled and then raked into flower beds or gardens; it can used to fill outdoor containers; you can put some in your indoor plants as well to help maintain nutrient rich soil. It can also be spread around a newly planted tree to help it grow. Compost is especially helpful in enclosed raised beds which over time lose soil health. Essentially, compost is good to use just about anywhere you might try to grow something. It will provide the necessary nutrients to the soil to improve the growth of whatever you might try to grow.

Helpful tips to use compost more effectively

Generally speaking, indoor plants do not need to have compost added in the amount or frequency of an outdoor garden. This is mostly because an outdoor garden will have more plants removing more nutrients compared to an indoor plant. For indoor plants you only need to add compost every 6 months or so and you do not need to add more than a handful or two provided it is not a large plant.

For outdoor gardens, there are a few different approaches you can take. In the fall, add a layer of compost that is a few inches thick across the entire surface. Then in the springtime, till the soil so the layer of compost you added in the fall gets mixed in thoroughly with the topsoil. In addition to this, it would also be helpful to add a small handful to each hole as you plant something in within your garden.

What not to do when using compost

The most important thing to avoid when using compost is to ensure it is actually decomposed completely. If food scraps are still present or not completely decomposed, you may attract critters or pests and by removing it from your composter, you will significantly slow down the process. Be patient and wait until your compost looks and smells like soil.

Once it’s ready, use like you would regular soil. Be sure to till it in well with existing soil and plant as you normally would. You may be able to cut back on fertilizer when adding compost as this soil will be much more nutritious for plants than regular garden soil.

Landscaping for Energy Reduction

maple tree leaf canopy

Saving energy use in your home starts outside! Strategically placing landscaping, garden plants, and trees around your home can help keep your home cool in the summer and warm in the winter. In addition to reducing the amount of energy you use to heat or cool your home, it will also increase the look of your yard and home by adding beautiful landscape features to it.

3 things that affect your home’s temperature

Air infiltration

This happens mostly in the winter or during periods of cold weather accompanied by strong winds. When the wind blows, it can penetrate through the walls of your house. This is even more problematic in older houses because they have had more time to settle and more time for small cracks to develop. It also can be a problem in newer houses so nobody is truly immune to the effects of the wind when it is cold outside.

Solar radiation

Solar radiation is essentially the energy your roof and walls are exposed to from the sun. In Northern climates during the summer months, your roof is exposed to high levels of solar radiation (and year-round in warmer climates). This essentially soaks into your home causing you to increase your air conditioning bill. However, it is an advantage in colder climates to let solar radiation warm your house in the winter. To help conserve the energy you use to control the temperature in your home, you should minimize solar radiation in the summer and maximize it in the winter.

Heat conduction

Heat conduction is somewhat similar to solar radiation with one exception being it is the energy your home absorbs from the walls as opposed to the roof. Keeping the walls of your house shaded during the warmer months will drastically lower the amount of energy you use to cool your home. The more shade you provide for your home during the warmer months, the easier it will be to control the temperature inside your home in addition to reducing the amount of energy it takes to do this.

Summer time energy reduction

One of the easiest ways to increase the amount of shade your house is in during the summertime but ensure it will get plenty of solar radiation in the winter to keep it warm, is to plant deciduous trees. The reasoning behind this is because deciduous trees will lose their leaves in the fall. So, during the summer, the large canopy of leaves will provide your roof will plenty of shade. When they lose their leaves in the fall, it will allow the solar radiation to reach your roof and keep your house warmer than it would if your roof was in the shade. In addition to planting deciduous trees to shade your roof, you can increase the shade your house is in by planting climbing vines and tall shrubs that grow vertically along an exterior wall of your home (typically on the Southern or Western side which receives the most summer sun).

Winter time energy reduction

Luckily, some of the tips for summer time energy reduction also help during the winter. As mentioned earlier in the article planting deciduous trees that drop their leaves will allow your house to take advantage of the sun’s warmth in the winter. In addition to that, vines and shrubs that grow along an exterior wall to provide extra shade in the summer can help your house encounter less strong wind directly against it which in the winter seems to suck all the heat out of your house. As far as protecting your house from those frigid winter winds, you might want to consider planting various types of evergreen hedges that grow wide and tall. In addition to helping in the winter to protect from the wind, they will help shade your house in the summer too! As far as where to plant these, you will want to start planting them on the side of your home that is most exposed to the wind. If your goal is a windbreak in the winter, and shade in the summer, you will want to make sure you plant them close enough to your house, so they will shade your home in the summertime.

How to Make your Own Rain Barrel

Why use a rain barrel?

Did you know that just a half-inch of rain falling on a 1,000 square foot house will generate about 300 gallons of water? Over the course of spring and summer (assuming 10 inches of rainfall), a roughly 1,300 square feet house can generate about 8,000 gallons of water! Saving that in a rain barrel to use in your garden means you’re not using municipal water (so dollar savings for you and better, untreated water for your plants)

Rain barrels can be part of your garden decor.

6 Easy Steps for Setting Up a Rain Barrel System

Step 1:

Install gutters on your house, along with a downspout. If you already have a home with these features this will be the easiest step!

Step 2:

Find something to collect the rain water in. Most people opt to use a 50-gallon drum, but just about anything that holds a decent amount of water will work. If you decide to use a smaller container, you might want to consider having a set up involving more than one. This can make the entire set up more complex so it would be best to have one large collection tank. Once you decide on your tank, you will need to cut a small hole to fit a spigot in the bottom of it. Make sure it is low enough on the tank for gravity to allow all the water to drain out.

You can also find premade rainbarrels at most home supply stores or through online retailers. Look for sturdy construction and attached overflow valves and spigots.

Step 3:

Install tubing or a short section of gutter to divert the water from the downspout into your rain barrel. This can be done in a variety of ways but is essentially just a tube connecting the two. When the barrel is full the water will just go out the downspout as it did before having a rain barrel. You can also buy an overflow pipe that connects into this system. This is an important component because it will direct the water away from your foundation once the rain barrel fills up.

Step 4:

Build (or buy) a stand to elevate the rain barrel — at least 1 foot high but customize to your height and landscape. The purpose of elevation is to use gravity to get the water flowing. If your garden is downhill from your rain barrel, you will need less height.

Step 5:

Install a filter between the downspout and rain barrel. Just a simple piece of screen will work but there are many premade options available online. This is an important step to keep debris out of your barrel which will eventually clog the spigot. It also would not hurt to have another back up filter where the spigot sits in the bottom of the barrel to ensure the hose connected to the spigot doesn’t get any unwanted debris in it that the other filter let pass through.

Step 6:

Connect a hose to the spigot and your rain barrel is ready for use! Once water accumulates in it, you can start watering your garden!

How to use Rainwater in your Garden

The water you collect with your rain barrel will most likely be very clean, provided you have a clean gutter system. This water is not considered potable because it’s run off your roof which has dirty, animal droppings, and so on. The water, though, is perfectly fine for all garden plants, bushes, trees, lawn, and even indoor plants.

Rain barrels do not typically have enough pressure to run a hose or sprinkler system. However, if you have enough slope you could use a soaker hose in between garden rows. It is also possible to install an electric pump (such as used in fountains) to create enough pressure to use with a hose.

Potential Problems with Rain Barrels

One of the biggest problems that come up with a rain barrel system is the connections getting clogged. This can be alleviated by using screen filters at the water intake site and by occasionally cleaning out the barrel.

Another thing to watch out for is insects that will try to reproduce in the water especially nasty mosquitoes. If you drain the rain barrel regularly the larvae will not have time to hatch. Also putting a lid on the rain barrel and draining it and disconnecting it before vacations will keep bugs away.