What it means to have healthy soil, might depend on who you
ask. For instance, a farmer might say that healthy soil will retain water and
provide crops with the nutrients they might need. These are not technically
wrong answers; however, they are more incomplete than they are correct. There are
a lot of things that determine the health of soil and this article will help
explain what they are, in addition to explaining what they mean.
Indicators of soil health
There are a few different ways to determine if soil is
healthy or not, some indicators are more scientific like testing the pH of the soil,
but we will not talk about those more complex indicators here. Instead we will
focus on the simpler indicators of soil health. The first being whether there
is anything growing in it already, chances are if there is lots of green
vegetation already growing in it the soil is fairly healthy. Another indicator
that is easy to determine is if there are earthworms living in it, the more
that live in it the better too. Earthworms play a very important role because
they do a few different things for soil. One thing they do is that they help
decompose organic matter like dead leaves and turn that into fresh healthy
black soil. In addition to being an important decomposer within the soil, they
also provide oxygenation to the soil by burrowing through it. This is important
because if there is no oxygen contained within the soil, nothing will be able
to grow because that is an important nutrient for just about every living
thing. One more indicator of healthy soil, is that there is a plethora of other
organisms living within the first few inches of soil. If there is a lack of
other things living there it usually means not all the nutrients necessary for
life are present.
Environmental benefits of healthy soil
There are quite a few benefits that healthy soil will
provide for the environment. There are 5 functions soil provides that are
essential to the health of an ecosystem, whether it be a garden in your
backyard or a forest far away from your home, it still does these 5 basic
functions.
Regulating water
Healthy soil will help control where any water in the environment will go. Whether it is rain, snow that has melted, or water from your garden hose it plays a large role in whether water pools up or runs off to another area.
Cycle nutrients
Just to name a few nutrients that are stored within the soil there is nitrogen, carbon, and phosphorus. These are all very important for the growth of any plants which form the base of most food chains, so it is vital that the soil can provide these nutrients to anything growing in it.
Sustain animal and plant life
This one is fairly self-explanatory, healthy soil is necessary for just about anything to live or grow in it. If there are not the proper conditions, nothing will grow or be able to live in it.
Support and physical stability
Healthy soil will provide anything growing in it, like grass, a place to anchor their roots in order to grow vertically. If the soil is loose or not packed somewhat tightly, nothing will be able to root itself properly within the soil and will be unable to sustain its structure in the lightest wind gusts.
Protection and filtration of pollutants
Arguably one of the more important functions of healthy soil is that it can filter out, detoxify, or degrade harmful pollutants. It also keeps them from reaching underground water, called aquifers, which is obviously important to humans because we use a lot of groundwater.
Did you know that bee populations worldwide have been in
decline in recent years? Did you know that about 30% of the crops grown
throughout the globe require cross pollination, provided by bees, to thrive and
prosper? These are just a few simple reasons that show why bee habitat is
important, without bee habitat where would the bees go? Bees play a vital role
in the health of the world as an ecosystem, because they provide the necessary
cross pollination for many species of plants to thrive. Without bees we would
lose an extremely vital aspect of the food chain, that aspect being the base of
it in the plants that bees help to spread and grow. Without these plants at the
bottom of the food chain, everything above it would collapse because they would
eventually have no food to eat; that would also include humans. So, just how
important is bee habitat you might ask? Bee habitat is an extremely vital part
of the planet and we must do everything we can to stop the decline of the
global bee populations. The easiest and likely fastest way to do this is to do
your part by building a habitat for bees in whatever space is available.
Step 1 pick bee friendly flowers
Did you know that bees are attracted to certain flowers more
than others? In order to improve bee habitat in your yard, or balcony, or
wherever you might live it is important to consider what kind of flowers that
get planted in order to attract more bees! A few examples of good flowers to
plant to attract bees are aster, sunflowers, foxglove, cornflowers, bluebells,
cosmos, or goldenrod. When picking what to plant, make sure the flowers you
choose are able to bloom for a long time; if it is possible pick flowers that
bloom more than one season every year as well.
Another important thing to consider when picking flowers to
plant for bees, is what climate and gardening zone you live in. For instance,
you would not want to plant a flower that is native to Florida if you live in
Minnesota. The more you stick to native plants the better they will survive and
more importantly reproduce so your flower garden will not have to be constantly
replanted.
One more thing to consider when planting flowers to attract
bees, is that they are drawn to brightly colored flowers from a distance. Even
though they may not be the “ideal” flowers for them to pollinate it will help
draw them in so they can explore the other flowers in the garden.
Step 2 plant herbs and vegetables
Just like humans, bees like vegetables and herbs too! The
easiest way to add some flare to your bee habitat improvement project is to add
a small herb garden next to the flower garden part of your bee habitat. A few
herbs to consider planting in this garden are oregano, rosemary, mint, or
lavender. The reasoning behind planting an herb garden is to give the bees
another area to pollinate. It also will not take up very much space so just in
case you have a limited space to work with already this small herb garden will
only improve the bee habitat. In addition to the bees using your new herb
garden, you will be able to periodically have fresh herbs to use in your own
kitchen!
Step 3 leave out some water
This might seem a little silly but when making a garden for
bees consider adding a bee sized bird bath. Bees need water just like every
other animal out there so putting out a few small dishes of water will help the
bees survive and potentially colonize the area. Obviously, a colony is what you
are aiming to establish so anything that helps them stay in the area will
encourage a colony to form.
Step 4 make your own bee habitat
There are quite a few different ways that this can be done.
The simplest way to make some habitat for bees is to ensure there is at least
some bare ground space within the garden and add some small piles of sticks for
them to hide within. If you are feeling craftier consider designing a bird
house, except with a hole or holes too small for any bird to get into. If you
are unable to make a small hole in it, an easy fix is to cover it with chicken
wire that will let bees in and out but keep anything else out.
Composting food scraps and garden debris is one of the easiest sustainable practices you can take on. And your reward is rich, nutritious soil you can use in your garden and patio pots! You don’t fancy equipment or a lot of space and within one season, you can “grow” a large, usable amount of compost soil. Best of all, you create a cycle of sustainability in your garden. This article will teach how to start a compost pile, how to feed it, and how to maintain it through the season.
The Basics of Composting
Creating composted soil depends on decomposition and decay of organic materials. Each compost pile is a balance of browns (dry material such as fall leaves or wood shavings) and greens (such as produce scraps or grass clippings). Too much of either and the balance is thrown off (you’ll know right away because it will look and smell funny). In this mixture, will be active bacteria, worms, and insects with a little heat thrown in. Together they break each piece down into nutrient-dense, organic material that plants absolutely thrive in.
You cannot put meat, dairy or processed foods (like bread) in your compost pile as it will upset this balance (and attract unwanted critters). You can, however, sparingly add coffee grounds, eggshells, or ashes. Again, the smell and feel will tell you right away if there’s too much of one thing. (We cover this in detail in another blog post, “Compost Troubleshooting” here.)
Where to Locate Your Compost Pile
Compost piles need heat to work so choose a spot that gets lots of sunshine and (if using a barrel), choose a dark color that will absorb the heat. Don’t choose a location too far away from where you normally work outside or is hard to access in the winter. But you also don’t want it close to any neighbors who may not appreciate the process. It is decaying material and not the most beautiful part of gardening!
Types of Compost Containers
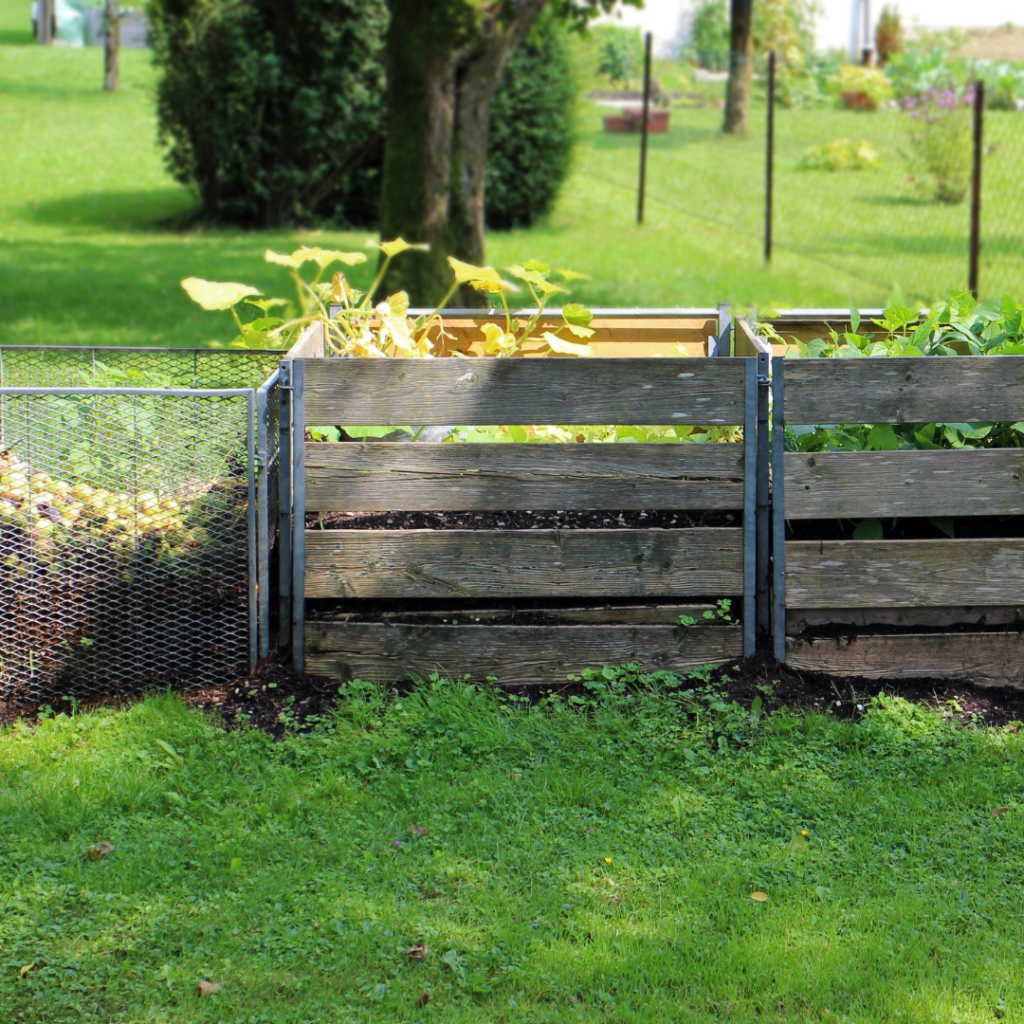
There are two common compost set-ups: a closed bin or barrel or an open, fenced in area that sits on the ground. This allows beneficial insects and worms easier access but can be unsightly. A bin or barrel is more practical in cases with limited yard space or where keeping the pile completely contained is necessary.
An open bin style works well on larger properties with lots of compost material. As shown in the photo, you can even create a multi-step system where new material goes into one bin and then is moved through each new bin as it decomposes. An open system is more susceptible to critters and should be covered to avoid too much moisture.
Choosing which type of storage is really based on personal preference and location. When done correctly, a compost pile will not smell bad but it can attract critters (if left open). For urban and residential properties, most people choose a closed container such as a large plastic tub or a barrel on a stand. This method also limits the quantity of compost produced and it is unwieldly to get the finished product out.
DIY Compost Bins
You can build your own compost pile by installing a three-walled enclosure built as you would a fence. This structure uses bare ground as its floor and the opening allows you to turn the compost with a rake or shovel. The drawback with this method is it will attract critters when you drop in fresh kitchen scraps.
For enclosed barrels, choose a large garbage can or barrel with a removable lid. Poke holes along the sides, bottom, and lid so air can move through and water can get in and drain out. Many large home stores and online retailers also offer premade compost barrels – some on a stand with a hand crank so you can easily give it a turn each day.
What to Add to Your Compost Pile
Start with twigs, straw, ash, hay, or another dry/brown material as your foundation. This allows the bottom of the pile to have more aeration and not become a slimy mess at the bottom. Your first layer, and every other layer thereafter should have a healthy dose of loose, dry, brown debris. Avoid large sticks, branches, or logs, as they can slow down the process. Larger things are harder to compost so be sure to break them down into smaller pieces before adding them.
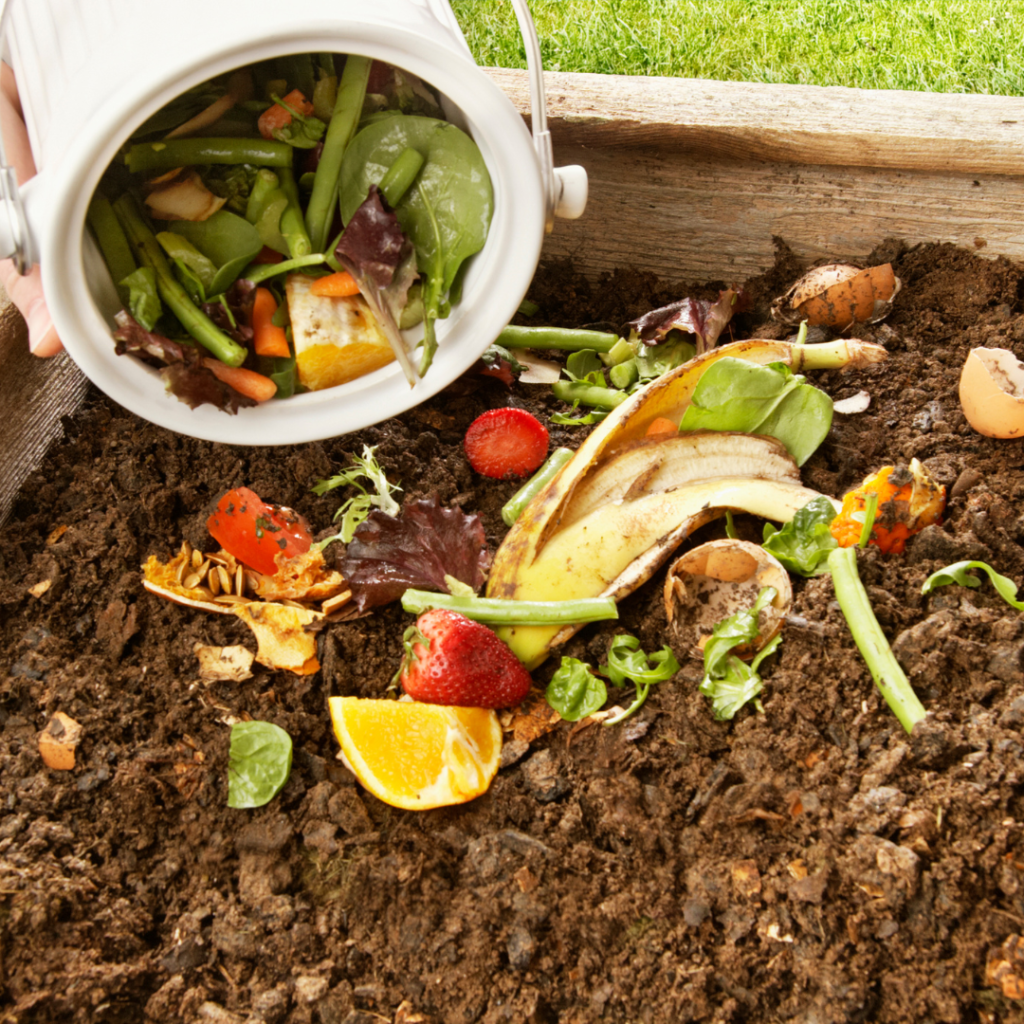
Add produce scraps, grass clippings, and plant debris but do not add meat, dairy, or oily and processed foods. Avoid using too many onions or citrus peels. They break down slowly and can kill off beneficial insects. Using kitchen scraps is a great way to reduce your indoor garbage and utilize things you would otherwise throw away. Keep a container with a tight-fitting lid in the kitchen where you store scraps until you’re ready to add it to your pile.
Any green plant matter can also be added but avoid adding weeds or leaves from diseases plants (such as tomato blight). These will remain in the finished compost and spread new weeds or disease when you use it next season.
Animal waste, or manure, is also a form of green compost. Avoid using dog or cat waste in gardens for crops meant for consumption. Their waste contains microorganisms that aren’t ideal for a healthy garden, especially ones growing food. For those of us that have fish, tank water is an excellent resource to use for your pile! Tank water is rich in nitrogen and phosphorus, both of which are important to maintaining your pile’s carbon cycle. Just be sure not to use too much water, as this can cause your compost to become overly soggy. Store excess in gallon jugs to use later!
Other excellent choices for the inclusion of animal waste are chicken, cow, horse, sheep and goat waste. Unless any of the animals are being medicated (aside from vaccinations), their waste is completely safe to use! Medications like antibiotics can be passed through the waste and into the crops. If the animals are sick, and/or on medication, avoid using their waste until they are healthy.
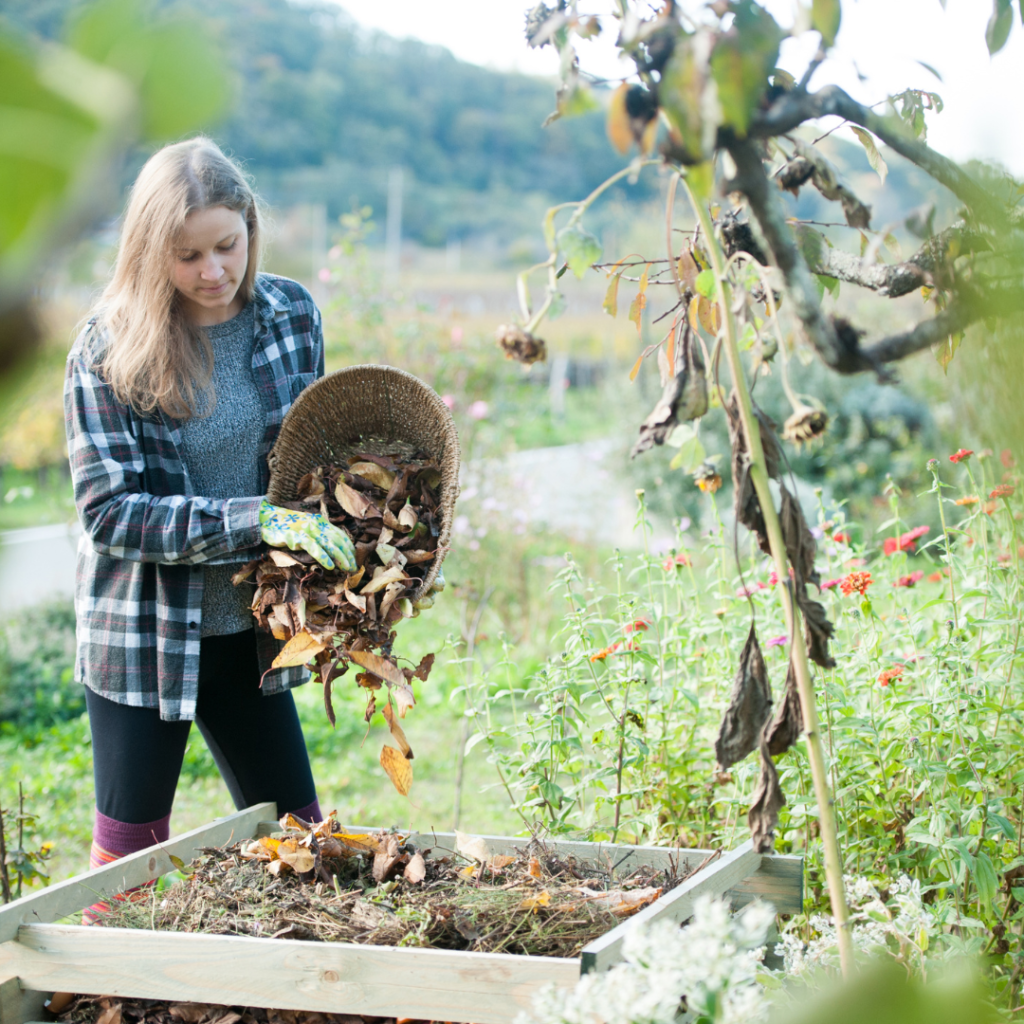
Brown scraps are usually found outside in the yard. Fallen leaves, dried grass clippings, chicken bedding, or small twigs. These materials are also the ideal foundation for your outdoor pile!
Maintaining Your Compost Pile
Having a good ratio of green scraps and brown scraps is the key to a successful compost. 50% green to 50% brown is a good ratio of each, and if layered correctly, there won’t be much maintenance. Composting, for the most part, will take care of itself. Checking on it occasionally and turning it with a pitch fork or shovel is about all that needs to be done to the pile – typically after adding scraps or at least twice per month. If the pile becomes overly soggy or starts to have a foul odor, toss in some brown scraps, make sure it gets mixed well and has plenty of aeration.
A healthy pile will stay at an average temperature of 150 degrees. This keeps things moving, including insects and microbes that all work together to help along the nitrogen cycle. Towards the end of the process, it will have cooled down significantly. If it’s cold out, the temperature will most likely be much lower depending on the size of your set up.
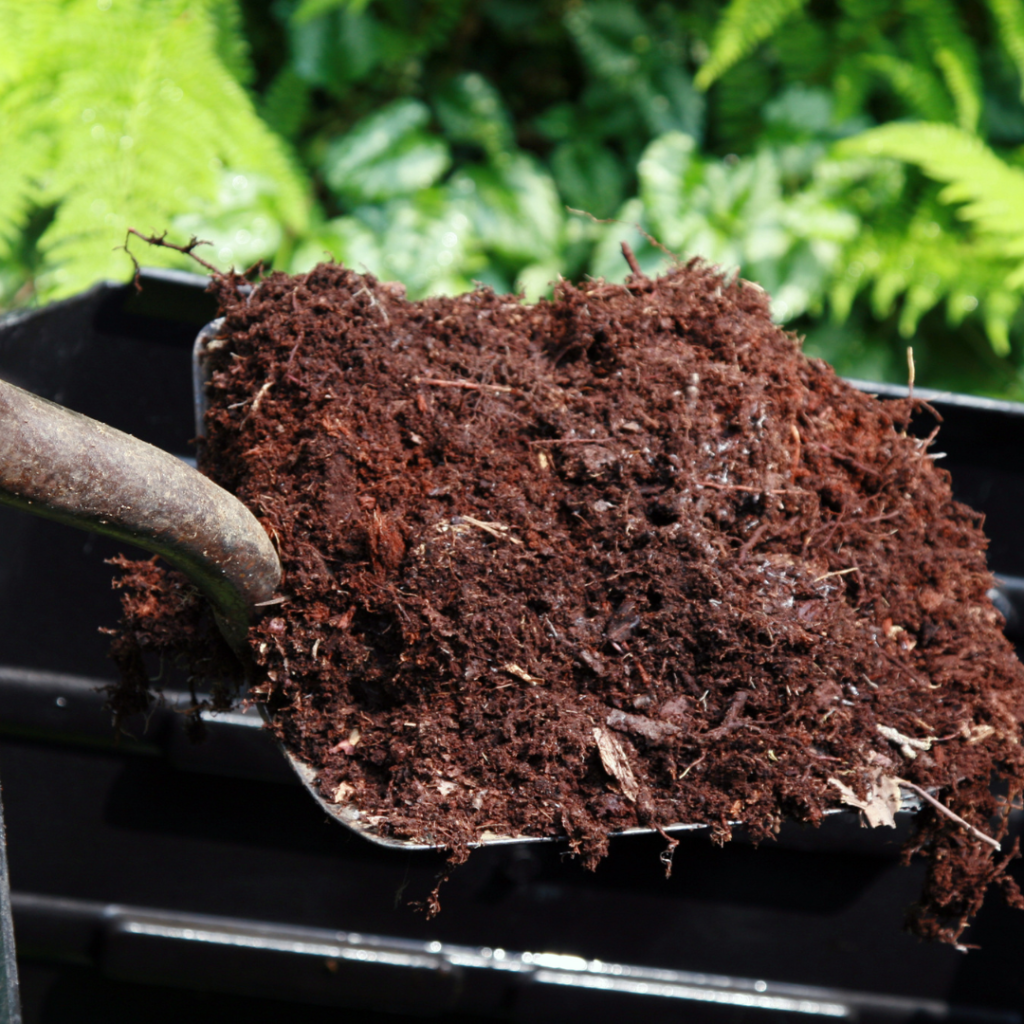
Once the compost turns a rich brown color and has an earthy smell, it’s ready to use! By this stage, everything you put in the pile should be completely broken down and unrecognizable. The pile will also have cooled down in temperature. Just scoop it out and mix it into your existing garden beds with a fork or shovel.
Composting in Winter
If you have a pile that isn’t finished and winter is nearing, don’t worry. Worst case scenario, the process is slowed down. Keep your compost taller and wider if you’re banking to keep your pile going during the winter. This will allow for the organisms breaking your compost down to stay alive and thrive in the winter months. If you live in an area that gets extremely cold during the winter, be sure to start it in a place where it stays sunny most of the day, and expect the process to be a bit slower.
Maintaining compost isn’t a difficult process and anyone can do it. It is an excellent addition to the garden, will yield beautiful crops, and is an awesome way to sustain the garden season after season!
To decide what kind of garden design is best for the space
you have, first you will have to learn about the different options for a garden
layout. There are quite a few different design plans out there, some are
simpler than others however and those might be best for a beginner. It also
makes a difference if the garden will be used for vegetables or flowers.
The first of these simple designs is for a vegetable garden.
It is just an open patch of soil, in any shape that the area has the space for.
It can be anywhere from just a few feet long to a hundred feet long if there is
space available. If the area the garden is in is frequented by lots of animals
like deer or rabbits, consider adding a fence made of mesh or chicken wire that
is 5 or 6 feet high to keep your plants from getting eaten by those pesky
critters. If you want to add a fence just find some pieces of wood to use as
posts in each corner. Then take the mesh and staple it to the posts. A helpful
tip for doing this would be to have 1 extra post than there are corners, that
way you can make an easy access gate. To make the gate just put the extra post
next to the final corner post, attach the mesh to the extra post but not to the
first post the mesh is already attached to. This way the extra post can be
taken in and out of its place in the corner for easy access to the garden by
humans but not deer or rabbits.
The next design for a vegetable garden but someone might
choose to make it a flower garden too. This design would be a raised be and there
are a few different ways to make a raised bed. You can either use stones or
boards to make the outline of your raised bed. After you have decided on the
shape, start building your outline for your raised bed. After this step is
complete, make sure to line the entire structure with landscaping fabric. You
can obtain a roll of this at just about any store that sells garden equipment
or find some online at a place like amazon. This is an important step, because
it will not only keep weeds from growing within the bed it will also ensure the
water will drain out and the soil will stay in the bed. Once the bed is lined
with landscaping fabric, add your soil. To ensure healthy and quick plant
growth, it would be beneficial to find some high-quality black soil. It also would
not hurt to add in a bag or two of potting soil on top and then till into the
soil, depending on the size of your layout and the size of the bag of potting
soil this can vary.
Back yard landscaping
Depending upon the space available in your yard, it might
make more sense to incorporate both garden designs explained above. There are
lots of different ways to add landscaping designs to a yard, and gardens are
one of the easier projects to do that can help lower a grocery bill along with
a healthier lifestyle. In addition to adding a garden to a backyard, consider
adding a stone walkway through the yard that leads to the garden. This will add
to the curb appeal of your house and can also improve the value if you were to
sell your house in the future.
Front yard landscaping
If there is not room in the front yard for a large vegetable
garden, consider adding a few small flower beds. There are lots of ways to make
your property more beautiful, and flower beds will quickly and easily do this.
When deciding what kind of flower bed or beds to install, consider how many you
plan on adding in total. Also consider whether to all put them on the same
level, an example of them being on the same level would be two flower beds both
on the ground; one by the sidewalk and another below a window. One of the
better ways to add to the appearance of your home, would be to have flower beds
at different eye levels. For example, one along the sidewalk, a raised bed as
you come closer to the house, and small hanging bed from the windowsill.
Another good way to add to the look of your home, is to consider adding some
shrubs. These will not only look nice, but depending on what kind of shrub and
where they are planted can also give your front yard some nice shade to relax
in.