1 bunch celery stalk, chopped (leave sections with leaves long so they can be removed later)
2 large onions, chopped
5 large carrots, peeled and cubed
5 to 7 potatoes, peeled and cubed
½ head of green cabbage, cut into small chunks
1 rutabaga or turnip, peeled and cubed
3 cups corn
Salt and pepper to taste
Barley (optional)
Directions:
Trim most of fat from roast. Add whole roast, V8, celery, and onions, to pot and cover with water (if needed). Bring to a boil and reduce to a simmer. Continue adding water as needed to keep covered and simmer gently for 3 to 4 hours. Remove roast, discard bone and extra fat, and shred meat into bite size pieces, return to pot. Remove celery leaves also. Cut vegetables into consistently sized pieces for even cooking. Add remaining vegetables and simmer covered for another hour until vegetables are tender. Season to your taste. Continue to add water to keep soup at your preferred consistency. Cook barley according to package directions and add to soup at the end.
This one simple gardening step guarantees healthy, hardy plants that will thrive all summer long. So what exactly does hardening off mean and how do you do it properly?
Whether you’ve grown plants from seed, bought a flat at your local nursery, or plan to move your indoor plants outside for the summer, this change of environment is a shock to their system. They’ve been living in a fairly cushy atmosphere where every condition from wind to rain to light is controlled by you, their doting parent. So you just can’t plop them into the garden and leave them on their own! Hardening off is a gradual process that allows plants to successfully make the switch to outdoor living.
Timing is important when choosing to start out. Count back from the date when you can expect adequate and consistent warmth both day and night. If you’re working with nursery-grown or indoor plants, plan on about five days. Tender annuals (such as impatiens) or baby seedlings need about one week. Refer to the plant tag or a plant-specific gardening guide for more information on the plants you’re using. Do not rush this step as it’s essential to a successful transition! A few too many hours in the sun could be just enough to ruin all your hard work and permanently damage your tender plants.
First set plants in the shade and out of the wind for a few hours on a warm afternoon. Bring them back indoors before evening but keep them in a warm part of the house. Every day lengthen the time the plants spend outside, always bring them in before nightfall, and gradually expose them to more and more direct sunlight. Continue to protect from strong wind and keep them watered!
After a week or so, leave them outside in the sun and overnight unless temperatures are forecast to drop below 50°F. If harsh weather or high winds are predicted, bring them indoors for the night. And, if you struggle with wildlife in your garden, make sure seedlings are in a protected area to avoid late night snacking. You can also use a cold frame or a mini-greenhouse for this hardening off process.
Once you’ve made it through a night – and the weather forecast remains warm – leave the plants outside or plant in the ground or containers. Don’t be worried if at first newly dug-in plants look slightly wilted. This is a normal reaction called transplant shock and within a couple days they will recover. Be sure to give them a good drink and some plant food and enjoy your garden!
Seedlings growing in eco-friendly paper seed pots.
Growing plants from seed requires the right equipment, adequate space, and patience. One thing most gardeners will tell you is you must follow established seed-starting regimens. A minor misstep during the process can devastate the entire growing crop and you will then be behind the planting season and may need to start over. These problems can be avoided if you take a few simple, tried-and-true steps for starting your seeds. This article will describe how to set up your space to grow healthy seedlings.
Seed Starting Space Needs
Before you can set up grow lights and plant seeds, you must first find dedicated space to house your seedlings for up to three months. Do not opt for a windowsill! While this would seem to be a good sunny spot, it’s often the draftiest and coldest area in a home and seedlings will grow sideways and spindly in an effort to reach the weak light. You can, however, set up tables near a sunny window but you will still need to provide additional lighting as a consistent source of light and heat. Also, be sure to choose a location away from drafts created by opening doors or heat registers; avoid high-traffic areas or places where pets or family activity can jostle tables; and locate your grow space in an area that can handle water spills or messes from soil. Many people do quite well starting seeds in the basement as this is often the quietest part of the house. Just make sure the air temperature stays at 60°F or above and consider providing bottom heat for the seedlings.
Along with space you’ll need tables, racks, or something stable to set your trays on while they grow. Again, this is for at least 4 weeks, so this equipment will be out of use within your household. Sawhorses or folding tables will work as long as they’re stable so your trays are secure. Don’t put trays on the floor as the temperatures will be too cold.
Seed Starting Lighting Needs
While natural sunlight can be a good supplemental light source, seedlings do best underneath an overhead fluorescent light. Most home stores and garden centers sell professional grow lights but a standard shop-type light fixture with two cool white bulbs will work great. You will need lights for all seed trays so if using a stacking rack system, lights will need to be positioned above the plants at each level. Hang your light so the height can also be adjusted as the plants grow (you will need at least 6” of space above the seedlings). Your seedlings need between 12 and 16 hours of light per day but they also need some dark to grow properly – set up your lights on a timer so you don’t have to worry about turning the lights on and off.
Using Bottom Heat for Starting Seeds
Seeds require a warm home to germinate and grow strong roots and a great way to quickly warm up your newly planted seeds is to use a heating mat or propagation mat. While it’s not a must-have, heating from the bottom provides gentle, indirect heat that will give your seeds a jump start. Available at most garden centers, heating mats are specially designed for seed trays and typically have a temperature control so you can set the heat for your specific seeds.
You can try a DIY approach, too, for bottom heat with a heated blanket, a heating pad, or even hot water bottles. These methods will work to provide heat but must be closely monitored so they do not get too hot which will essentially cook the seeds and they will not germinate. Most plants require a soil temperature of 70°F to 72°F but more “tropical” veggies like peppers prefer warmer range of 80°F to 85°F. Check your seed packet for specifics. During germination, the heating mat should be left on at all times so if using a timer for your lights, do not plug it in to the same cord. Also, bottom heat tends to dry out the soil more quickly so be sure to keep your trays well-watered and check often. Once plants have broken through the soil, remove the heating mat.
Seeds Starting Trays or Pots
Obviously you’ll need something to start your little seedlings in! Specially-made seed starting trays are a great choice as they’re the perfect size for seedlings, lightweight and easy to move, and reusable from year to year. They also have predrilled holes in the bottom so water will easily drain through. (Shop our eco-friendly seed pots here). Styles vary and choices include:
Individually celled trays work well for small seeds and to keep plants’ roots separate for easier transplanting. However, many seedlings will quickly outgrow these cells and will need to be transplanted to a large pot prior to planting outside.
Row-style trays work for plants with large roots such as winter vegetables, onions, or leeks and are a good choice for planting lots of the same variety of seeds.
Small pots fitted into a larger holding tray work well for plants that will eventually grow large such as tomato or eggplant. These also have an added advantage because the plant has plenty of room to grow and will not need intermediate transplanting. These pots work well for transplanting seedlings that have outgrown the seed tray but are not ready to be planted outside.
All of these styles are reusable from year to year but must be cleaned after the first use. Remove all soil and rinse thoroughly. Soak trays for one hour in a mild bleach solution (10 parts water to one part household bleach) and rinse again with clean water. If storing away for the season, be sure to dry thoroughly.
Another option is to plant seeds in small fiber pots. These are nice because they can be planted directly in the garden and will dissolve over the growing season. Not only does this quicken your planting process but it reduces transplant shock which is especially important for tender-rooted plants such as cucumber or squash.
Some trays come with a clear plastic dome lid which is used to cover the newly planted seeds to hold in heat and moisture which promotes germination. You can create your own cover with a sheet of kitchen plastic wrap loosely placed over the seed trays. Be sure to remove covering as soon as you see seedlings emerging from the soil.
To avoid water spills or leakage, place your pots or seed trays on top of a plastic liner tray to catch any water that drips through. Be sure, though, to empty the trays so the seedlings are not sitting in water.
What Soil to Start Seeds In?
Available at garden centers, the best choice is a seed-starting mix that is not really soil but a mixture of vermiculite and peat. This finely-textured and loamy mixture is easy for seeds to push through, it’s guaranteed sterile so no diseases will hurt your seedlings, and it’s filled with just the right nutrients to feed the growing seed. Some growers mix their own potting mix and include a bit of compost – this is acceptable as long as you’re sure your compost is “well-cooked” so no traces of disease or weed seeds remain. Until your plants have leaves, they do not require fertilizer.
Before planting, fill seed trays with the potting mix and water well. The mix will sink slightly down into the planting pot and continue filling and watering until the cell is full within 3/4” of the rim of the container.
Watering Tools
Choose a spray bottle with multiple settings so you can first start out with a fine mist and eventually work your way up to larger droplets that mimic a spring rain. The key is to keep the soil at a consistently moist level without disturbing it or the growing seed. Keep your water at room temperature to reduce shock to the seedling.
Garden Recordkeeping Tools
Once all those little seeds sprout, you’ll need a way to keep track of everything. Plastic plant tags or popsicle sticks work well to mark each tray – record plant variety and the date you planted the seed. Cross reference this with the expected planting dates for each plant and record on a calendar so you’ll know when to begin the hardening off and transplanting process. Keep a mini-diary, too, for each season so next year you can refer back to what worked well and what didn’t do so great.
How To Choose Garden Seeds
Obviously the most important part of the process! Choose seeds that are no older than two years old and have been stored indoors (or not in freezing temperatures.) The fresher the seed, the greater chance for germination. If possible, plant more seeds than you think you’ll need just to ensure you’ll have enough plants. If you’re gathering seeds from plants to use next year, be sure to choose non-hybridized varieties and healthy plants. Many times you can just let the fruit or flower stay on the plant and the seeds will dry in place. When thoroughly dry, collect, label, and store in an airtight container in a cool place.
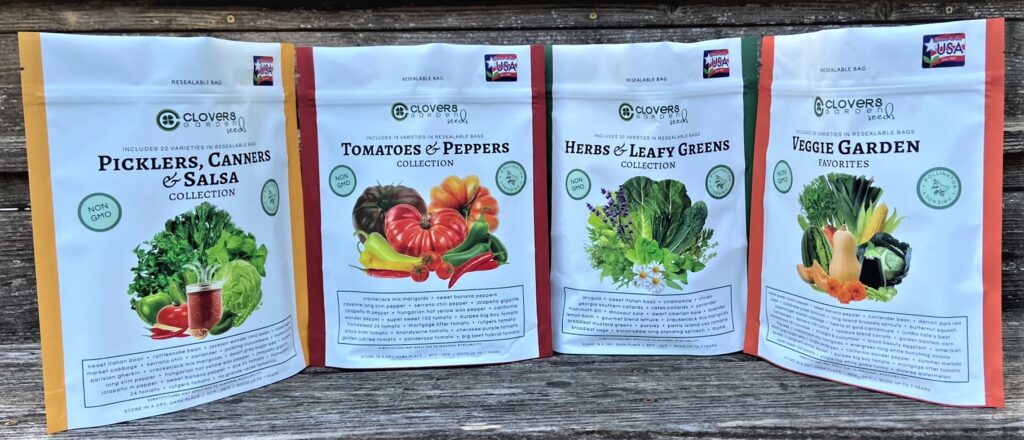
We now offer a full line of garden seeds, curated into garden favorites collections. Perfect for starting indoors or outdoors with a full range of varieties and proven favorites. Shop our seed collection here.
For gardeners spring fever usually comes a little early . . . right around the time the seed catalogs show up! Don’t we all page through and create that perfect garden in our heads? Overflowing, of course, with bountiful produce. Here are a few tips to help you make your garden dreams a reality.
Tip #1 Be honest about space needs. Follow the guidelines on the seed packet or plant tag. We’re always tempted to squeeze things in a little closer together but this can reduce your harvest and make your plants more prone to disease.
Tip #2 Put it on paper (or find a good garden planning app). It may be old-fashioned but standard graph paper is a great way to map out your planting strategy. Create whatever scale works for you (I like 1:1, each box equals one foot). Sketch in all your plants, making sure to leave enough room for full growth. Now you can buy your seeds and plants knowing they’ll fit and you’ll have plenty of space.
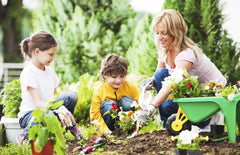
Little Gardeners Tip:Let the kids in your life help. Drawing out plots on graph paper teaches so many handy lessons including measuring and counting practice, spatial recognition, and calendar awareness. Plus you’ll spark their interest and get them excited to help you when planting season arrives.
Tip #3 Grow up! Vertical gardening can nearly double your garden space and you’ll be surprised by how many plants thrive on a trellis. Just about anything with vining growth can be trained up a wire – beans, cucumbers, peas, and tomatoes but also zucchini, squashes, and even melons. Not only do you increase your growing space but training them up will produce better veggies! By growing up, the fruits are not crowded on the ground and will ripen more evenly; they’ll be out of the reach of ground-foraging insects; it’s much easier for you to see and pick the produce; and the vines create some visual interest in an otherwise flat garden landscape.
How to make a low-cost trellis. Just about any sturdy structure will work as a trellis or arbor. Try long willow branches formed into an arch, a teepee-style wire design, or a piece of narrow lattice attached to a couple sturdy fenceposts. Be sure your structure is well-anchored in your garden and the wires or strings are spaced close enough together that vines can easily reach them with their tendrils. Larger fruits such as watermelon or squash may need a light sling for support towards the end of the season. An old nylon or soft piece of tulle or mesh work great.
Tip #4 Expand out to Containers. How many containers and windowboxes do you have in your garden? Why not mix in a little produce to add interest, form, and function? Herbs of all kinds make great fillers and add great scent to your outdoor living spaces. Tomatoes and peppers are especially suited to large pots and if you struggle with cutworm or blight in your regular garden spaces, containers keep these plants safe from those problems. And, of course, give you more room in your regular garden! One note about planting big veggie plants in containers – you will need to water and fertilize more often than if they’re planted in a garden plot.
Tip #5 Companion Planting. Grandma used these tricks and they still work today! Companion gardening puts like-minded plants together and keeps those that don’t like each other apart). And the winner is your garden! Knowing the family of your plant is a good start (for example, broccoli and cabbage are from the same family so have the same likes and dislikes.) Also, knowing your garden helps determine the problems that need fixing (for instance, not all gardens have trouble with cutworms.) Here are just a few of our favorite combos:
Chives at the base of rose bushes will repel aphids.
Radishes near cucumbers deter beetles.
Plant beans alongside corn to help replenish nitrogen loss.
Beans like cabbage, carrots, pea, or marigolds but hate onions or garlic.
Cucumbers like cabbage and tomatoes but hate sage.
Lettuce loves beets, carrots, and chives.
Tomatoes love cukes, parsley, and peppers but not kohlrabi, mature dill, or corn.
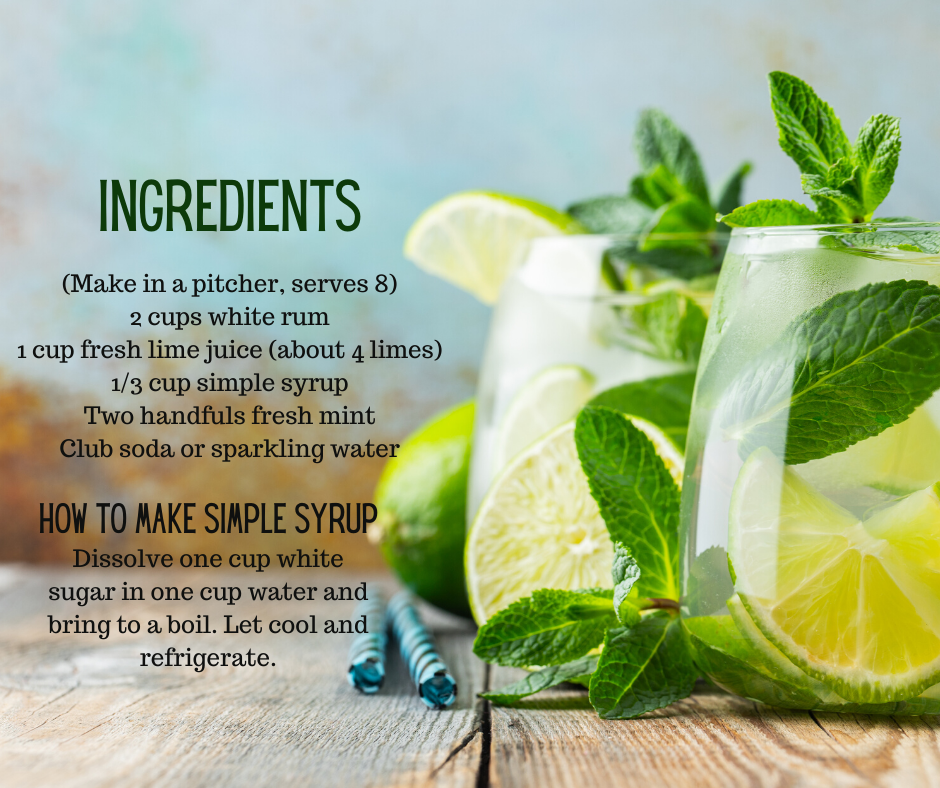
This delicious sauce recipe is similar to traditional Chimichurri sauce and is scrumptious over grilled chicken, tossed with pasta, mixed with mayo for a yummy salad dressing, or spread on crusty bread. Freezes up really well — just scoop into ice cube trays and freeze for handy small serving sizes all summer.
Ingredients
6 cups loosely packed Parsley
¼ cup fresh squeezed lemon juice (about 1 lemon)
2 garlic cloves, chopped (about 1 TB)
½ tsp salt
½ TB red pepper flakes
1 cup extra virgin olive oil
1 cup walnuts (if desired)
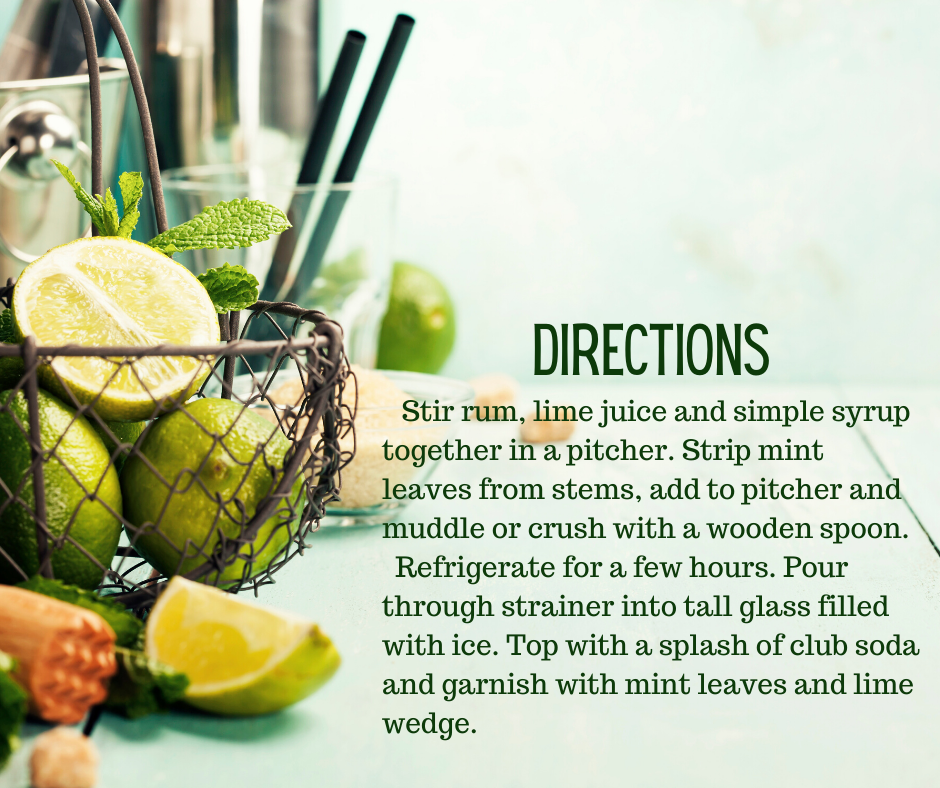
Directions
Put all (except oil) in food processor, pulse and slowly add olive oil until pureed to desired consistency ( you may not use all of the olive oil). Store in airtight container in fridge.
For many of us, autumn gardening means packing up and battening down for winter. But there is still lots to do and time to enjoy our backyards. These five garden tasks will help your garden right now and give you a healthy head start for Spring.
Five Fall Garden Tasks
Leave as much plant debris as possible. Yes, that means less work for you and a head start on a better garden next year! You’d be amazed by how many beneficial insects and worms depend on that debris to survive winter. Frogs, worms, and large insects burrow into the ground because the leaves provide insulation; bees and beneficial insects hide out in hollow stems of plants and under bark of woody branches; butterflies create an overwintering chrysalis and attach it to stems and branches; some insects lay eggs inside seed pods, and your feathered friends have a protein-rich bug buffet to snack on all winter. You should, however, dispose of plants that suffered from diseases such as blight or leaf spot. Be sure to cut those away and dispose of away from your compost pile or garden soil.
Bring outdoor plants in without bugs. Before it turns cold, it’s time to bring your favorites back into the house (or a greenhouse if you’re lucky). But they, too, can be home to insects you may not want in an enclosed space. The best treatment is to douse the leaves (on both sides) with Neem oil. This is an organic treatment, safe for most plants, but it does have an off-putting odor and can stain so be sure to spray outside. Choose a calm, overcast day, follow dilution directions on the bottle, check your plant species on the label or spot test on a leaf, cover all leaves and let dry for 24 hours before bringing indoors.
Start a garden journal. After a glorious summer of gardening, we all think we’ll remember every minute! But next spring when you’re trying to buy that same variety of tomato or discern what is actually poking through the soil, you’ll wish you kept notes. If you haven’t already done this, start a dedicated gardening journal (a three-ring binder works great). Record where and what you planted, note what did well and what didn’t, mark down your favorites so you can find them next year, and take a few pics to include for reference. For large perennial gardens, this become a valuable reference tool for adding in new pieces each year or for future owners.
Clean your tools. This is a step most of us are guilty of skipping but it’s worth a little extra effort at the end of the season. It’s important because it removes disease remnants so you won’t spread to next year’s garden but also prolongs the life of your tools.
Start by removing soil with a scrub brush dipped in a mild dish soap or bleach solution. Rinse with clean water. If you’ve cut something sappy, you may need a little rubbing alcohol or paint thinner to clean blades of pruners or shears. Dry thoroughly.
Check the condition of all tools and sharpen blades as need. In most cases a good sharpening stone can restore your cutting power. If you see spots of rust, try to remove with a wire brush, rinse, dry, and then wipe down with a tiny bit of motor oil before storing. This will slough off in the soil next year so no need to remove.
Once clean, rub all other tools down with balled up wax paper to give it a slight protective coat over winter.
For wood handled tools, run linseed oil over each handle to keep from cracking.
Store hanging and off the floor as this may cause damage to the edge or handle.
Plant something! No matter where you live Fall is not the end of gardening season. In Northern climates this is the time of year to plant garlic, fall crop greens like lettuce or spinach, flowering spring bulbs, and herbs for an indoor garden. In Southern zones, you can still plant fruits and veggies outside or in pots and harvest another crop of tomatoes, peppers, or herbs.
We keep a good selection of garden plants as long as we can — especially tomatoes, peppers, and herbs for our Southern gardening friends. Check here for what’s in stock. We ship Priority so it will get there quickly.
Your hard work and patience are about to pay off and your tomato vines are loaded with big, plump tomatoes! Visions of BLTs, caprese salad (recipe here), and fresh salsa dance in your head and you just can’t wait to pick them. So how do you know when the right harvest time is?
Unlike other veggies (i.e. peppers or cukes), tomatoes do not improve when left on the vine too long. Even picking a day early is better than waiting for that perfect moment. After all this isn’t a grocery store . . . you have complete control over when you pick your precious tomatoes. Here’s a few tips to get it perfect.
Tomatoes continue to ripen after picking (thank you Ethylene gas). Release of this gas is what turns the tomato from green to yellow, red, or orange. Store bought tomatoes are typically picked at the mature green stage and let to ripen in transit but this does result in some loss of flavor and texture.
As your tomatoes ripen, watch the color. A pinkish blush will start on the bottom and work its way over the top of the fruit. Once fully red (or yellow, orange, or pink depending on variety) and very slightly soft to the touch, you can harvest. See below for a handy color chart from the USDA. Exception to this rule: Heirloom varieties should be picked before they reach the “full color” stage. Pick when the bottom of the fruit has fully changed but the stem end still has flecks of green and the fruit is slightly soft to the touch. Let ripen the rest of the way on your kitchen counter. A handy hint: fully ripe tomatoes will sink in water.
If you have tomatoes on the vine at the end of the season when a freeze is imminent, pick them all and store in a brown paper bag with a banana peel or two. The released ethylene gas will continue the ripening process.
To pick without damaging the rest of the vine, gently grab the tomato with one hand and twist until the stalk breaks away from the plant. Do not pull straight up or out as this could dislodge the whole plant. If you’re growing indeterminate varieties (those that produce all season long), be careful not to knock off baby tomatoes or new blossoms.
Gently wash and dry the fruit and store indoors and out of direct sunlight. Do not store tomatoes in the refrigerator!
Cooking hint: to easily remove the skin for making sauces or salsa, cut out the core and make a small X on the blossom end. Submerge in boiling water for about 30 seconds or until you see the skin start to split. Remove with a slotted spoon and submerge into ice water to stop the cooking. The skins will practically fall right off.
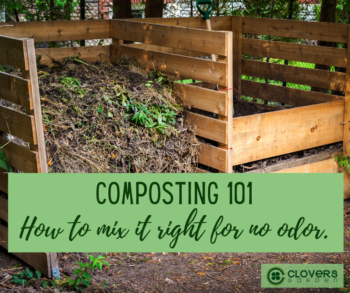
Let’s start with the basic ground rule of composting: your pile should not smell bad. It can occasionally smell “earthy” or even fruity if you’ve dumped in a lot of rinds but an unpleasant smell is a sign that something is out of balance.
Sour or AmmoniaSmell
This one was learned from personal experience as we’ve gotten to know our enclosed composting bin. This small bin holds 65 gallons so it’s just slightly bigger than a large hard-sided garbage can. You’d think that’s too small but after two weeks of just dumping in our household food scraps and odds and ends from trimming and weeding in my gardens, we barely had a few inches of compost cooking. So, the husband decided to get things moving by adding lawn clippings. Like three mower bags full of lawn clippings.
And that’s how we learned: compost mixture should be two to three parts browns (leaves, sawdust, wood shavings, shredded newspaper) to one part greens (veggie scraps, trimmings, grass, etc.). It’s best to layer greens and browns and mix them thoroughly after each layer and always top off the pile with a layer of browns.
Luckily, we are currently “grandparents” to a dozen baby chickens so our son brought over a big bag of their bedding (wood shavings). This was the perfect browns mixture to fix our problem plus we got an extra dose of super starter, chicken manure. I know, the things you learn when composting! Within 24 hours, the smell was gone!
Sulphur or Rotten Egg Smell
This smell is caused by a lack of oxygen so it tells you the pile is not decomposing properly (or anaerobically). This can also be caused by a too large input of greens – especially grass – as it can become matted and compacted too thickly to allow oxygen to work through the layers. Again, adding browns in layers and mixing well will stop this smell.
Also, make sure your compost pile has sources of air inflow – either through slits in the side of the bin or an open top. You should also aerate your compost pile by stirring it every few days when you first start out and then every week or so after it ages for a while.
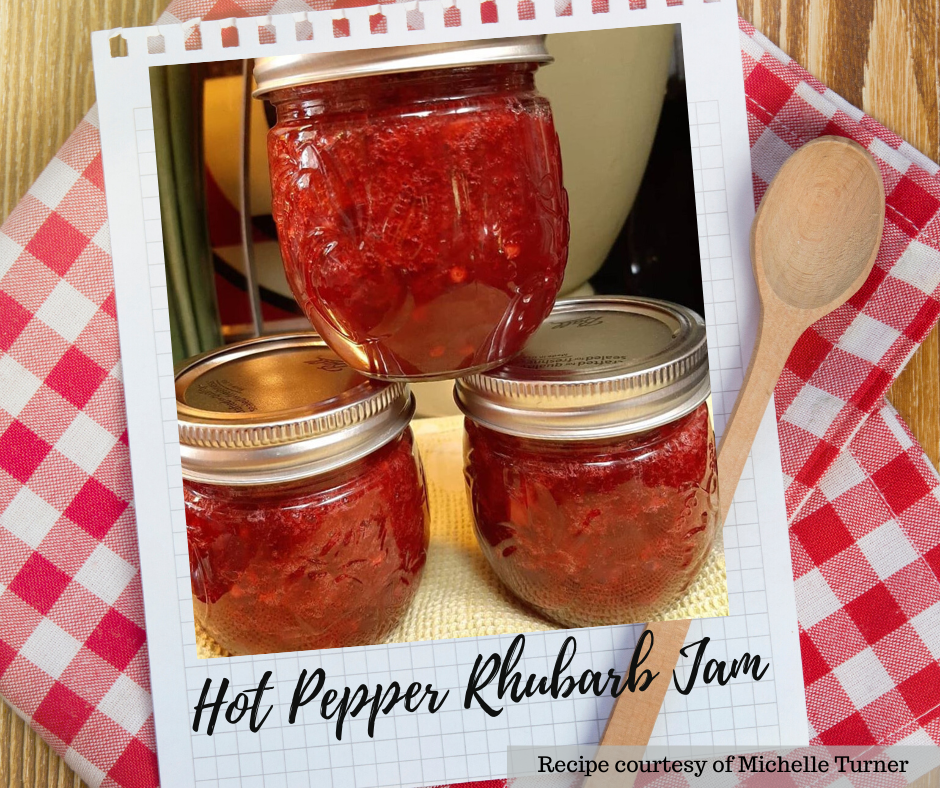
A delicious spicy-sweet combo that makes a great dip or sauce for chicken or pork. Can be frozen or canned. Recipe courtesy of Michelle Turner.
Ingredients
4 cups chopped rhubarb
1 ½ cups white sugar
1 3-ounce package cherry jello
4 finely chopped hot peppers
1 tsp. vanilla
1 tsp. baking soda
Directions
Mix first four ingredients and cook over low heat until bubbly. Let cook until rhubarb is broken down. Add vanilla and baking soda (this will foam up). Let settle and heat through. Freeze in jars or hot water bath according to standard canning process. Makes approximately 12 ounces of jam.
To serve, mix one-to-one with whole grain mustard and use a pretzel dip, sandwich spread, or sauce for chicken or pork. Spread over a block of cream cheese and serve with crackers.

 Whether you’ve grown plants from seed, bought a flat at your local nursery, or plan to move your indoor plants outside for the summer, this change of environment is a shock to their system. They’ve been living in a fairly cushy atmosphere where every condition from wind to rain to light is controlled by you, their doting parent. So you just can’t plop them into the garden and leave them on their own! Hardening off is a gradual process that allows plants to successfully make the switch to outdoor living.
 First set plants in the shade and out of the wind for a few hours on a warm afternoon. Bring them back indoors before evening but keep them in a warm part of the house. Every day lengthen the time the plants spend outside, always bring them in before nightfall, and gradually expose them to more and more direct sunlight. Continue to protect from strong wind and keep them watered!
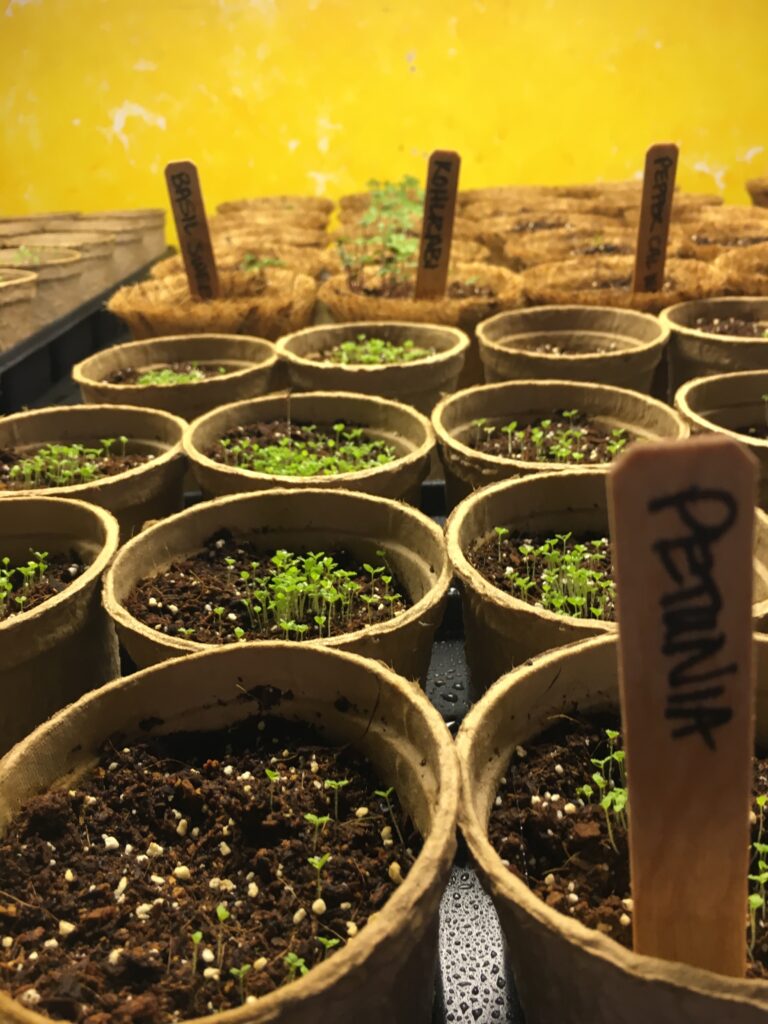
 Little Gardeners Tip: Let the kids in your life help. Drawing out plots on graph paper teaches so many handy lessons including measuring and counting practice, spatial recognition, and calendar awareness. Plus you’ll spark their interest and get them excited to help you when planting season arrives.
 How to make a low-cost trellis. Just about any sturdy structure will work as a trellis or arbor. Try long willow branches formed into an arch, a teepee-style wire design, or a piece of narrow lattice attached to a couple sturdy fenceposts. Be sure your structure is well-anchored in your garden and the wires or strings are spaced close enough together that vines can easily reach them with their tendrils. Larger fruits such as watermelon or squash may need a light sling for support towards the end of the season. An old nylon or soft piece of tulle or mesh work great.
 have in your garden? Why not mix in a little produce to add interest, form, and function? Herbs of all kinds make great fillers and add great scent to your outdoor living spaces. Tomatoes and peppers are especially suited to large pots and if you struggle with cutworm or blight in your regular garden spaces, containers keep these plants safe from those problems. And, of course, give you more room in your regular garden! One note about planting big veggie plants in containers – you will need to water and fertilize more often than if they’re planted in a garden plot.
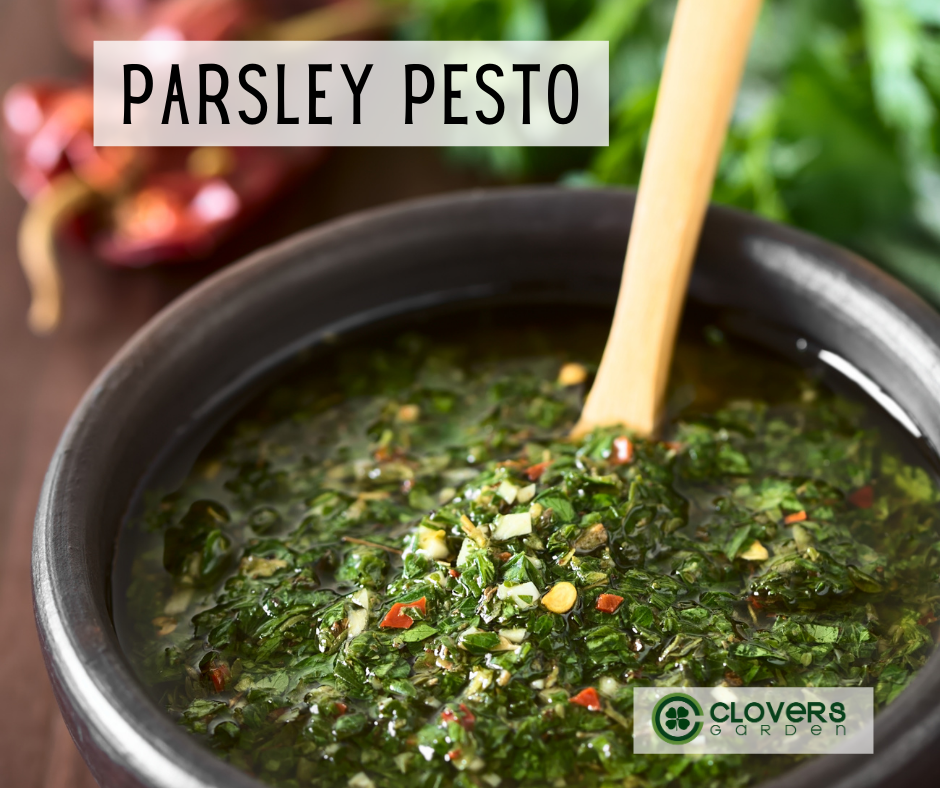


 As your tomatoes ripen, watch the color. A pinkish blush will start on the bottom and work its way over the top of the fruit. Once fully red (or yellow, orange, or pink depending on variety) and very slightly soft to the touch, you can harvest. See below for a handy color chart from the USDA. Exception to this rule: Heirloom varieties should be picked before they reach the “full color” stage. Pick when the bottom of the fruit has fully changed but the stem end still has flecks of green and the fruit is slightly soft to the touch. Let ripen the rest of the way on your kitchen counter. A handy hint: fully ripe tomatoes will sink in water.
 To pick without damaging the rest of the vine, gently grab the tomato with one hand and twist until the stalk breaks away from the plant. Do not pull straight up or out as this could dislodge the whole plant. If you’re growing indeterminate varieties (those that produce all season long), be careful not to knock off baby tomatoes or new blossoms.