Five Tips for Planning a Bountiful Veggie Garden.

For gardeners spring fever usually comes a little early . . . right around the time the seed catalogs show up! Don’t we all page through and create that perfect garden in our heads? Overflowing, of course, with bountiful produce. Here are a few tips to help you make your garden dreams a reality.

Tip #1 Be honest about space needs. Follow the guidelines on the seed packet or plant tag. We’re always tempted to squeeze things in a little closer together but this can reduce your harvest and make your plants more prone to disease.

Tip #2 Put it on paper (or find a good garden planning app). It may be old-fashioned but standard graph paper is a great way to map out your planting strategy. Create whatever scale works for you (I like 1:1, each box equals one foot). Sketch in all your plants, making sure to leave enough room for full growth. Now you can buy your seeds and plants knowing they’ll fit and you’ll have plenty of space.

Little Gardeners Tip: Let the kids in your life help. Drawing out plots on graph paper teaches so many handy lessons including measuring and counting practice, spatial recognition, and calendar awareness. Plus you’ll spark their interest and get them excited to help you when planting season arrives.

Tip #3 Grow up! Vertical gardening can nearly double your garden space and you’ll be surprised by how many plants thrive on a trellis. Just about anything with vining growth can be trained up a wire – beans, cucumbers, peas, and tomatoes but also zucchini, squashes, and even melons. Not only do you increase your growing space but training them up will produce better veggies! By growing up, the fruits are not crowded on the ground and will ripen more evenly; they’ll be out of the reach of ground-foraging insects; it’s much easier for you to see and pick the produce; and the vines create some visual interest in an otherwise flat garden landscape.

How to make a low-cost trellis. Just about any sturdy structure will work as a trellis or arbor. Try long willow branches formed into an arch, a teepee-style wire design, or a piece of narrow lattice attached to a couple sturdy fenceposts. Be sure your structure is well-anchored in your garden and the wires or strings are spaced close enough together that vines can easily reach them with their tendrils. Larger fruits such as watermelon or squash may need a light sling for support towards the end of the season. An old nylon or soft piece of tulle or mesh work great.

Tip #4 Expand out to Containers. How many containers and windowboxes do you
have in your garden? Why not mix in a little produce to add interest, form, and function? Herbs of all kinds make great fillers and add great scent to your outdoor living spaces. Tomatoes and peppers are especially suited to large pots and if you struggle with cutworm or blight in your regular garden spaces, containers keep these plants safe from those problems. And, of course, give you more room in your regular garden! One note about planting big veggie plants in containers – you will need to water and fertilize more often than if they’re planted in a garden plot.

Tip #5 Companion Planting. Grandma used these tricks and they still work today! Companion gardening puts like-minded plants together and keeps those that don’t like each other apart). And the winner is your garden! Knowing the family of your plant is a good start (for example, broccoli and cabbage are from the same family so have the same likes and dislikes.) Also, knowing your garden helps determine the problems that need fixing (for instance, not all gardens have trouble with cutworms.) Here are just a few of our favorite combos:

  • Chives at the base of rose bushes will repel aphids.
  • Radishes near cucumbers deter beetles.
  • Plant beans alongside corn to help replenish nitrogen loss.
  • Beans like cabbage, carrots, pea, or marigolds but hate onions or garlic.
  • Cucumbers like cabbage and tomatoes but hate sage.
  • Lettuce loves beets, carrots, and chives.
  • Tomatoes love cukes, parsley, and peppers but not kohlrabi, mature dill, or corn.
  • Bee balm and mint will enhance a tomato’s flavor.

Five Garden Tasks for Fall

For many of us, autumn gardening means packing up and battening down for winter. But there is still lots to do and time to enjoy our backyards. These five garden tasks will help your garden right now and give you a healthy head start for Spring.

Five Fall Garden Tasks

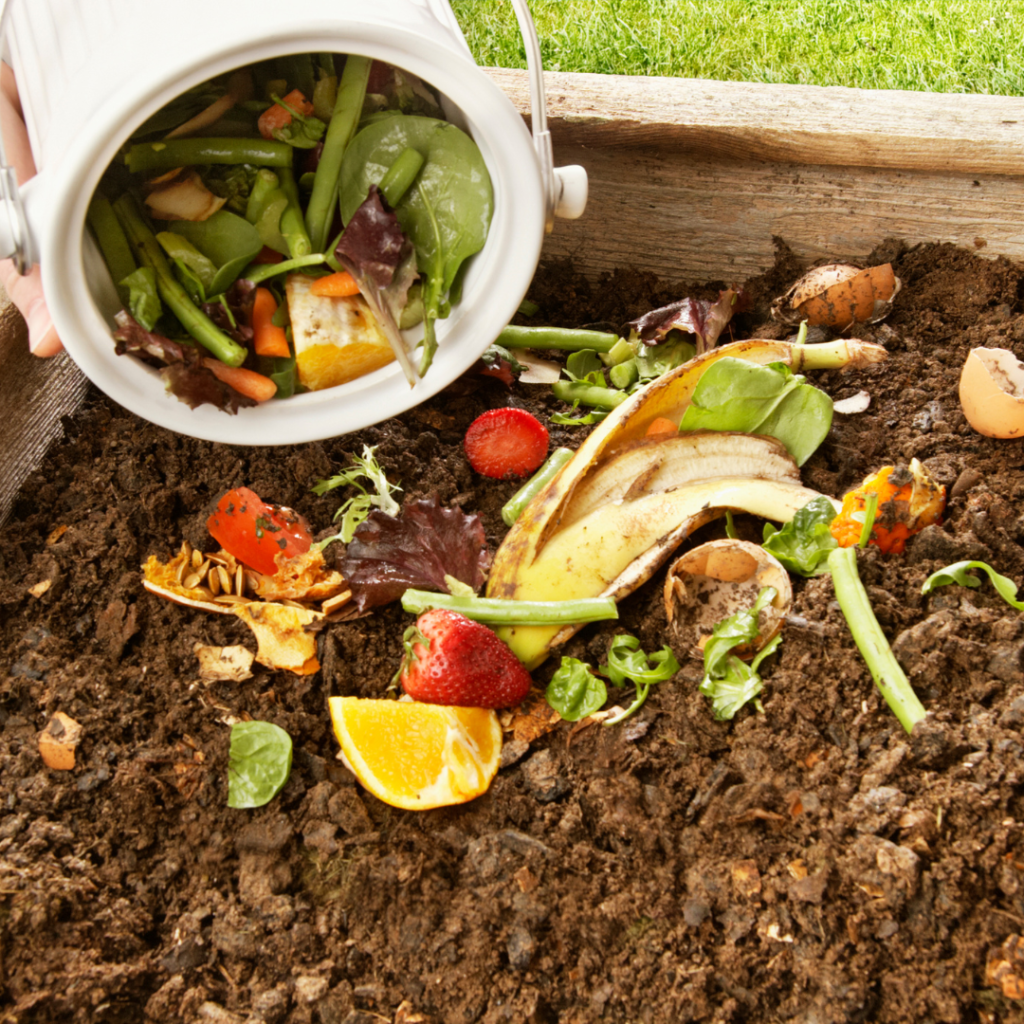
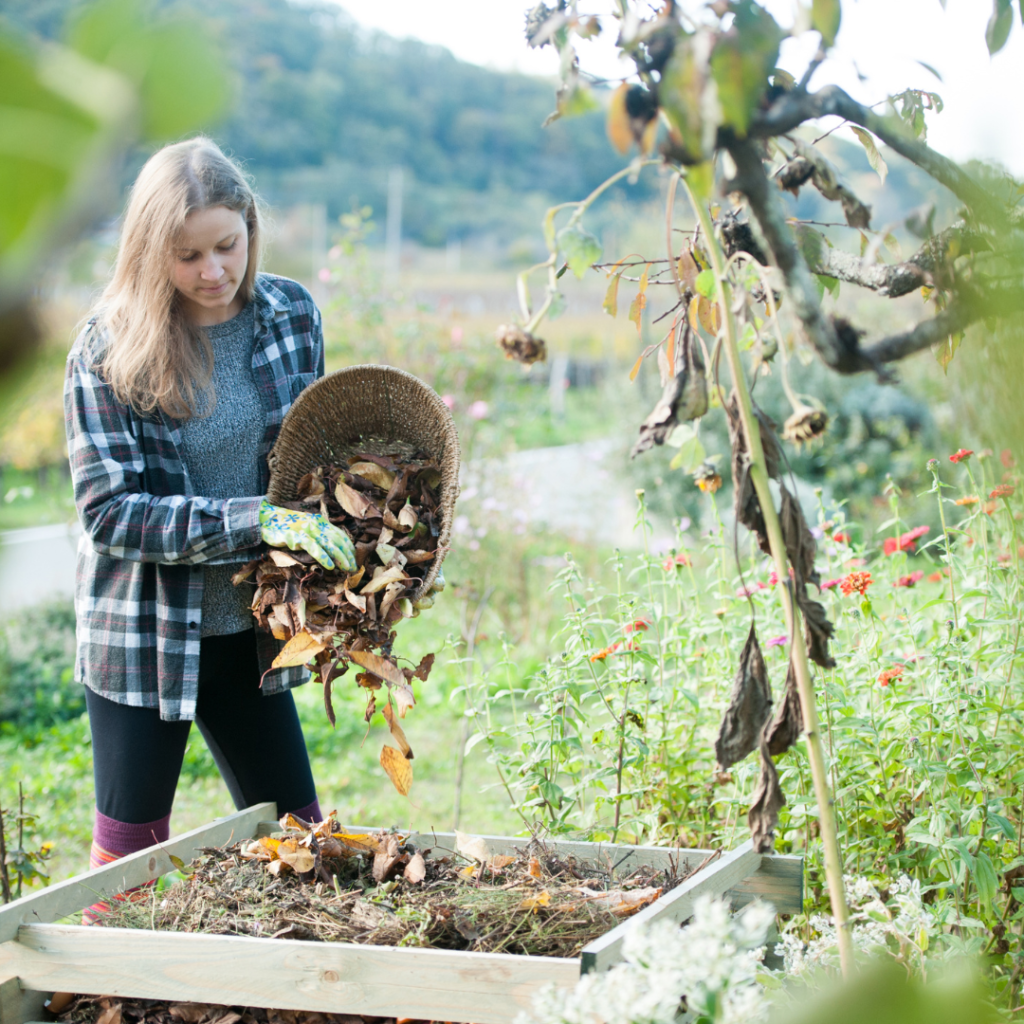
  1. Leave as much plant debris as possible. Yes, that means less work for you and a head start on a better garden next year! You’d be amazed by how many beneficial insects and worms depend on that debris to survive winter. Frogs, worms, and large insects burrow into the ground because the leaves provide insulation; bees and beneficial insects hide out in hollow stems of plants and under bark of woody branches; butterflies create an overwintering chrysalis and attach it to stems and branches; some insects lay eggs inside seed pods, and your feathered friends have a protein-rich bug buffet to snack on all winter. You should, however, dispose of plants that suffered from diseases such as blight or leaf spot. Be sure to cut those away and dispose of away from your compost pile or garden soil.
  2. Bring outdoor plants in without bugs. Before it turns cold, it’s time to bring your favorites back into the house (or a greenhouse if you’re lucky). But they, too, can be home to insects you may not want in an enclosed space. The best treatment is to douse the leaves (on both sides) with Neem oil. This is an organic treatment, safe for most plants, but it does have an off-putting odor and can stain so be sure to spray outside. Choose a calm, overcast day, follow dilution directions on the bottle, check your plant species on the label or spot test on a leaf, cover all leaves and let dry for 24 hours before bringing indoors.
  3. Start a garden journal. After a glorious summer of gardening, we all think we’ll remember every minute! But next spring when you’re trying to buy that same variety of tomato or discern what is actually poking through the soil, you’ll wish you kept notes. If you haven’t already done this, start a dedicated gardening journal (a three-ring binder works great). Record where and what you planted, note what did well and what didn’t, mark down your favorites so you can find them next year, and take a few pics to include for reference. For large perennial gardens, this become a valuable reference tool for adding in new pieces each year or for future owners.
  4. Clean your tools. This is a step most of us are guilty of skipping but it’s worth a little extra effort at the end of the season. It’s important because it removes disease remnants so you won’t spread to next year’s garden but also prolongs the life of your tools.
    • Start by removing soil with a scrub brush dipped in a mild dish soap or bleach solution. Rinse with clean water. If you’ve cut something sappy, you may need a little rubbing alcohol or paint thinner to clean blades of pruners or shears. Dry thoroughly.
    • Check the condition of all tools and sharpen blades as need. In most cases a good sharpening stone can restore your cutting power. If you see spots of rust, try to remove with a wire brush, rinse, dry, and then wipe down with a tiny bit of motor oil before storing. This will slough off in the soil next year so no need to remove.
    • Once clean, rub all other tools down with balled up wax paper to give it a slight protective coat over winter.
    • For wood handled tools, run linseed oil over each handle to keep from cracking.
    • Store hanging and off the floor as this may cause damage to the edge or handle.
  5. Plant something! No matter where you live Fall is not the end of gardening season. In Northern climates this is the time of year to plant garlic, fall crop greens like lettuce or spinach, flowering spring bulbs, and herbs for an indoor garden. In Southern zones, you can still plant fruits and veggies outside or in pots and harvest another crop of tomatoes, peppers, or herbs.

We keep a good selection of garden plants as long as we can — especially tomatoes, peppers, and herbs for our Southern gardening friends. Check here for what’s in stock. We ship Priority so it will get there quickly.

Hot Pepper Rhubarb Jam

hot-pepper-rhubarb-jam-michelle-turner

A delicious spicy-sweet combo that makes a great dip or sauce for chicken or pork. Can be frozen or canned. Recipe courtesy of Michelle Turner.

Ingredients

4 cups chopped rhubarb

1 ½ cups white sugar

1 3-ounce package cherry jello

4 finely chopped hot peppers

1 tsp. vanilla

1 tsp. baking soda

Directions

Mix first four ingredients and cook over low heat until bubbly. Let cook until rhubarb is broken down. Add vanilla and baking soda (this will foam up). Let settle and heat through. Freeze in jars or hot water bath according to standard canning process. Makes approximately 12 ounces of jam.

To serve, mix one-to-one with whole grain mustard and use a pretzel dip, sandwich spread, or sauce for chicken or pork. Spread over a block of cream cheese and serve with crackers.

Techniques to Maintain Soil Health

What it means to have healthy soil

What it means to have healthy soil, might depend on who you ask. For instance, a farmer might say that healthy soil will retain water and provide crops with the nutrients they might need. These are not technically wrong answers; however, they are more incomplete than they are correct. There are a lot of things that determine the health of soil and this article will help explain what they are, in addition to explaining what they mean.

Indicators of soil health

There are a few different ways to determine if soil is healthy or not, some indicators are more scientific like testing the pH of the soil, but we will not talk about those more complex indicators here. Instead we will focus on the simpler indicators of soil health. The first being whether there is anything growing in it already, chances are if there is lots of green vegetation already growing in it the soil is fairly healthy. Another indicator that is easy to determine is if there are earthworms living in it, the more that live in it the better too. Earthworms play a very important role because they do a few different things for soil. One thing they do is that they help decompose organic matter like dead leaves and turn that into fresh healthy black soil. In addition to being an important decomposer within the soil, they also provide oxygenation to the soil by burrowing through it. This is important because if there is no oxygen contained within the soil, nothing will be able to grow because that is an important nutrient for just about every living thing. One more indicator of healthy soil, is that there is a plethora of other organisms living within the first few inches of soil. If there is a lack of other things living there it usually means not all the nutrients necessary for life are present.

Environmental benefits of healthy soil

There are quite a few benefits that healthy soil will provide for the environment. There are 5 functions soil provides that are essential to the health of an ecosystem, whether it be a garden in your backyard or a forest far away from your home, it still does these 5 basic functions.

  1. Regulating water
    • Healthy soil will help control where any water in the environment will go. Whether it is rain, snow that has melted, or water from your garden hose it plays a large role in whether water pools up or runs off to another area.
  2. Cycle nutrients
    • Just to name a few nutrients that are stored within the soil there is nitrogen, carbon, and phosphorus. These are all very important for the growth of any plants which form the base of most food chains, so it is vital that the soil can provide these nutrients to anything growing in it.
  3. Sustain animal and plant life
    • This one is fairly self-explanatory, healthy soil is necessary for just about anything to live or grow in it. If there are not the proper conditions, nothing will grow or be able to live in it.
  4. Support and physical stability
    • Healthy soil will provide anything growing in it, like grass, a place to anchor their roots in order to grow vertically. If the soil is loose or not packed somewhat tightly, nothing will be able to root itself properly within the soil and will be unable to sustain its structure in the lightest wind gusts.
  5. Protection and filtration of pollutants
    • Arguably one of the more important functions of healthy soil is that it can filter out, detoxify, or degrade harmful pollutants. It also keeps them from reaching underground water, called aquifers, which is obviously important to humans because we use a lot of groundwater.

How to Improve Bee Habitat in Four Simple Steps

Why improving bee habitat is important

Did you know that bee populations worldwide have been in decline in recent years? Did you know that about 30% of the crops grown throughout the globe require cross pollination, provided by bees, to thrive and prosper? These are just a few simple reasons that show why bee habitat is important, without bee habitat where would the bees go? Bees play a vital role in the health of the world as an ecosystem, because they provide the necessary cross pollination for many species of plants to thrive. Without bees we would lose an extremely vital aspect of the food chain, that aspect being the base of it in the plants that bees help to spread and grow. Without these plants at the bottom of the food chain, everything above it would collapse because they would eventually have no food to eat; that would also include humans. So, just how important is bee habitat you might ask? Bee habitat is an extremely vital part of the planet and we must do everything we can to stop the decline of the global bee populations. The easiest and likely fastest way to do this is to do your part by building a habitat for bees in whatever space is available.

Step 1 pick bee friendly flowers

Did you know that bees are attracted to certain flowers more than others? In order to improve bee habitat in your yard, or balcony, or wherever you might live it is important to consider what kind of flowers that get planted in order to attract more bees! A few examples of good flowers to plant to attract bees are aster, sunflowers, foxglove, cornflowers, bluebells, cosmos, or goldenrod. When picking what to plant, make sure the flowers you choose are able to bloom for a long time; if it is possible pick flowers that bloom more than one season every year as well.

Another important thing to consider when picking flowers to plant for bees, is what climate and gardening zone you live in. For instance, you would not want to plant a flower that is native to Florida if you live in Minnesota. The more you stick to native plants the better they will survive and more importantly reproduce so your flower garden will not have to be constantly replanted.

One more thing to consider when planting flowers to attract bees, is that they are drawn to brightly colored flowers from a distance. Even though they may not be the “ideal” flowers for them to pollinate it will help draw them in so they can explore the other flowers in the garden.

Step 2 plant herbs and vegetables

Just like humans, bees like vegetables and herbs too! The easiest way to add some flare to your bee habitat improvement project is to add a small herb garden next to the flower garden part of your bee habitat. A few herbs to consider planting in this garden are oregano, rosemary, mint, or lavender. The reasoning behind planting an herb garden is to give the bees another area to pollinate. It also will not take up very much space so just in case you have a limited space to work with already this small herb garden will only improve the bee habitat. In addition to the bees using your new herb garden, you will be able to periodically have fresh herbs to use in your own kitchen!

Step 3 leave out some water

This might seem a little silly but when making a garden for bees consider adding a bee sized bird bath. Bees need water just like every other animal out there so putting out a few small dishes of water will help the bees survive and potentially colonize the area. Obviously, a colony is what you are aiming to establish so anything that helps them stay in the area will encourage a colony to form.

Step 4 make your own bee habitat

There are quite a few different ways that this can be done. The simplest way to make some habitat for bees is to ensure there is at least some bare ground space within the garden and add some small piles of sticks for them to hide within. If you are feeling craftier consider designing a bird house, except with a hole or holes too small for any bird to get into. If you are unable to make a small hole in it, an easy fix is to cover it with chicken wire that will let bees in and out but keep anything else out.

Composting 101: How to Make Compost and Use It In The Garden

Composting food scraps and garden debris is one of the easiest sustainable practices you can take on. And your reward is rich, nutritious soil you can use in your garden and patio pots! You don’t fancy equipment or a lot of space and within one season, you can “grow” a large, usable amount of compost soil. Best of all, you create a cycle of sustainability in your garden. This article will teach how to start a compost pile, how to feed it, and how to maintain it through the season.

The Basics of Composting

Creating composted soil depends on decomposition and decay of organic materials. Each compost pile is a balance of browns (dry material such as fall leaves or wood shavings) and greens (such as produce scraps or grass clippings). Too much of either and the balance is thrown off (you’ll know right away because it will look and smell funny). In this mixture, will be active bacteria, worms, and insects with a little heat thrown in. Together they break each piece down into nutrient-dense, organic material that plants absolutely thrive in.

You cannot put meat, dairy or processed foods (like bread) in your compost pile as it will upset this balance (and attract unwanted critters). You can, however, sparingly add coffee grounds, eggshells, or ashes. Again, the smell and feel will tell you right away if there’s too much of one thing. (We cover this in detail in another blog post, “Compost Troubleshooting” here.)

Where to Locate Your Compost Pile

Compost piles need heat to work so choose a spot that gets lots of sunshine and (if using a barrel), choose a dark color that will absorb the heat. Don’t choose a location too far away from where you normally work outside or is hard to access in the winter. But you also don’t want it close to any neighbors who may not appreciate the process. It is decaying material and not the most beautiful part of gardening!

Types of Compost Containers

There are two common compost set-ups: a closed bin or barrel or an open, fenced in area that sits on the ground. This allows beneficial insects and worms easier access but can be unsightly. A bin or barrel is more practical in cases with limited yard space or where keeping the pile completely contained is necessary.

An open bin style works well on larger properties with lots of compost material. As shown in the photo, you can even create a multi-step system where new material goes into one bin and then is moved through each new bin as it decomposes. An open system is more susceptible to critters and should be covered to avoid too much moisture.

Choosing which type of storage is really based on personal preference and location. When done correctly, a compost pile will not smell bad but it can attract critters (if left open). For urban and residential properties, most people choose a closed container such as a large plastic tub or a barrel on a stand. This method also limits the quantity of compost produced and it is unwieldly to get the finished product out.

DIY Compost Bins

You can build your own compost pile by installing a three-walled enclosure built as you would a fence. This structure uses bare ground as its floor and the opening allows you to turn the compost with a rake or shovel. The drawback with this method is it will attract critters when you drop in fresh kitchen scraps.

For enclosed barrels, choose a large garbage can or barrel with a removable lid. Poke holes along the sides, bottom, and lid so air can move through and water can get in and drain out. Many large home stores and online retailers also offer premade compost barrels – some on a stand with a hand crank so you can easily give it a turn each day.

What to Add to Your Compost Pile


Start with twigs, straw, ash, hay, or another dry/brown material as your foundation. This allows the bottom of the pile to have more aeration and not become a slimy mess at the bottom. Your first layer, and every other layer thereafter should have a healthy dose of loose, dry, brown debris. Avoid large sticks, branches, or logs, as they can slow down the process. Larger things are harder to compost so be sure to break them down into smaller pieces before adding them.

Add produce scraps, grass clippings, and plant debris but do not add meat, dairy, or oily and processed foods. Avoid using too many onions or citrus peels. They break down slowly and can kill off beneficial insects. Using kitchen scraps is a great way to reduce your indoor garbage and utilize things you would otherwise throw away. Keep a container with a tight-fitting lid in the kitchen where you store scraps until you’re ready to add it to your pile.

Any green plant matter can also be added but avoid adding weeds or leaves from diseases plants (such as tomato blight). These will remain in the finished compost and spread new weeds or disease when you use it next season.

Animal waste, or manure, is also a form of green compost. Avoid using dog or cat waste in gardens for crops meant for consumption. Their waste contains microorganisms that aren’t ideal for a healthy garden, especially ones growing food. For those of us that have fish, tank water is an excellent resource to use for your pile! Tank water is rich in nitrogen and phosphorus, both of which are important to maintaining your pile’s carbon cycle. Just be sure not to use too much water, as this can cause your compost to become overly soggy. Store excess in gallon jugs to use later!

Other excellent choices for the inclusion of animal waste are chicken, cow, horse, sheep and goat waste. Unless any of the animals are being medicated (aside from vaccinations), their waste is completely safe to use! Medications like antibiotics can be passed through the waste and into the crops. If the animals are sick, and/or on medication, avoid using their waste until they are healthy.

Brown scraps are usually found outside in the yard. Fallen leaves, dried grass clippings, chicken bedding, or small twigs. These materials are also the ideal foundation for your outdoor pile!

Maintaining Your Compost Pile


Having a good ratio of green scraps and brown scraps is the key to a successful compost. 50% green to 50% brown is a good ratio of each, and if layered correctly, there won’t be much maintenance. Composting, for the most part, will take care of itself. Checking on it occasionally and turning it with a pitch fork or shovel is about all that needs to be done to the pile – typically after adding scraps or at least twice per month. If the pile becomes overly soggy or starts to have a foul odor, toss in some brown scraps, make sure it gets mixed well and has plenty of aeration.

A healthy pile will stay at an average temperature of 150 degrees. This keeps things moving, including insects and microbes that all work together to help along the nitrogen cycle. Towards the end of the process, it will have cooled down significantly. If it’s cold out, the temperature will most likely be much lower depending on the size of your set up.

Once the compost turns a rich brown color and has an earthy smell, it’s ready to use! By this stage, everything you put in the pile should be completely broken down and unrecognizable. The pile will also have cooled down in temperature. Just scoop it out and mix it into your existing garden beds with a fork or shovel.

Composting in Winter

If you have a pile that isn’t finished and winter is nearing, don’t worry. Worst case scenario, the process is slowed down. Keep your compost taller and wider if you’re banking to keep your pile going during the winter. This will allow for the organisms breaking your compost down to stay alive and thrive in the winter months. If you live in an area that gets extremely cold during the winter, be sure to start it in a place where it stays sunny most of the day, and expect the process to be a bit slower.

Maintaining compost isn’t a difficult process and anyone can do it. It is an excellent addition to the garden, will yield beautiful crops, and is an awesome way to sustain the garden season after season!

What Garden Design is Best for You?

Garden design for beginners

To decide what kind of garden design is best for the space you have, first you will have to learn about the different options for a garden layout. There are quite a few different design plans out there, some are simpler than others however and those might be best for a beginner. It also makes a difference if the garden will be used for vegetables or flowers.

The first of these simple designs is for a vegetable garden. It is just an open patch of soil, in any shape that the area has the space for. It can be anywhere from just a few feet long to a hundred feet long if there is space available. If the area the garden is in is frequented by lots of animals like deer or rabbits, consider adding a fence made of mesh or chicken wire that is 5 or 6 feet high to keep your plants from getting eaten by those pesky critters. If you want to add a fence just find some pieces of wood to use as posts in each corner. Then take the mesh and staple it to the posts. A helpful tip for doing this would be to have 1 extra post than there are corners, that way you can make an easy access gate. To make the gate just put the extra post next to the final corner post, attach the mesh to the extra post but not to the first post the mesh is already attached to. This way the extra post can be taken in and out of its place in the corner for easy access to the garden by humans but not deer or rabbits.

The next design for a vegetable garden but someone might choose to make it a flower garden too. This design would be a raised be and there are a few different ways to make a raised bed. You can either use stones or boards to make the outline of your raised bed. After you have decided on the shape, start building your outline for your raised bed. After this step is complete, make sure to line the entire structure with landscaping fabric. You can obtain a roll of this at just about any store that sells garden equipment or find some online at a place like amazon. This is an important step, because it will not only keep weeds from growing within the bed it will also ensure the water will drain out and the soil will stay in the bed. Once the bed is lined with landscaping fabric, add your soil. To ensure healthy and quick plant growth, it would be beneficial to find some high-quality black soil. It also would not hurt to add in a bag or two of potting soil on top and then till into the soil, depending on the size of your layout and the size of the bag of potting soil this can vary.

Back yard landscaping

Depending upon the space available in your yard, it might make more sense to incorporate both garden designs explained above. There are lots of different ways to add landscaping designs to a yard, and gardens are one of the easier projects to do that can help lower a grocery bill along with a healthier lifestyle. In addition to adding a garden to a backyard, consider adding a stone walkway through the yard that leads to the garden. This will add to the curb appeal of your house and can also improve the value if you were to sell your house in the future.

Front yard landscaping

If there is not room in the front yard for a large vegetable garden, consider adding a few small flower beds. There are lots of ways to make your property more beautiful, and flower beds will quickly and easily do this. When deciding what kind of flower bed or beds to install, consider how many you plan on adding in total. Also consider whether to all put them on the same level, an example of them being on the same level would be two flower beds both on the ground; one by the sidewalk and another below a window. One of the better ways to add to the appearance of your home, would be to have flower beds at different eye levels. For example, one along the sidewalk, a raised bed as you come closer to the house, and small hanging bed from the windowsill. Another good way to add to the look of your home, is to consider adding some shrubs. These will not only look nice, but depending on what kind of shrub and where they are planted can also give your front yard some nice shade to relax in.

Why is a Pollinator Garden Important?

monarch butterfly on milkweed plant

Bee and butterfly population in decline

It is pretty likely you have heard but the populations of a lot of common pollinators are in decline. Bee populations are in decline globally which is something that needs to be fixed. Some other pollinators, less important than bees but still important, like Monarch butterflies have seen a 90% drop in their population over the last 20 years or so.

The main reasons that pollinator populations are in decline is because of increased use of pesticides (insect killers) and herbicides (weed killers) accompanied by an ever-increasing destruction of habitat due to urban sprawl and agricultural development. The loss of habitat is a serious blow to pollinator’s abilities to nest, feed, and shelter but the increased use of pesticides and herbicides in both rural and urban settings has taken an already bad situation and made it much worse. Where bees, butterflies, and other pollinators lived is now mostly urban developments or corn fields.

Combating these potentially devastating losses requires a combination of multiple methods.

  1. Education. Learn more about it and teach those around you. Demonstrate to your community how to grow a pollinator-friendly garden.
  2. Practice what you preach. Stop using pesticides or herbicides in your own garden. Let native flowers and grasses grow to support pollinators (hint: big expanses of green lawn do not help many creatures!)
  3. Talk to your local government. Be the voice of the pollinators and encourage your local officials to stop using chemicals and to not mow flowers or grasses until after the nesting season. This especially applies to rural ditches and buffer strips.
Summer meadow with butterfly at sunset.

How a pollinator garden benefits your yard or other gardens

Aside from the wonderful aesthetic a pollinator garden can add to the area you call home, it will also provide lots of benefits to any flower or vegetable gardens in your landscape. Having a pollinator garden will attract bees, butterflies, and other pollinators to the area and help the growth of a vegetable of a flower garden by accelerating the rate of pollination in the garden. Spend a few minutes watching the bees in your garden and you’ll soon learn they do a lot of work for us!

In addition to the benefits to a garden, there can also be a financial incentive opportunity depending on the state you reside in. There are a few states within the US that are exploring programs that would pay residents to establish bee habitat, which a pollinator garden would potentially qualify as depending on size and state regulations.

What is Greywater and How You can Benefit from it

What exactly is greywater

You may be wondering what this new word your friends all are talking about it, greywater. Essentially greywater is just about any kind of water that you use in your house, after it has been used for something. There are a few exceptions however, those being any water that comes into contact with human waste. So, in other words, the water you flush down your toilet would not be considered greywater. But other things like water from your shower, sink, dishwasher, or laundry machine would all be considered greywater. One exception to those would be if you wash dirty diapers in your laundry machine however.

How to collect greywater

The best way to collect greywater from all these sources is to simply just have the plumbing system direct water to a holding tank, this will also work best if you can avoid the use of pumps to help save on electrical costs you already have in your home. There are some instances where you would not have to change your plumbing system at all to collect it however, there are washing machines available that have a drain that would direct all the water into a barrel or tank of some sort. You can then use this greywater as you please, assuming it is not being used for cooking or drinking because it will have soap residue in it. The water you collect may not look “clean”, but it is clean enough to use for lawn irrigation or other outdoor activities like gardening.

How to use the greywater you collect

The greywater you collect within your house unfortunately cannot be used for many indoor activities because it is not safe for consumption because of chemical residues. However, it is a perfectly safe alternative to use as water in a toilet, which is one of the top uses of water in every home. And of course, the less “new water” you use in your home, the more money you will save on your energy and water bills every month!

Most people that use greywater will use it to water either their lawn or gardens in their yards. However, there are a few things to remember when using greywater in your garden or lawn. The most important one, is to not store greywater for more than a day because the residues within it will start to break down and will likely lead to an unpleasant odor. Another thing to consider when using greywater outside, is that you do not want to use it in an area where it will pool up, that can lead to all sorts of problems such as a mosquito breeding habitat!

Helpful greywater tips

You also should consider using environmentally friendly soaps in your home that are low in chlorine, salts, and boron, because those will clog up pores in the soil and not let the water soak in as much over time. Using these kinds of soaps and detergents in your home will ensure the greywater you collect will not have chemicals in it that will reduce the health of your lawn and garden. It is really important to consider what chemicals you use in your house if you decide to install a greywater system, because not using environmentally friendly cleaning products can harm things you use greywater on. Keep in mind that greywater is a great way to reduce your water usage, but you need to be mindful of what is going into your greywater collection system.

Why Conserving Water is so Important

Benefits of conserving water

Did you know that only 3% of water on the entire earth is freshwater? An even crazier fact is that only 0.5% of that is available for us to use as drinking water. The other 2.5% is locked up in ice caps or frost deep underground, so we must really be conservative when it comes to how much and how often we use water. One of the largest benefits of conserving water, whether it be indoor habits or during outdoor activities, is that you will use less energy. Obviously, the less energy you use the less your bills will be, not to mention the fact you will be helping save the planet! Practicing sustainable water usage is so very important, and once you learn the tips and tricks to help conserve water it is very simple to do.

Helpful tips for indoor water conservation

Conserving water might seem like a big task to accomplish considering how important it is, but it truly is really simple. Here are some tips to help you conserve water indoors during everyday activities. When you are brushing your teeth or washing your hands, turn the faucet off when you aren’t putting your toothbrush or hands in the water. You can also buy a low-flow attachment for your shower, which is a great way to reduce the gallons of water that would normally be wasted during shower time. Another bathroom tip to conserve water would be to invest in a low flow or dual flush toilet, these can either be bought as a conversion kit or a standalone product to replace your old toilet.

Fun facts about water conservation

You would be amazed at all the water you can conserve indoors with these simple changes to your everyday indoor habits! Just to put it into perspective, the average American household uses around 170 gallons of water per day, while a country like Australia only uses about 36 gallons per day! For instance, if the metro area of Atlanta, GA embraced efficient water use and conservation techniques they would save up to 700 million dollars, or in terms of gallons around 150 million gallons!

Helpful tips for outdoor water conservation

Similarly, to the tips for indoor water conservation, tips to conserve water outdoors are also very simple! One thing you can do to drastically reduce the amount of water you use from a well or city system, is to make your own rain barrel. If you are not sure what that is or how to do it, you are in luck because we have an entire article dedicated to rain barrels!

Another big tip to conserve water outside is to not excessively water your lawn, especially if it is during the peak season for rainfall. Another helpful tip for outdoor water conservation, is to water your garden or lawn early in the morning when it is cooler. The cooler it is outside, the less of the water you use will evaporate and will have a better chance to do what you put it there to do! After all, if you knew most of the water you were using in your garden just evaporated why water it at all in the first place?