How to use Compost

How to tell if compost is ready for use

The best way to tell if your compost is ready for use is if it looks like soil or if it still resembles whatever you put in your composting area. If it looks like soil and does not look like the things you put in to be composted, it is ready for use! Another easy way to tell if it is ready, is if it smells earthy, it is ready for use! If you are still unsure after these two techniques, there is one more you can try. Put some in a sealed container and remove the air from it; a plastic bag works best for this. Let it sit in the bag for a few days and after this open it up. If you detect any sort of funky smell coming from it, your compost is not quite ready for use yet and needs more time to decompose.

Where to use compost

As far as usage of your compost, there really is not a limit to where you can use it. Any plant that uses soil will love a compost home. It can be sprinkled and then raked into flower beds or gardens; it can used to fill outdoor containers; you can put some in your indoor plants as well to help maintain nutrient rich soil. It can also be spread around a newly planted tree to help it grow. Compost is especially helpful in enclosed raised beds which over time lose soil health. Essentially, compost is good to use just about anywhere you might try to grow something. It will provide the necessary nutrients to the soil to improve the growth of whatever you might try to grow.

Helpful tips to use compost more effectively

Generally speaking, indoor plants do not need to have compost added in the amount or frequency of an outdoor garden. This is mostly because an outdoor garden will have more plants removing more nutrients compared to an indoor plant. For indoor plants you only need to add compost every 6 months or so and you do not need to add more than a handful or two provided it is not a large plant.

For outdoor gardens, there are a few different approaches you can take. In the fall, add a layer of compost that is a few inches thick across the entire surface. Then in the springtime, till the soil so the layer of compost you added in the fall gets mixed in thoroughly with the topsoil. In addition to this, it would also be helpful to add a small handful to each hole as you plant something in within your garden.

What not to do when using compost

The most important thing to avoid when using compost is to ensure it is actually decomposed completely. If food scraps are still present or not completely decomposed, you may attract critters or pests and by removing it from your composter, you will significantly slow down the process. Be patient and wait until your compost looks and smells like soil.

Once it’s ready, use like you would regular soil. Be sure to till it in well with existing soil and plant as you normally would. You may be able to cut back on fertilizer when adding compost as this soil will be much more nutritious for plants than regular garden soil.

Landscaping for Energy Reduction

maple tree leaf canopy

Saving energy use in your home starts outside! Strategically placing landscaping, garden plants, and trees around your home can help keep your home cool in the summer and warm in the winter. In addition to reducing the amount of energy you use to heat or cool your home, it will also increase the look of your yard and home by adding beautiful landscape features to it.

3 things that affect your home’s temperature

Air infiltration

This happens mostly in the winter or during periods of cold weather accompanied by strong winds. When the wind blows, it can penetrate through the walls of your house. This is even more problematic in older houses because they have had more time to settle and more time for small cracks to develop. It also can be a problem in newer houses so nobody is truly immune to the effects of the wind when it is cold outside.

Solar radiation

Solar radiation is essentially the energy your roof and walls are exposed to from the sun. In Northern climates during the summer months, your roof is exposed to high levels of solar radiation (and year-round in warmer climates). This essentially soaks into your home causing you to increase your air conditioning bill. However, it is an advantage in colder climates to let solar radiation warm your house in the winter. To help conserve the energy you use to control the temperature in your home, you should minimize solar radiation in the summer and maximize it in the winter.

Heat conduction

Heat conduction is somewhat similar to solar radiation with one exception being it is the energy your home absorbs from the walls as opposed to the roof. Keeping the walls of your house shaded during the warmer months will drastically lower the amount of energy you use to cool your home. The more shade you provide for your home during the warmer months, the easier it will be to control the temperature inside your home in addition to reducing the amount of energy it takes to do this.

Summer time energy reduction

One of the easiest ways to increase the amount of shade your house is in during the summertime but ensure it will get plenty of solar radiation in the winter to keep it warm, is to plant deciduous trees. The reasoning behind this is because deciduous trees will lose their leaves in the fall. So, during the summer, the large canopy of leaves will provide your roof will plenty of shade. When they lose their leaves in the fall, it will allow the solar radiation to reach your roof and keep your house warmer than it would if your roof was in the shade. In addition to planting deciduous trees to shade your roof, you can increase the shade your house is in by planting climbing vines and tall shrubs that grow vertically along an exterior wall of your home (typically on the Southern or Western side which receives the most summer sun).

Winter time energy reduction

Luckily, some of the tips for summer time energy reduction also help during the winter. As mentioned earlier in the article planting deciduous trees that drop their leaves will allow your house to take advantage of the sun’s warmth in the winter. In addition to that, vines and shrubs that grow along an exterior wall to provide extra shade in the summer can help your house encounter less strong wind directly against it which in the winter seems to suck all the heat out of your house. As far as protecting your house from those frigid winter winds, you might want to consider planting various types of evergreen hedges that grow wide and tall. In addition to helping in the winter to protect from the wind, they will help shade your house in the summer too! As far as where to plant these, you will want to start planting them on the side of your home that is most exposed to the wind. If your goal is a windbreak in the winter, and shade in the summer, you will want to make sure you plant them close enough to your house, so they will shade your home in the summertime.

How to Make your Own Rain Barrel

Why use a rain barrel?

Did you know that just a half-inch of rain falling on a 1,000 square foot house will generate about 300 gallons of water? Over the course of spring and summer (assuming 10 inches of rainfall), a roughly 1,300 square feet house can generate about 8,000 gallons of water! Saving that in a rain barrel to use in your garden means you’re not using municipal water (so dollar savings for you and better, untreated water for your plants)

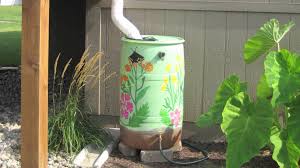
Rain barrels can be part of your garden decor.

6 Easy Steps for Setting Up a Rain Barrel System

Step 1:

Install gutters on your house, along with a downspout. If you already have a home with these features this will be the easiest step!

Step 2:

Find something to collect the rain water in. Most people opt to use a 50-gallon drum, but just about anything that holds a decent amount of water will work. If you decide to use a smaller container, you might want to consider having a set up involving more than one. This can make the entire set up more complex so it would be best to have one large collection tank. Once you decide on your tank, you will need to cut a small hole to fit a spigot in the bottom of it. Make sure it is low enough on the tank for gravity to allow all the water to drain out.

You can also find premade rainbarrels at most home supply stores or through online retailers. Look for sturdy construction and attached overflow valves and spigots.

Step 3:

Install tubing or a short section of gutter to divert the water from the downspout into your rain barrel. This can be done in a variety of ways but is essentially just a tube connecting the two. When the barrel is full the water will just go out the downspout as it did before having a rain barrel. You can also buy an overflow pipe that connects into this system. This is an important component because it will direct the water away from your foundation once the rain barrel fills up.

Step 4:

Build (or buy) a stand to elevate the rain barrel — at least 1 foot high but customize to your height and landscape. The purpose of elevation is to use gravity to get the water flowing. If your garden is downhill from your rain barrel, you will need less height.

Step 5:

Install a filter between the downspout and rain barrel. Just a simple piece of screen will work but there are many premade options available online. This is an important step to keep debris out of your barrel which will eventually clog the spigot. It also would not hurt to have another back up filter where the spigot sits in the bottom of the barrel to ensure the hose connected to the spigot doesn’t get any unwanted debris in it that the other filter let pass through.

Step 6:

Connect a hose to the spigot and your rain barrel is ready for use! Once water accumulates in it, you can start watering your garden!

How to use Rainwater in your Garden

The water you collect with your rain barrel will most likely be very clean, provided you have a clean gutter system. This water is not considered potable because it’s run off your roof which has dirty, animal droppings, and so on. The water, though, is perfectly fine for all garden plants, bushes, trees, lawn, and even indoor plants.

Rain barrels do not typically have enough pressure to run a hose or sprinkler system. However, if you have enough slope you could use a soaker hose in between garden rows. It is also possible to install an electric pump (such as used in fountains) to create enough pressure to use with a hose.

Potential Problems with Rain Barrels

One of the biggest problems that come up with a rain barrel system is the connections getting clogged. This can be alleviated by using screen filters at the water intake site and by occasionally cleaning out the barrel.

Another thing to watch out for is insects that will try to reproduce in the water especially nasty mosquitoes. If you drain the rain barrel regularly the larvae will not have time to hatch. Also putting a lid on the rain barrel and draining it and disconnecting it before vacations will keep bugs away.

Plants that Protect Your Family from Mosquitoes

(Shop the Mosquito Repellent Plant Collection Here.)

Mosquitoes! That one word is enough to drive anyone indoors! After all the hard work you’ve done to create a welcoming and fun outdoor space, it’s hard to believe one tiny bug is that powerful. Mosquitoes not only put a damper on our outdoor activities but they are downright scary for how many awful diseases they can transmit to our family and pets.

But putting on bug spray every time you go outside is not practical and for little kids and pets, it’s potentially toxic. So how to create a first line of defense for your family that works continuously for the entire summer? Try all-natural and easy-to-grow mosquito repellent plants. You can protect your friends and family and grow a gorgeous, edible garden at the same time.

These robust and adaptable plants thrive from spring through the first heavy frost and even grow perennially in some zones. They give off a pleasant lemony, citronella scent when cut, bruised, or even rustled in the wind, creating a natural barrier mosquitoes won’t want to cross. With thick foliage; great shapes; and superb adaptability, these plants not only drive mosquitoes away but bring beauty to your garden; attract beneficial insects and birds, and even liven up your summer cooking!

Here are a few of the basics on growing our three most popular Mosquito Plants and a list of seven other plants you can grow to deter biting insects. And bonus, most are edible herbs.

Mosquito Plant (Citrosa Geranium)

mosquito-plant-citrosa-geranium-cloversgarden

This gorgeous plant is part of the Geranium family, and features thick, mounded foliage of lacy, medium-green leaves and over the season will produce a few pretty pink-purple blossoms. This lovely green foliage makes it a great companion plant, a fantastic container filler, and a nice foundation or edging plant.

Like all geraniums, Citrosa Geranium needs direct sunlight for at least six hours per day but can tolerate partial shade. It does best in well-drained, moderately-rich soil but can handle most growing conditions. This large plant can grow up to 48” high and 24” wide so give it plenty of room to grow! Towards mid-summer, the plant will benefit from a trimming of woody branches to keep it nicely shaped. Look for the main central stem and cut it back to the height you prefer – this will promote outward, side stem growth and encourage more blossoms. After you’ve trimmed those branches, add them into your floral arrangements as the thick leaves provide a good structure for smaller flowers and the citronella scent will be released so your bouquet does double-duty as a mosquito deterrent. Plants are still in stock, order here.

Lemongrass (Cymbopogon citratus)

lemongrass-mosquito-repellent-plant-cloversgarden

One of our most popular plants, Lemongrass is often grown as an ornamental and grows in a dense, rounded clump and can grow up to 48” high and 36” wide. The stems grow out of a bulbous base similar to a scallion and this portion is frequently used in Asian-inspired cooking. Lemongrass requires the same general planting needs as Citrosa Geranium: full sun but can tolerate shade; well-draining, loamy soil but can withstand drought. Lemongrass bulbs can be harvested and will regrow if there is enough growing time left.

Lemongrass is perennial only in Zones 9 through 11 and must be treated as a tender annual in all other climates but will grow into late fall if protected from late-season frosts.  When mature, this plant benefits from division as it can become rootbound. Just slice into the crown with a sharp knife or spade and separate each root clump. Replant in a pot or in the ground and feed and water until established. Plants are still in stock, order here.

Lantana Camara


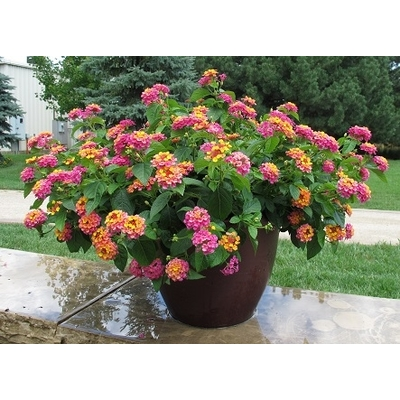
This heat-resistant flowering plant loves dry spots and full sun. It grows in a bushy pattern with dark green, glossy leaves and blooms profusely all summer long. Perfect in large containers or in foundation plantings, this plant is also a butterfly favorite! One note: after blossoming, the plant form berries which are poisonous. Just snip off spent flowers which actually encourages more growth! Plants are still in stock, order here.

Herbs and Flowers that Repel Mosquitoes

Give them a try (it’s not too late to get growing!):

How to Plant to Repel Mosquitoes

Both plants’ leaves give off a natural citronella scent when cut, bruised, or even rustling in the breeze. To repel mosquitoes, plant near high use areas such as patio borders, deck containers, play areas, or near entryways. When you walk by the plant, roughly brush or rub leaves together to release a burst of scent.

Add cut branches to floral arrangements and place around your sitting areas for extra evening protection. Dry the leaves in the sun on a window screen, then crush them and sprinkle around the deck. You can also steep the leaves to make a natural bug spray but test first on a small patch of skin.

In the Kitchen

Geranium leaves and flowers can be added fresh or candied to desserts to lend a lemony flavor. Leaves can be brewed into tea, steeped to create a lemony liqueur or flavored vinegar, made into jellies and sauces, added to butter or ice cream for a subtle flavor, and used as a garnish.

Lemongrass is usually ready for harvest near the end of the growing season. Pick individual stalks when they’ve grown to ½” thick and the plant is at least 12” tall. Just cut off at ground level with a sharp knife or twist off sideways from the main root crown (similar to picking rhubarb). After picking, remove outer, woody layers and leaf tips as they can be bitter. The bulbous portion and lower thicker stalks can be chopped like a scallion and added to stir-fries. The leaves can be dehydrated and used as a ground herb, as a whole dried leaf, or added to oils or vinegar for a lemony infusion. Fresh leaves can be bundled and submerged in hot water to make tea. The whole stalk makes a great skewer and adds lemony flavor to your shishkabobs.

It’s not too late to start growing your Mosquito Repellent Garden. You don’t have to pour on the bug spray to protect your family from mosquitoes and the scary diseases they carry. Give these gorgeous plants a try and take back your yard!

Deck Lighting that Naturally Repels Mosquitoes.

  mosquito repellent candle as centerpiece

   So can we all agree that tiki torches are only good for a 70s-themed pool party or a Gilligan’s Island Revival? Stinky, smoky, and unattractive, they do not belong on your gorgeously decorated deck, patio, or worse outdoor event! But they do have one redeeming quality: the bug fighting power of essential oils (yes, citronella is an essential oil). Mosquitoes just hate that lemony smell and it’s a great non-chemical, non-toxic solution to keeping our outdoor spaces bug free.

Mosquitoes hate these essential oils . . .

If you’ve been on Pinterest (or even to a grocery store these days), you’ve heard about essential oils. They seem to have downright magical properties! We couldn’t possibly list them all but we do know one thing for sure, there are a few essential oils that work fantastically to repel bugs. For centuries, folks have been using plants to deter bugs and unwanted critters. In Victorian times, herb and plant sachets were not only pretty but widely used to keep homes free of pests. But once modern science got involved, everyone turned to chemicals like DEET (which is potentially toxic to kids and pets). With the recent popularity of essential oils, people have come back to a more natural (less toxic) approach and have found that they really do work!

  These plants — Citronella Geranium, Lemongrass, Eucalyptus, Lavender, Rosemary, Tea Tree and many herbs — have been proven to ward off pesky insects. And the essential oil of these plants is the super concentrated form. But a vial of essential oil can be hard to find, expensive, and comes with a bit of learning curve if you’re going to use the raw form. And besides, who has time for another DIY project?

   The trick to using essential oils for bug protection is to get the scent spread around so it creates a “bubble” of mosquito protection. And burning it is a great dispersement method (which is why our grandmothers liked tiki torches!). Luckily, candlemakers have improved on that idea and we now can infuse a normal candle with the essential oil and that lovely, subtle scent will hover around your spaces. Even better, mixing them into a soy- and citronella-based candle gives us a longer burn time and a lot less smoke.

   And, of course, if you want to go true Pinterest-worthy, you can choose a color and scent that actually matches your deck décor. Check out our gorgeous scents here.

Basil Gardening

   This garden favorite is easy to grow and versatile in so many dishes, make sure you plant lots because you’ll always find a use for it! Basil can be started from seed directly in the garden but will take some time to harvest. Planting from seedling will give you quicker results. Basil prefers full sun, well-drained but consistently moist soil, and needs warmth to grow. If your soil dries out quickly, mulch around the base of the plant (be sure to choose organic mulch!). It does have a tendency to flower so be sure to trim off blossoms to promote growth (they are edible!). Not fussy, basil just needs regular watering and occasional fertilizer. The more you harvest, the faster it grows and will keep producing until the first heavy frost.

   Basil does not have many problems but will occasionally get aphids, fusarium or bacterial wilt,  mildew, and leaf spots. These are all easily avoided and handled so don’t be deterred from grow this great garden addition. This fantastic article from Clemson University Extension office covers common Basil problems in more detail.

Fun Basil Facts!

Mosquitoes hate the scent! Especially Lemon Basil and Cinnamon Basil – combine a few plants in your patio containers to keep the bugs away. The full foliage makes a nice addition to containers; just rustle the leaves for a burst of scent; and you’ll have ready access to herbs for dinner.   Old-time gardeners always planted basil near tomatoes, peppers, and asparagus to repel thrips and beetles. Folklore also goes that basil planted near tomatoes make the fruit sweeter. Definitely worth a try and you’ll need both ingredients for our killer Caprese recipe (here).
Harvesting and Cooking with Basil

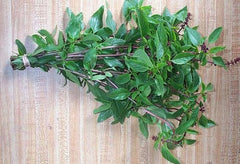
   Basil can be harvested as needed but try to pick in the morning as the taste will be the sweetest. To pick, just snip leaves off the plant or cut a whole stem (the latter will cause plant to bush out more). Rinse leaves in cool water and spread on towels or use a salad spinner to dry out. If you aren’t using right away, submerge stems in water as with a flower bouquet until ready to use. Do not store in the refrigerator as this will affect taste. To strip leaves off stems, just hold upside and run fingers down the length of the branch.

   Basil is best used fresh and does not hold up well to cooking heat (so add to dishes at the very end of cooking time). It can be dried in a dehydrator or frozen for later use in marinades or sauces. To freeze basil, pack ice cube trays with chopped leaves and fill with olive oil – when thawed they make a great addition to dressings or sauces. Basil is also a great mix in to marinades, can be steeped in vinegar, and is a nice complement with “bitter” salad greens such as arugula.

Browse our selection of basil (and other herbs) here:

How To Burn a Jar Candle

This may be surprising but there is a right (and wrong!) way to burn a jar candle. Here’s just a few tips to get the best results and longest burn time out of your candles:

  1. During your first use, burn the candle long enough to liquefy the entire top layer of wax to prevent the formation of a dip or “wax memory ring”. If this depression forms, it will tunnel to the bottom of the candle and the outer edges will not burn. It will also cause the wick to eventually drown in the wax, making it difficult to keep lit.
  2. After the first burn, keep the wick trimmed to ¼”. A perfectly-burning candle should not smoke, flare-up, or flicker. This means the wick is too long or the candle is placed in too strong of a draft. Short wicks also cannot flop over and get trapped in the wax as it cools.
  3. Keep the wax pool free of debris such as matchheads or wick trimmings. Once the candle cools down, just screw the lid back on to protect the surface.
  4. If keeping candles on your deck or patio, be sure they are not exposed to the hot sun. A normal sunny summer day is enough to melt the wax in the jar!
  5. Always burn on a heatproof surface and away from potential fire hazards such as curtains or fabrics.

For best mosquito repelling, place candles within 6 feet of activity areas. Use multiple candles to ring your sitting areas for maximum coverage.


How to Attract Butterflies to Your Garden

It doesn’t take much to create a butterfly-friendly garden! Try these quick tips for fast results:

  1. Butterflies prefer red, yellow, orange, pink, or purple blossoms and need flat-topped, clustered, or short-tubed flowers so they can get at the nectar. A few good choices: Zinnia, Purple Coneflower; Lantana; and Coreopsis.
  2. Butterflies also need native plants for all life stages – eggs, caterpillars, and new emerging butterflies are adapted to thrive with plants most likely found in their area. This is one reason Milkweed is so crucial to the Monarch migration. When planning the garden, combine plants for continuous bloom so butterflies will always find a food source.
  3. Always avoid using chemicals (or choosing plants treated with chemicals such as neonicotinoids). These are toxic to many caterpillars and they will not survive once the eggs hatch.
  4. Plant a variety of other flowers (and herbs) they can’t resist: Butterfly Bush; Sweet Alyssum; Wisteria; Hollyhocks; Sweet William; Red Bee Balm; Borage; Lavender; Chives; Allium; Phlox; and Butterfly Weed. These will call them in and they will stop by all your plants (pollinating each time!)
  5. Butterflies love the sun! They need to warm their wings for flight and will happily sit on a flat rock in the sun to rest and warm up. They also generally prefer feeding in full sun during the heat of the day (from mid-morning to mid-afternoon).
  6. Give them something to drink. Have you ever seen a group of butterflies gathered on wet sand or mud? They are extracting minerals and drinking water. You can recreate this by placing a layer of coarse sand in the shallow container (terracotta trays work well); keep the sand moist; and place where you see butterflies. Make sure to keep the sand moist but not submerged.
  7. Resist the urge to clean out gardens in the Fall. Many caterpillars overwinter in a chrysalis so if you remove tall plants, you may also be taking with you the chrysalis. In addition, birds love to peck away at left over seeds during the winter so you’re helping other wildlife.

Want more great ideas on butterfly gardening? Visit your region’s Extension office or website for Zone-specific suggestions. One website we really love is the Clemson Cooperative Extension, found here.

Interested in adding butterfly-friendly plants to your garden? We still have some left! Those can be found here.

How To Grow Milkweed for Monarchs

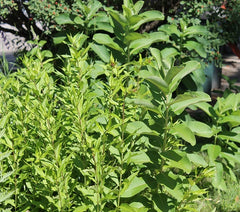
milkweed budsMilkweed grows in a sturdy upright pattern with large leaves that turn from light green to dark green and sometimes to red as they mature. The plant can reach up to six-feet tall and produces a multi-clustered pinkish purple flower that is typically as large as a tennis ball and blooms throughout the summer, if regularly pruned. In addition to Monarchs, many other pollinators will visit these flowers so this plant does well if combined with other flowering plants. If leaves or stalks are broken, they ooze a white, milky substance which gives the plant its name. Large oblong seed pods eventually form with a hard husky shell and are often used in dried floral arrangements. When broken open, the silky seeds will float all over and can be a bit messy.
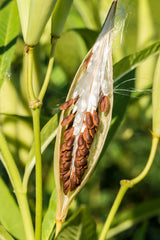
milkweed seedpodMilkweed requires full sun, light soil, and can handle drier conditions once established. This plant is also perennial (assuming you choose a variety native to your region) and spreads rapidly through a rhizome or taproot growing out from the plant. Planting just a few plants this year will eventually help you establish a large patch over time and will require some cutting back if it outgrows your flowerbed.   While Milkweed will not fit every landscape design, there are many ways to include this amazing plant in your garden. Be creative and put the plant’s tall, sturdy structure to use to complement other more delicate plants. Here are just a few ideas to get you started:
Cottage Garden Design

The best and easiest way is to plant a cottage-style garden. These freeform gardens typically include hardy plants such as Hollyhocks, Tall Garden Phlox, Climbing Roses, and Daisies and it’s easy to tuck a few Milkweeds into that mix. As the summer goes, each plant will flower, inviting birds and butterflies from all over. Monarchs will feed from many different plants and you’ll most likely attract lots of other beneficial insects who’ll work hard to pollinate your garden or fruit trees.


Create a Corridor Rest Stop

Just a few plants placed together in a corner of your yard are enough to support quite a few Monarchs over the summer. Try a grouping around your mailbox or in an out-of-the-way strip such as along the back of your garage or near an alley. Because these plants are so hardy, you don’t have to worry about keeping them watered like many regular landscaping plants. And they’ll regrow from year to year so once you plant, you’ll always have milkweed for the Monarchs.

Go Big!

If you have a pasture, a roadside piece of land, or just an extra large backyard, consider building up a “native prairie” in your corner of the world. Start with lots of milkweed and add in other favorites pollinators such as Purple Coneflower or Black-Eyed Susans. Your local Extension office can help you pick out the right plants for your area, assist you to draw up a plan, and probably even help you source and buy the plants and seeds.

Get Milkweed for your garden here

Want to learn more about Monarchs? Click over to our article, “America’s Favorite Butterfly.”


.

America’s Favorite Butterfly: The Monarch

monarch lifecycle usdaMonarchs are the only butterfly known to make a two-way migration. Most other butterflies are able to overwinter as larvae or pupae but Monarchs cannot survive the cold. Relying on environmental changes, they know when it’s time to head South and will travel between 50 and 100 miles per day, taking up to two months to reach their winter home in Mexico or Southern California. They start returning to the Southern U.S. in late February, making pit stops along the way to refuel and reproduce. Over the course of the summer and their travels, they will produce four generations of Monarchs, each one travelling further North. The fourth generation does not reproduce the first year and are the ones who travel to overwinter and restart the cycle in the Spring.

During the summer breeding season, the life cycle of a Monarch lasts for two to five weeks and goes from an amazing transformation from a tiny egg to a gorgeous butterfly. Because caterpillars are so easy to find, raising them “by hand” is very easily done in a large fish tank as long as you can feed them fresh milkweed every day.

Do You Want to Learn More?

The good news with this story is that the U.S. government and educational institutions are taking the declining Monarch population seriously and are actively working to help. From offering Monarch habitat ideas to creating school projects for teaching kids, start your search at these fantastic resources to learn more.

National Park Service Monarchs and Milkweed Video (click here)

Monarch Joint Venture (click here)

A large conglomeration of federal and state agencies, prominent Universities, and private nonprofits, you’ll find a wealth of information here as well as links to other sites for active learning and registration as Monarch Waystation.

USDA Monarch Page (click here)

This United States Department of Agriculture Forest Service website has detailed Monarch information in addition to general pollinator gardening tips and a thorough list of additional resources for adults and kids.

Save The Monarch (click here

Another great resource with some really beautiful videos, this United States Fish & Wildlife Service website connects you with other organizations and detailed plans on how you can help the butterflies. If you’d like to watch a video about saving the Monarchs at Yosemite, click here (https://www.youtube.com/watch?v=V3jpu2th34o).

Changing the World, One Yard at a Time.

While there is disagreement about many environmental issues these days, everyone agrees that the plight of the Monarch is a reflection on the health of our North American landscape and its pollinators. The same stressors causing harm to Monarch habitat also affect plants, animals, and critical food pollinators such as honeybees. By doing your part with just a few Milkweed plants, this valuable resource can be reshaped one yard at a time! If you’d like to learn more about planting Milkweed in your garden, click over to our blog posts “How to Grow Milkweed.

And get them from our store.